Pollock Themed Party
I POP Design Board

Shiraga and Motonaga dinner design board
Dallas, TX—June 4, 2014—In February 2015, the Dallas Museum of Art will present the first major exhibition to explore the work of influential painters Kazuo Shiraga and Sadamasa Motonaga side-by-side. Between Action and the Unknown: The Art of Kazuo Shiraga and Sadamasa Motonagawill examine the full arcs of the artists’ careers, from their early works to their 18-year engagement with the Gutai Art Association—the leading avant-garde group of postwar Japanese artists—to their later masterworks created in the 1980s 90s and early 2000s. Drawing from among the best collections in Japan, the exhibition will include paintings, drawings, photographs, films, small-scale sculpture, Gutai-related ephemera and re-creations of outdoor installations—many of which have never been exhibited in the United States.
Big things this fall
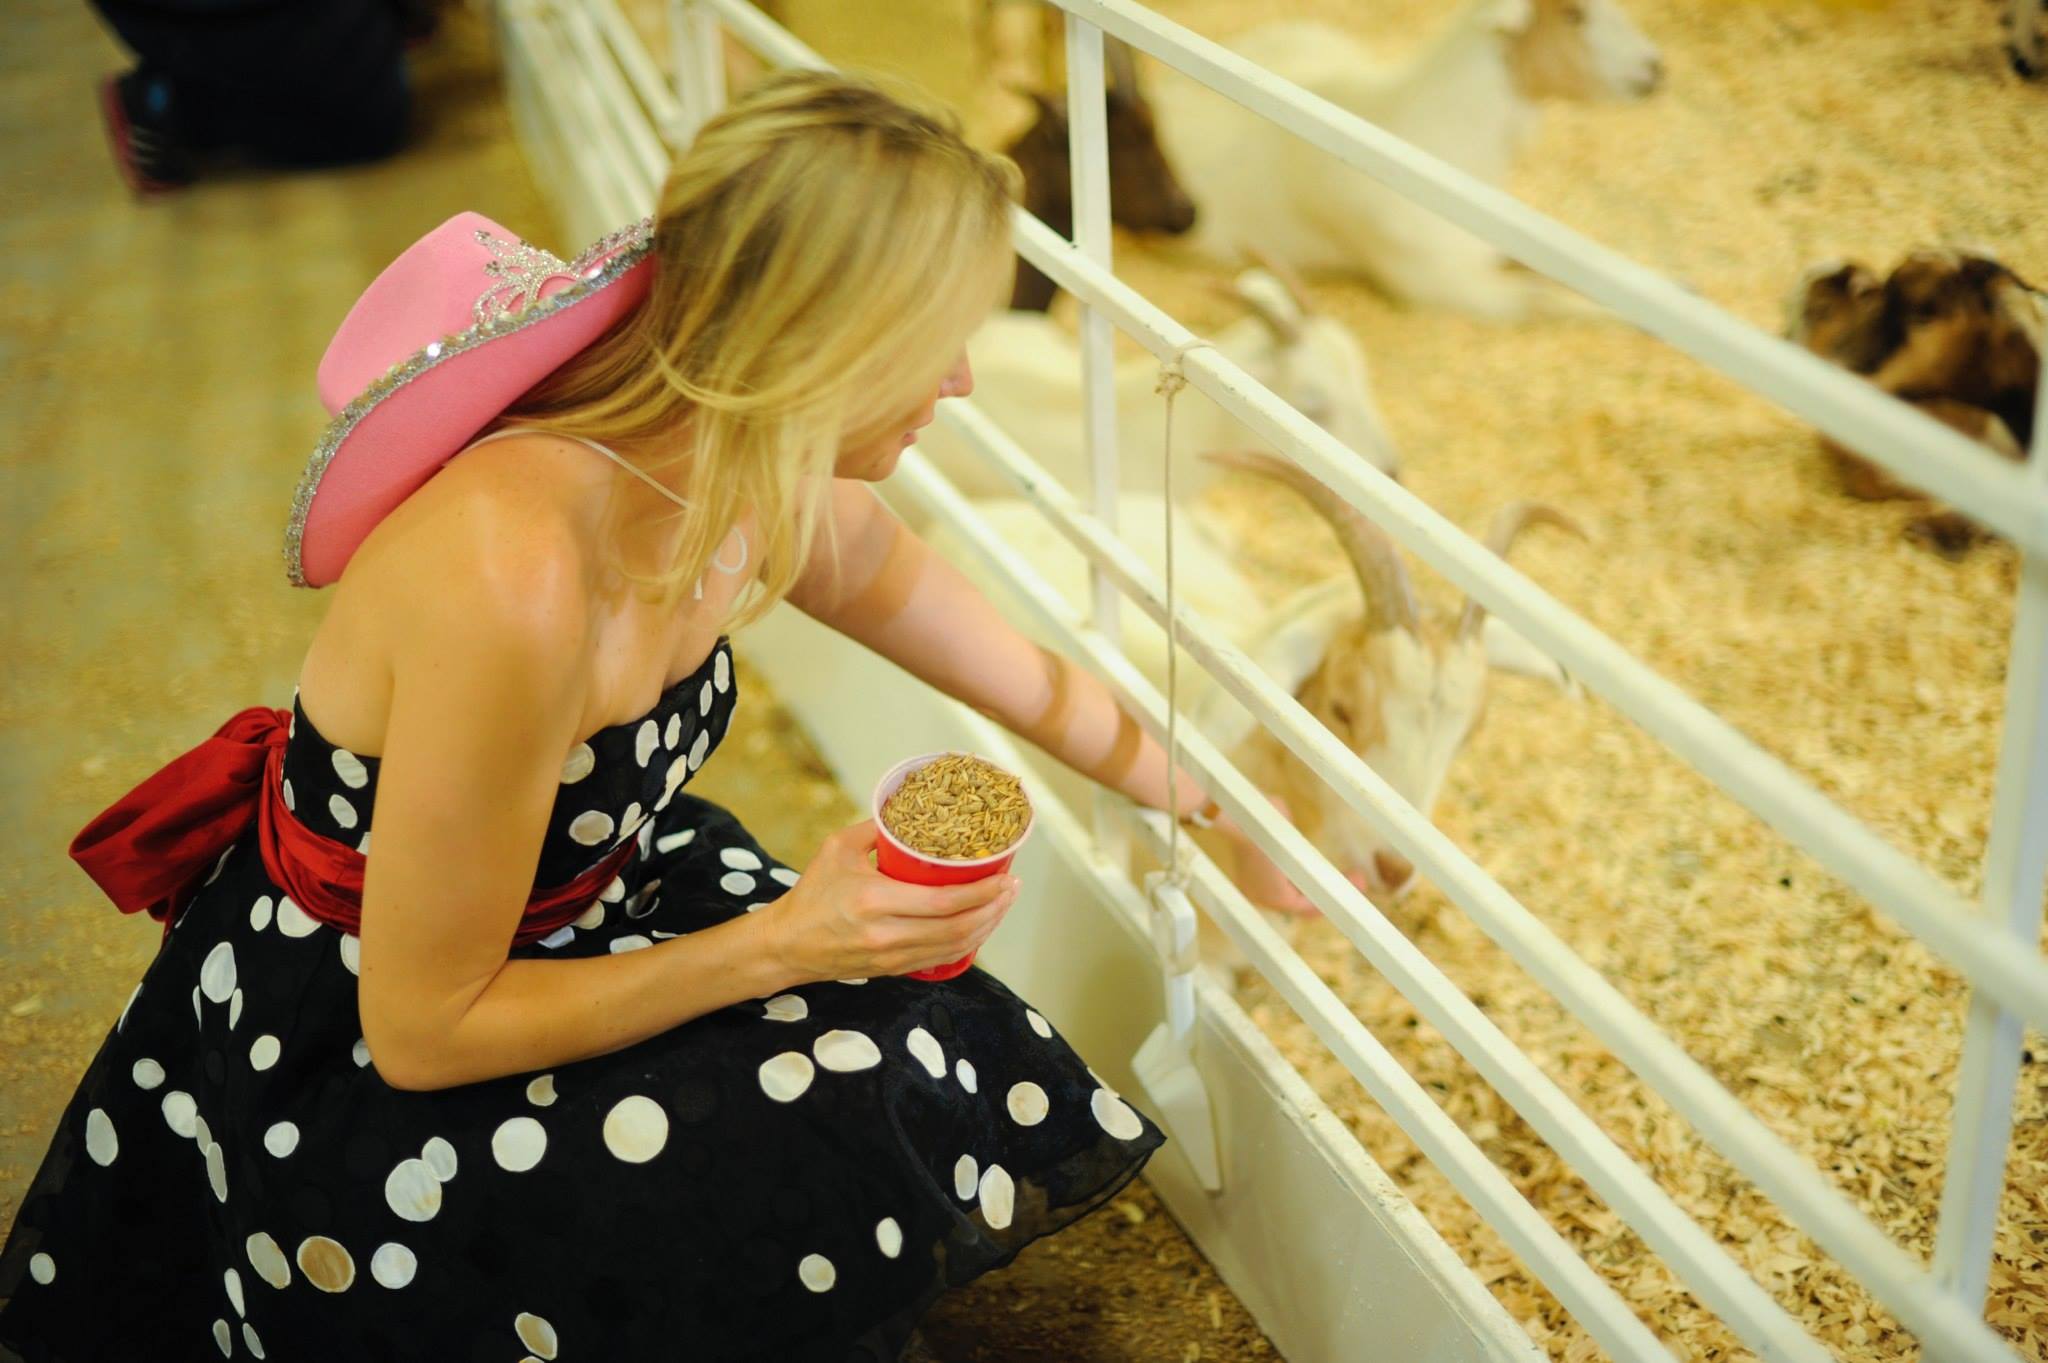
Well, a lot has happened in the past three months... I have moved from the Meadows Museum, downtown to the DMA, (Dallas Museum of Art) and things are busy! I am acclimatizing to my new museum home, slowly but surely. I also turned 35 opening night of the Texas State Fair! With the absolute sweetest group of friends a gal could ever have. Of course, all the beautiful images of us were taken by tamytha cameron photography. This has been a lucky fall!


GOYA coming up fast
in art, Special Events
AAMD Lunch for 200
What an exciting time at Meadows Museum! We had the great privilege to host a lunch for 200 members of the Association of Art Museum Directors (AAMD). I was ever-so fortunate to plan with Pam Little, a good friend and a great catering/event manager. We had an incredible menu from Experimental Table. Chef George Brown prepared the most exquisite Entremeses Variados, which is a fancy way of saying assorted appetizers. Guests were treated to housemade charcuterie by Local Yocal Farm to Market, Hand-picked mixed greens, sun gold tomato gazpacho, and Shaved Van Sormon cheese from Brazos Valley Cheese. Farm Fresh deviled eggs, pickled veggies, and beautiful Spanish olives. Full menu below!
As for the look of this lunch, POSH Couture Rentals is the best! Don't you love the new website! The linens are from La Tavola and were perfect. Per usual, I had my trusty floral experts at the Garden Gate, Maria and Junior to make the tables sing with spring! Stunningly photographed by the one and only Tamytha Cameron Photography.


Stunning work by Mister Finch
in art
It has been some time since I have seen work by an artist that made me gasp. I have some pretty specific tastes when it comes to textiles and these objects are making me feel famished and manic all at once. I want to pet this gigantic moth so badly! I am getting in line for one of whatever this man creates; it would be an honor to have any of these fantastical objects in my possession.
I do not have any permission to show you these objects; however, Mister Finch does have a Pinterest page and a beautiful website. So you will have to go take a look for yourself.
Here is the front of his website, hopefully he will not mind.
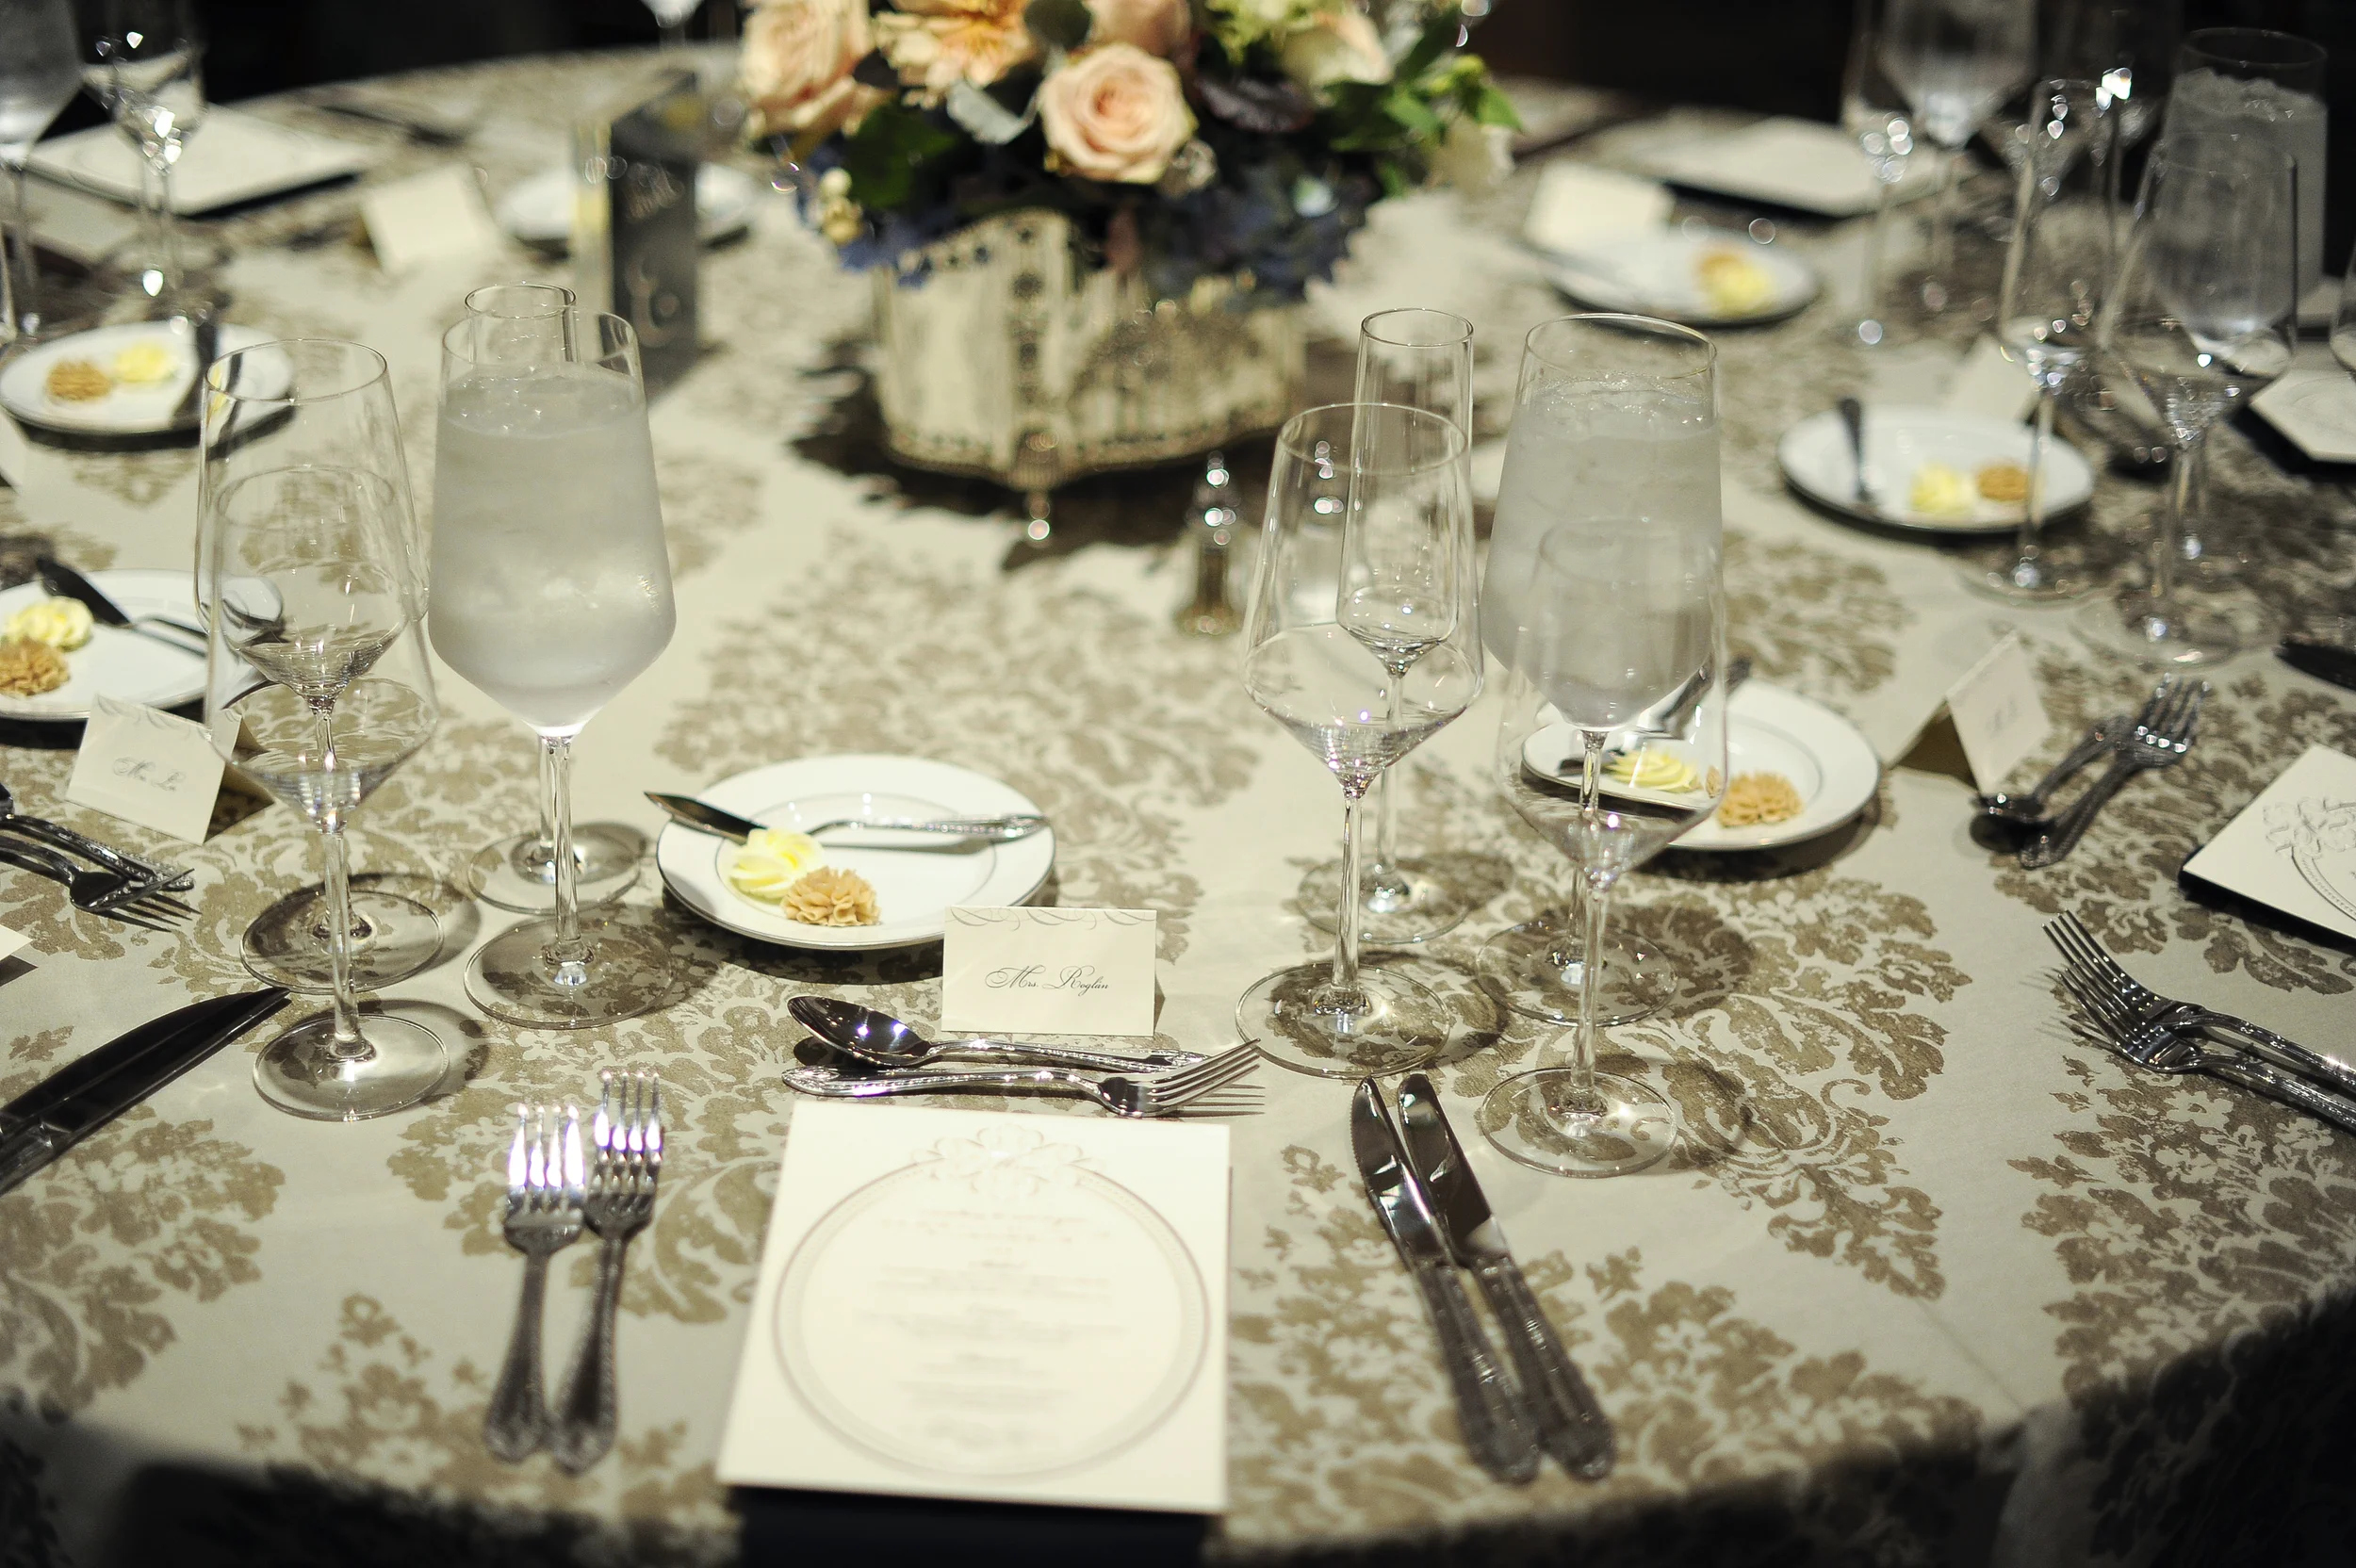
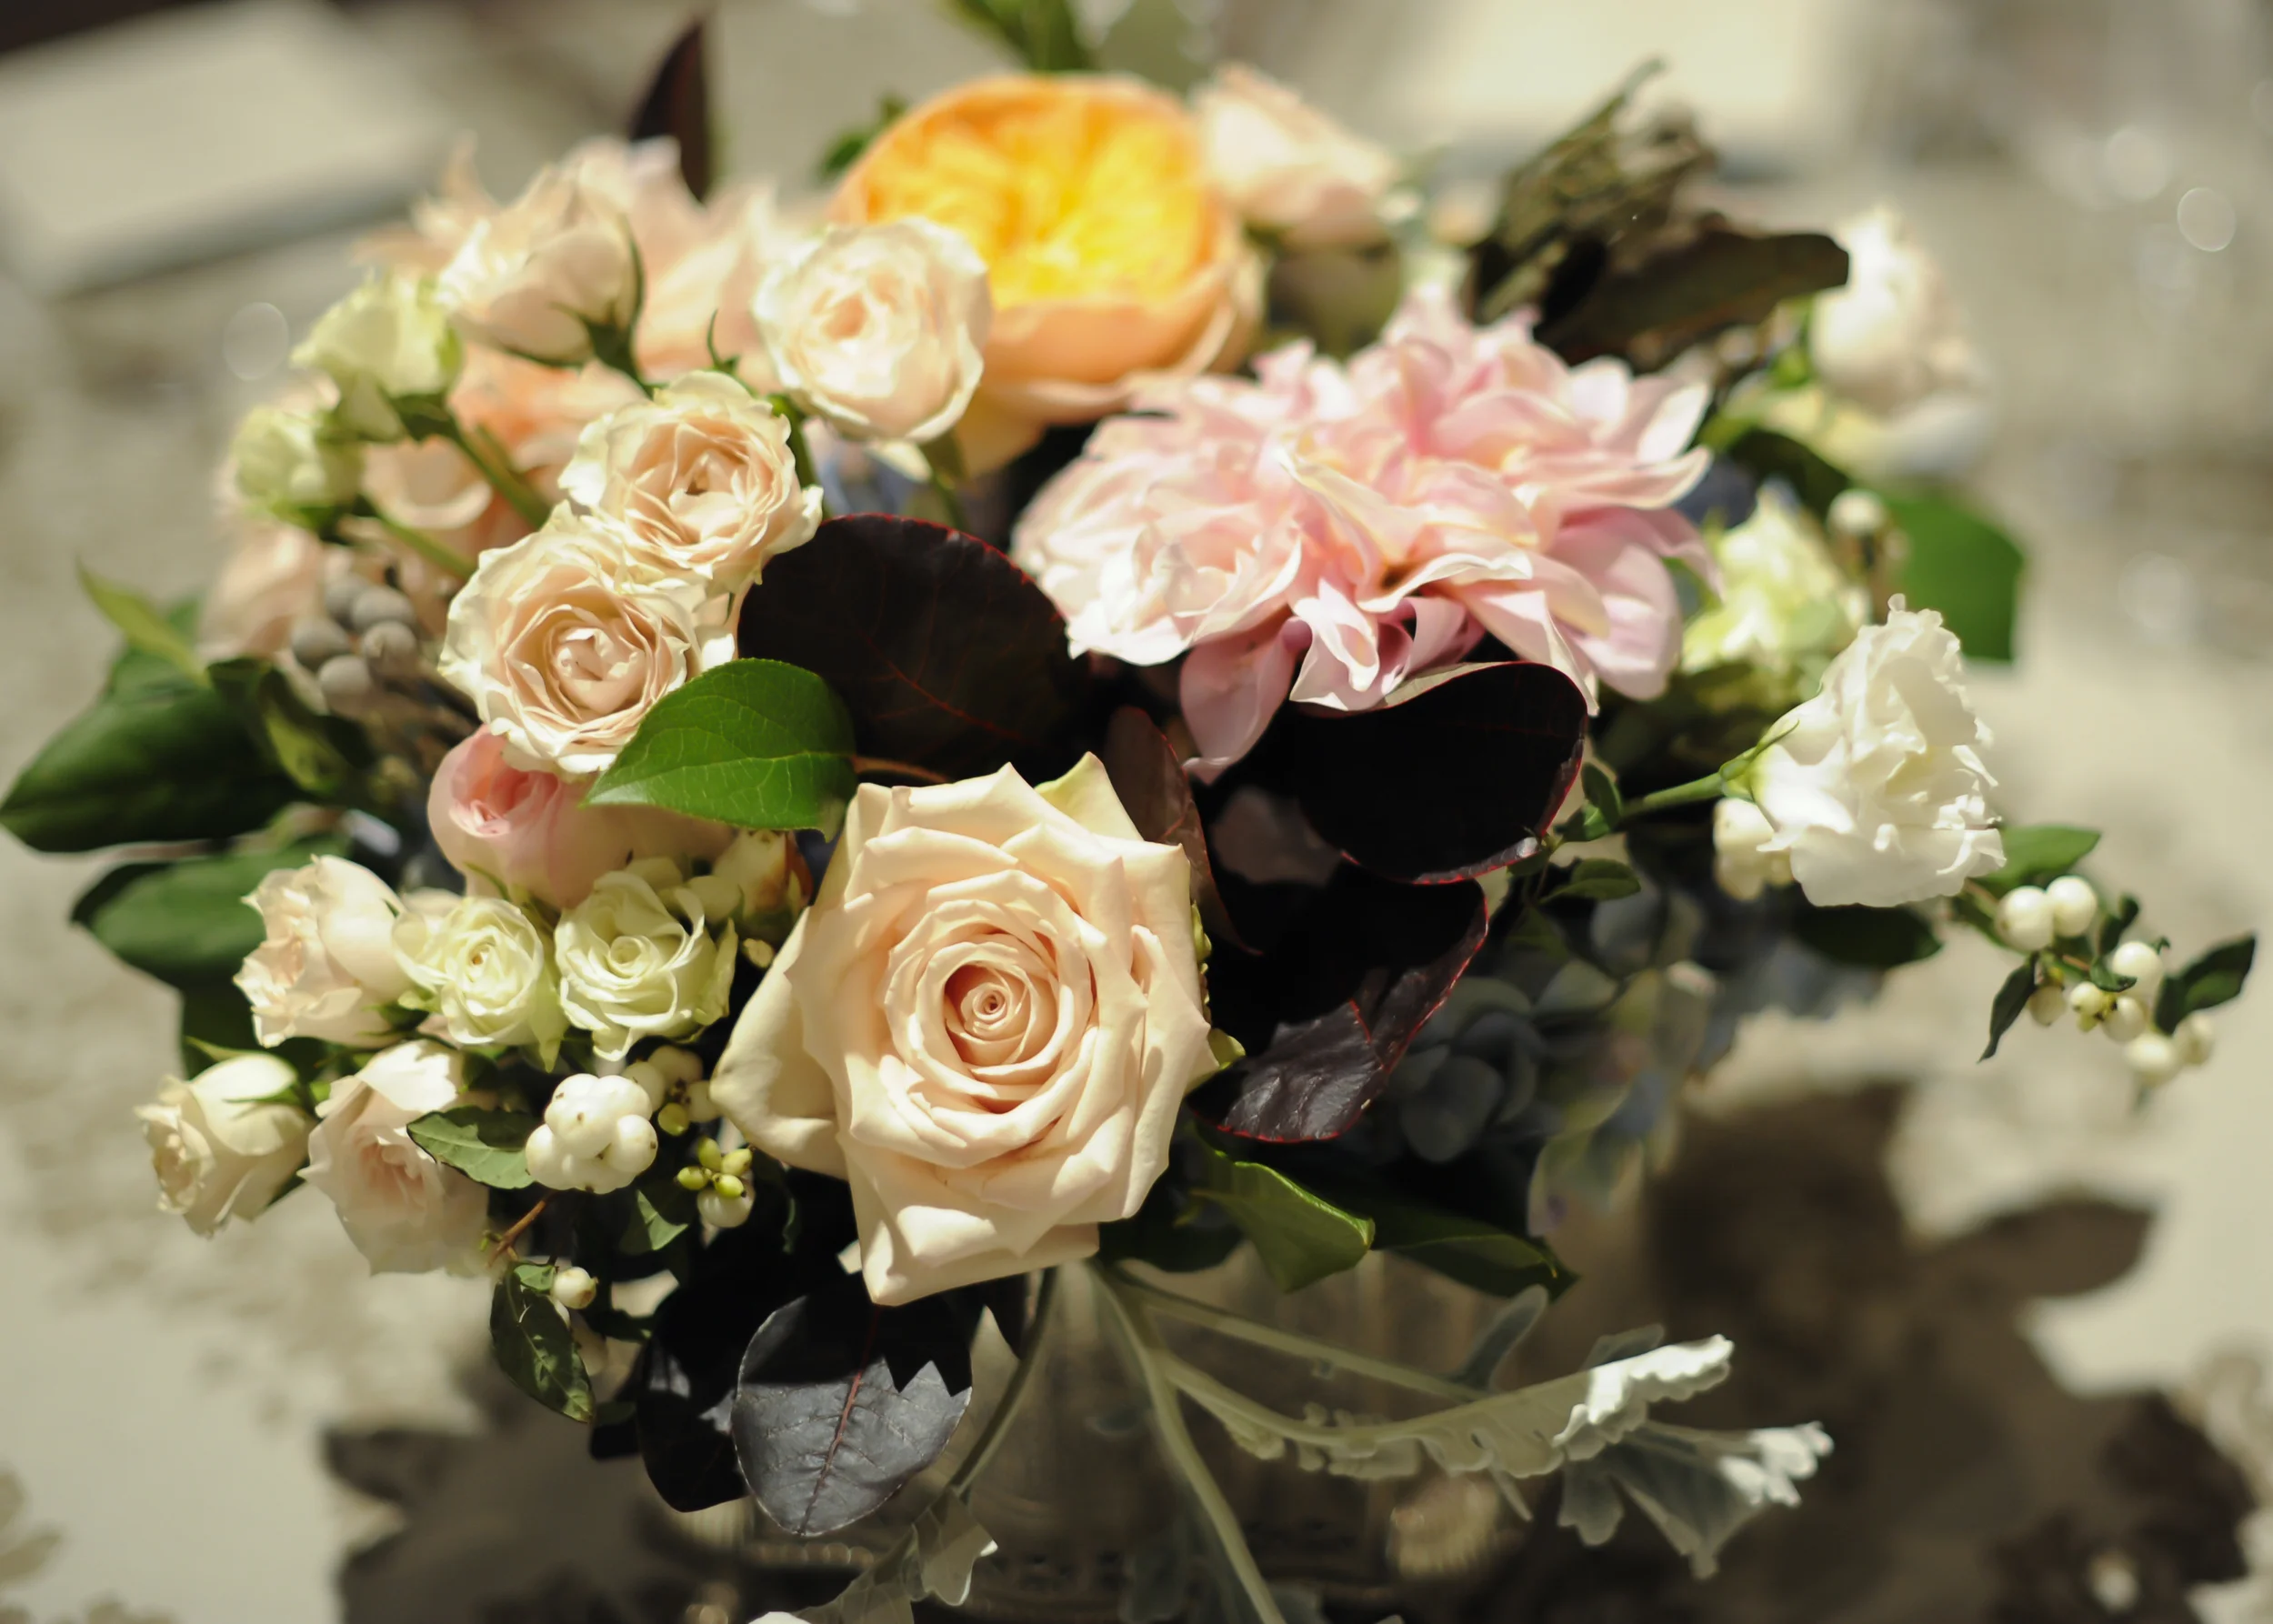
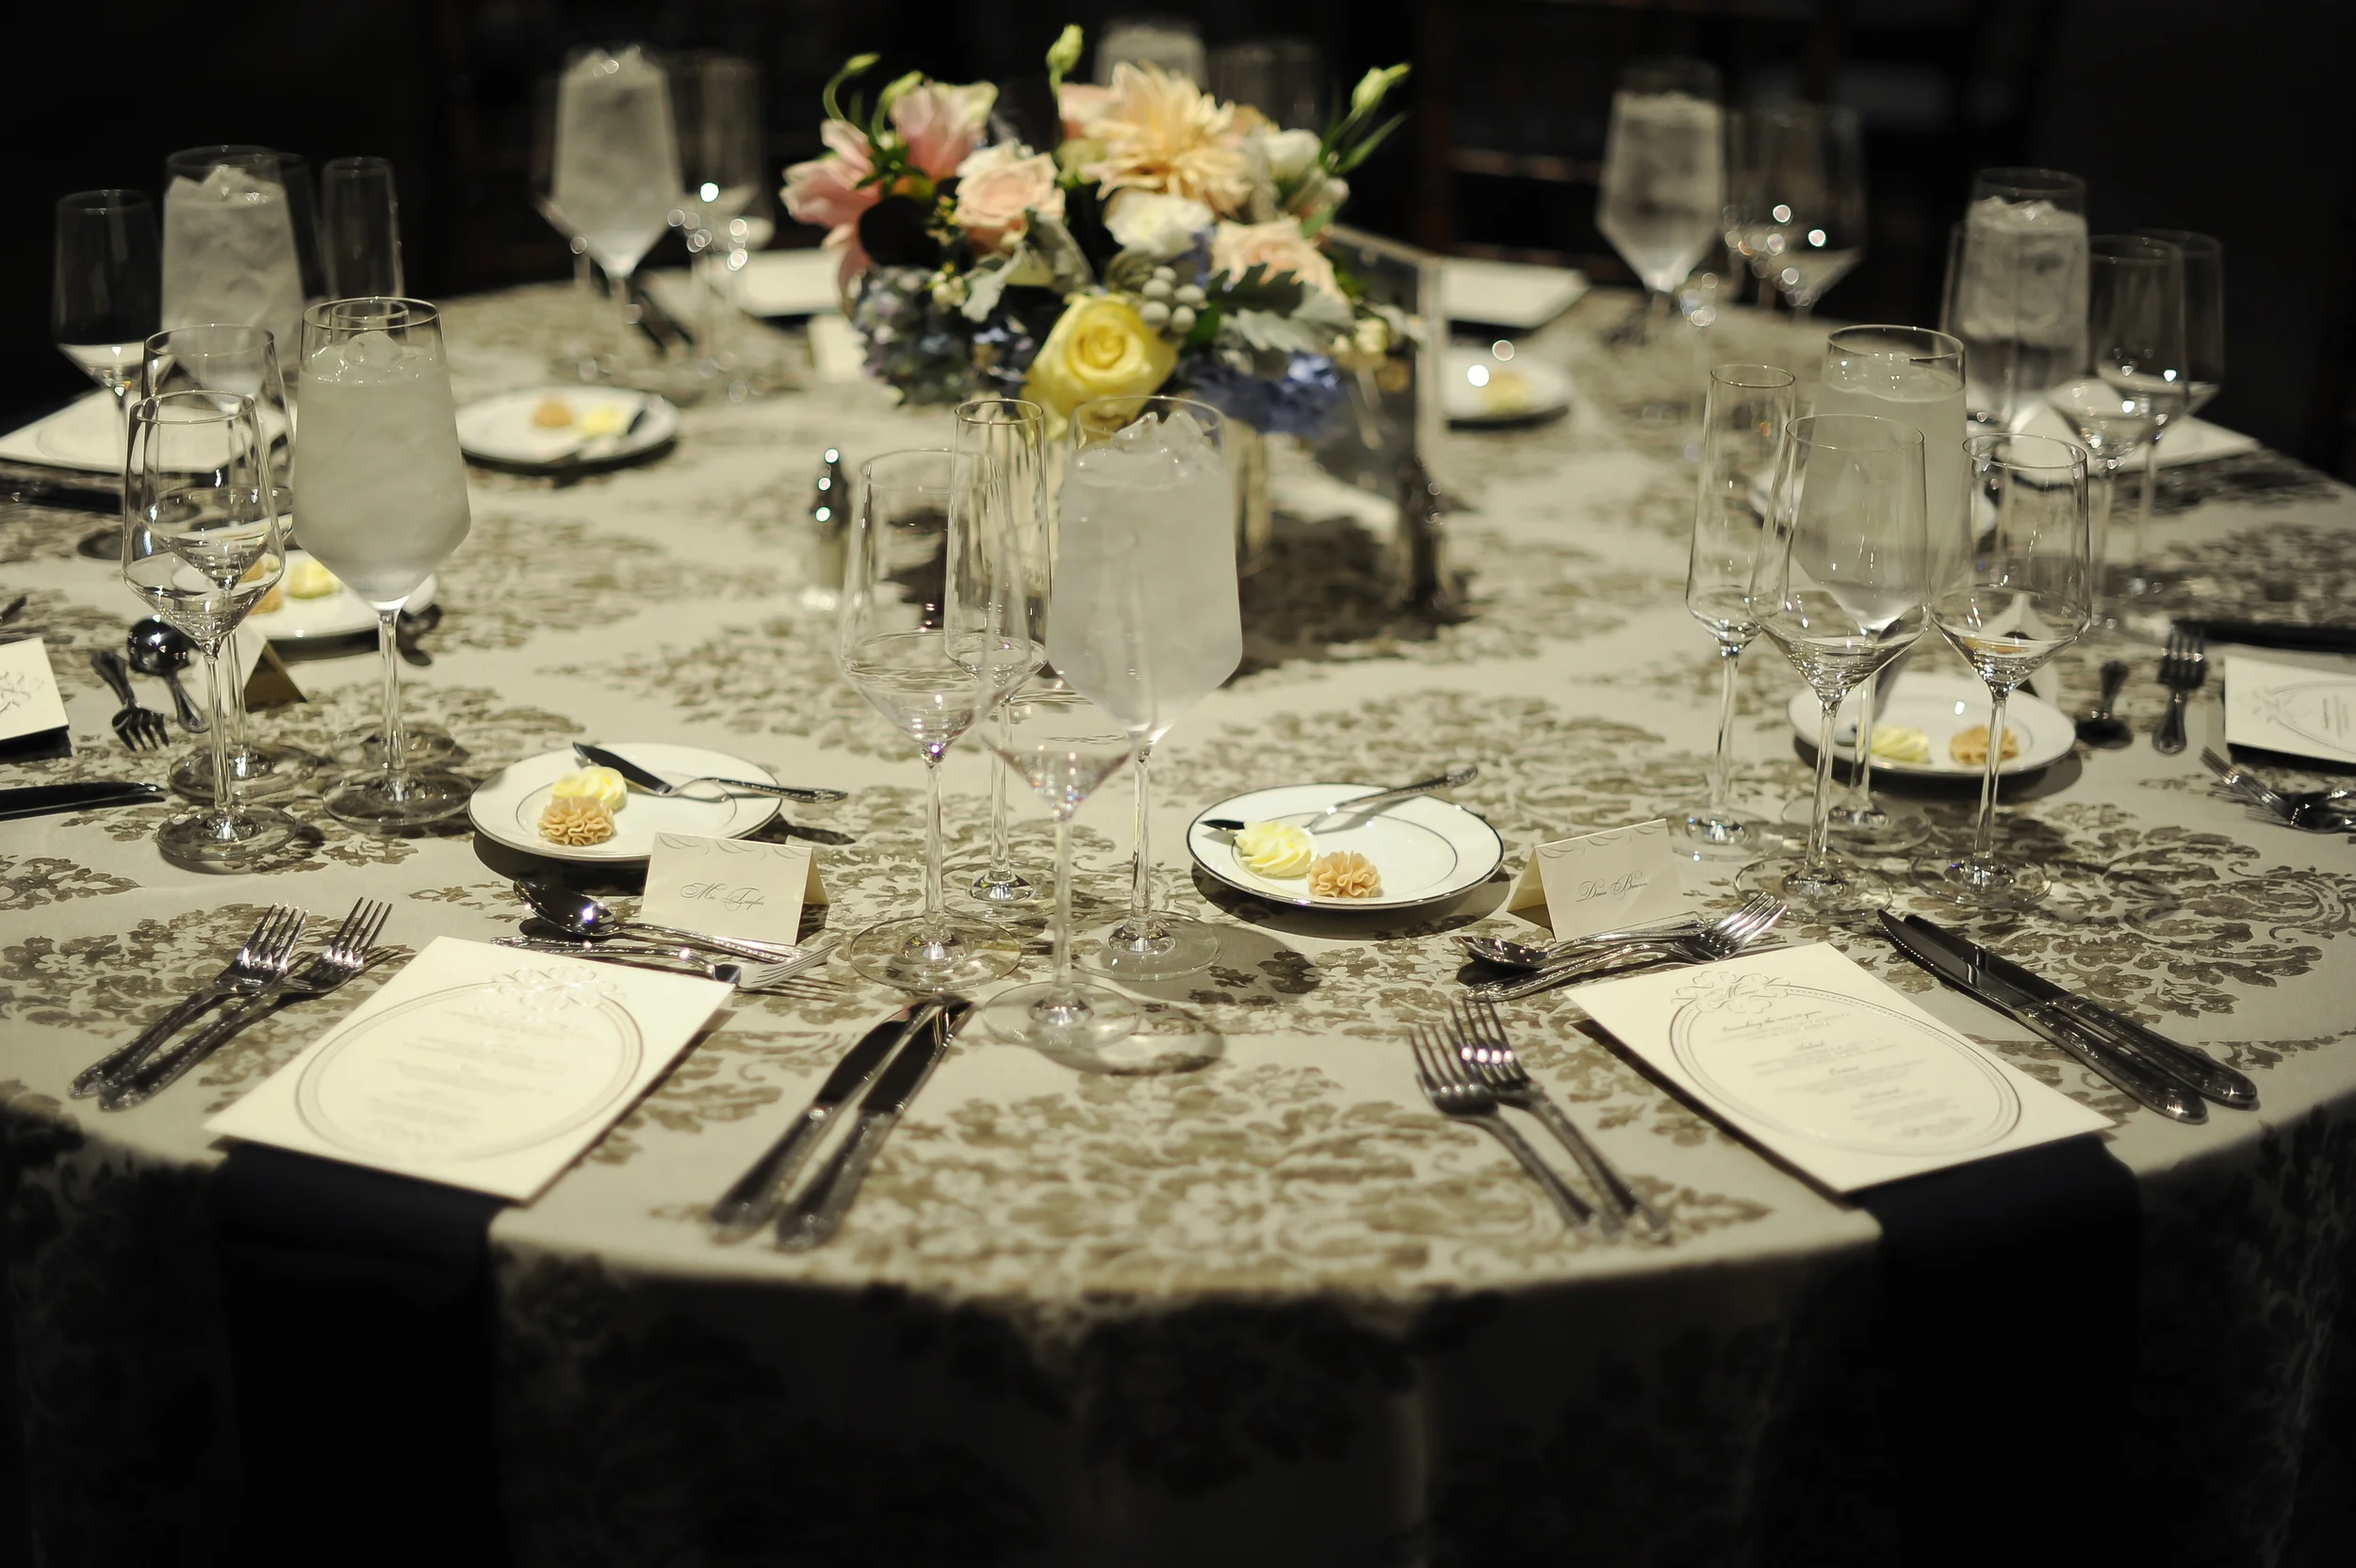
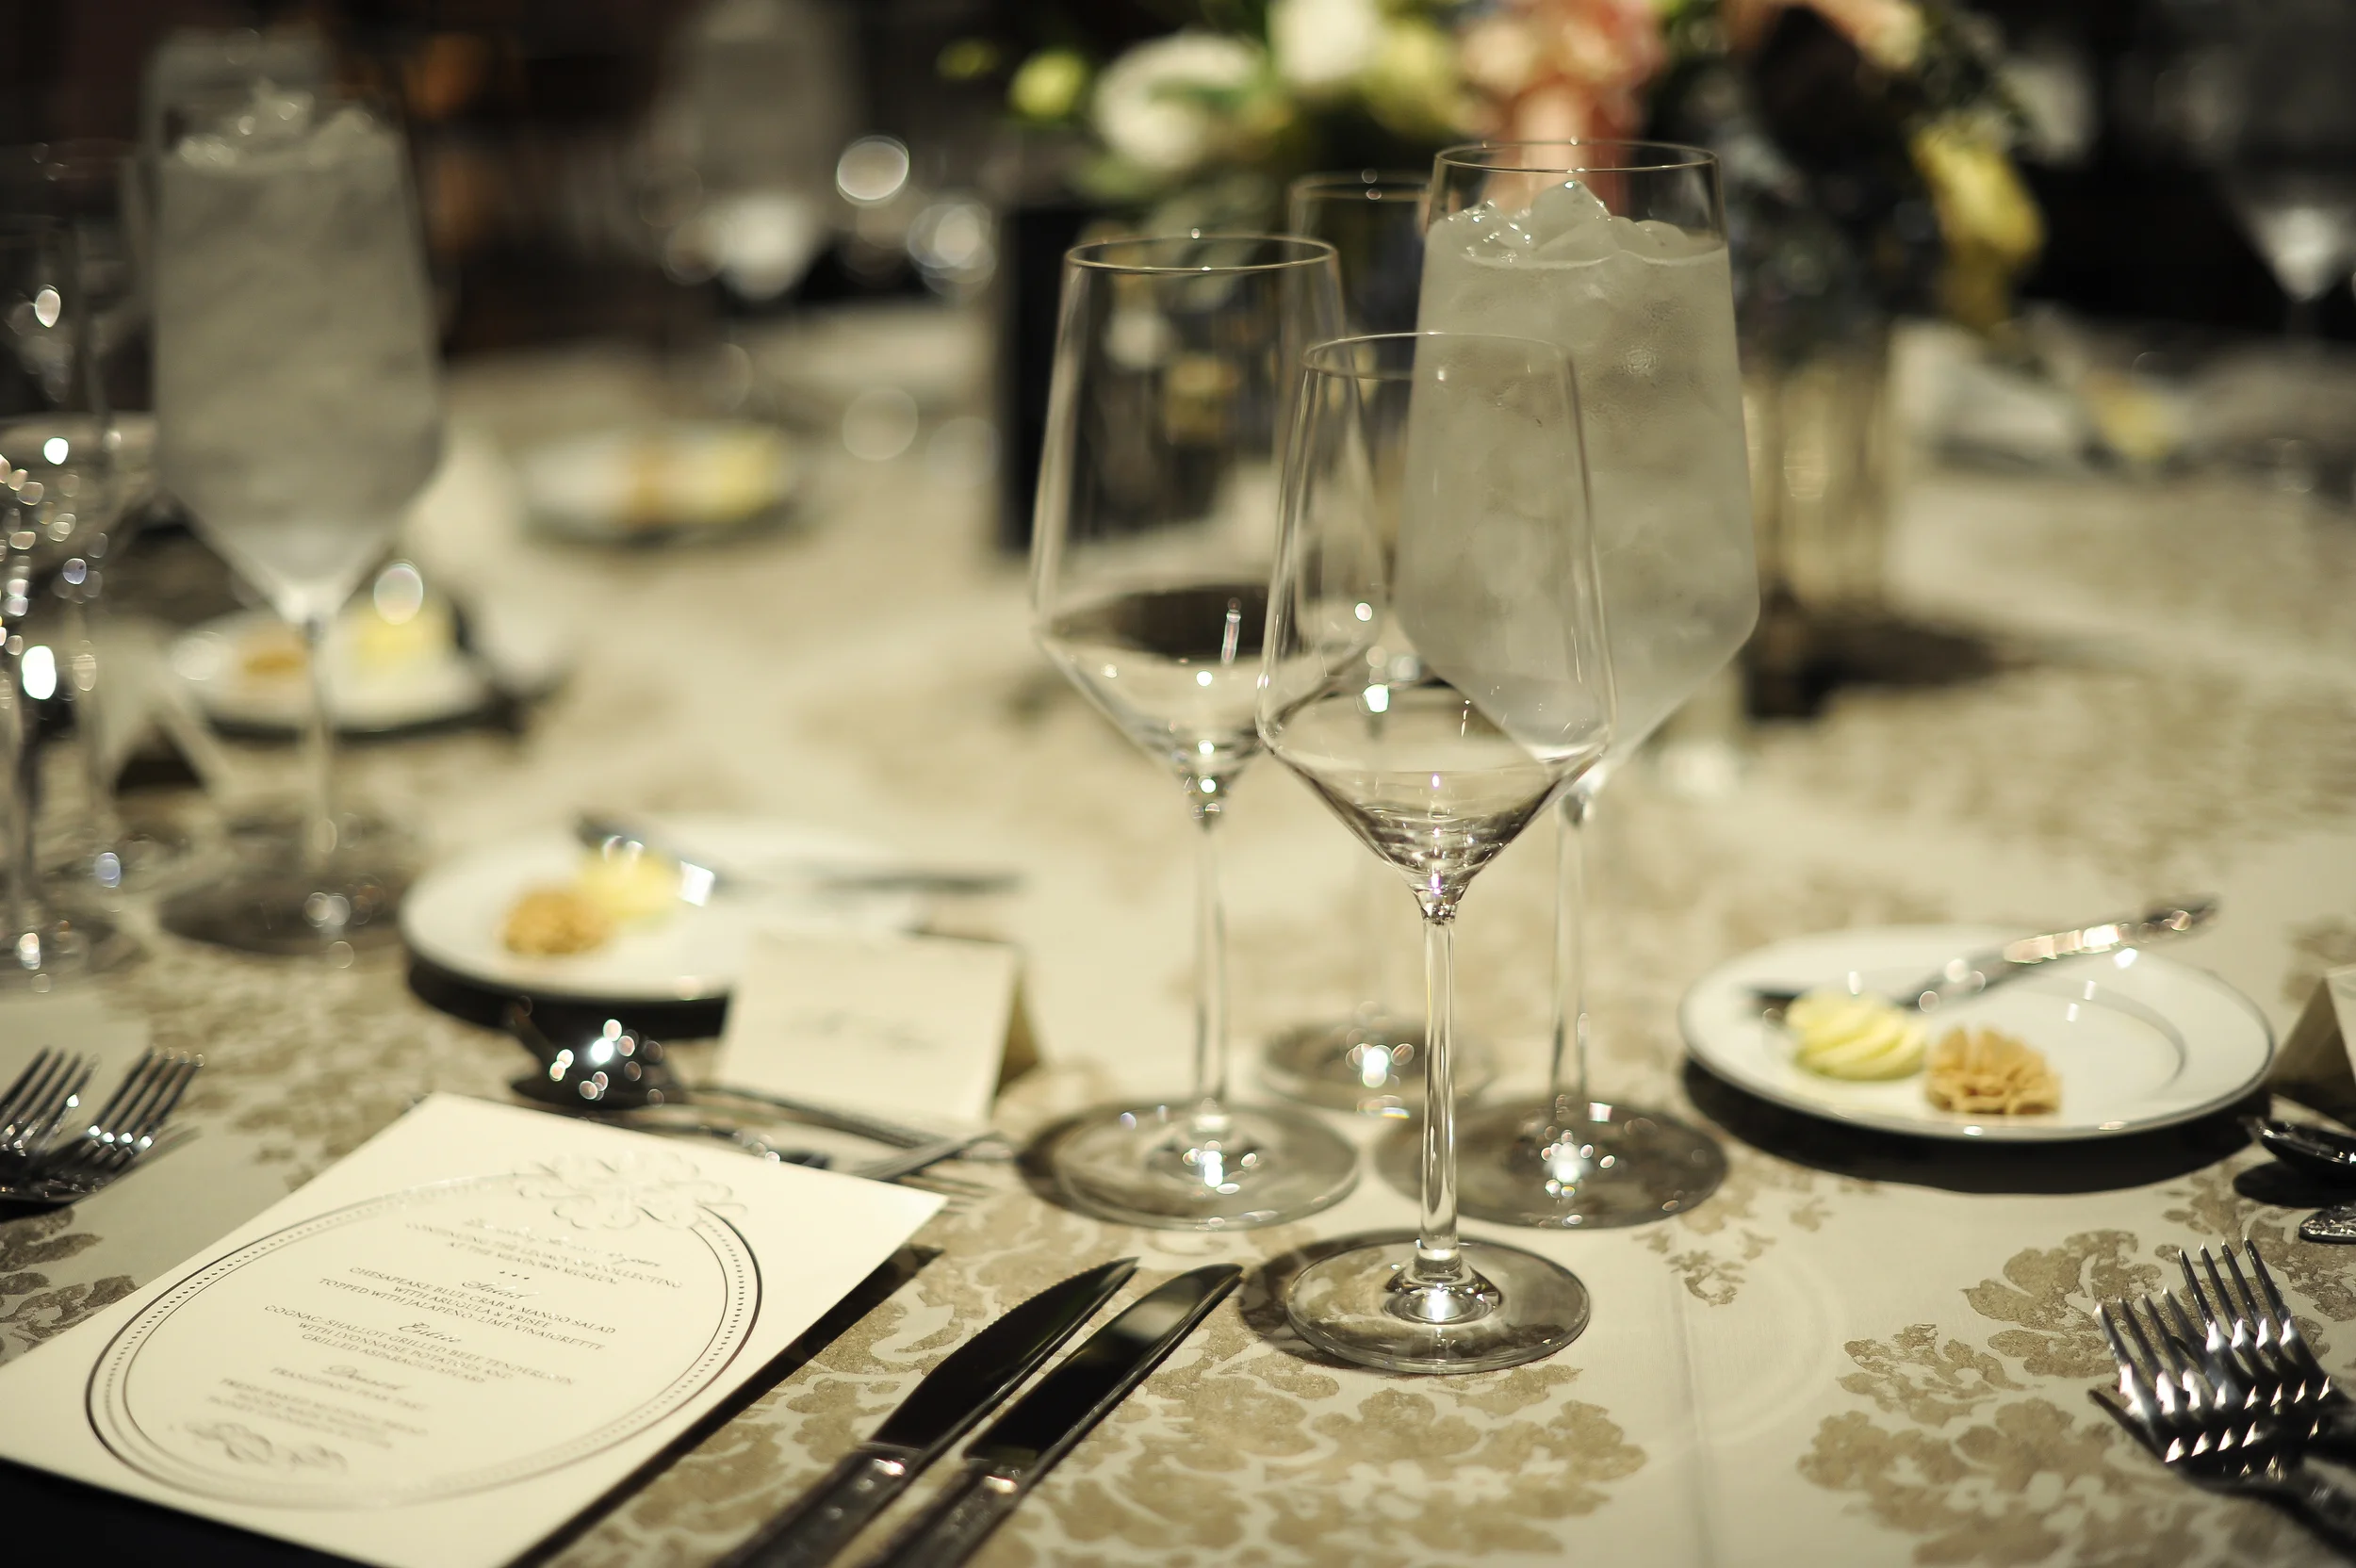
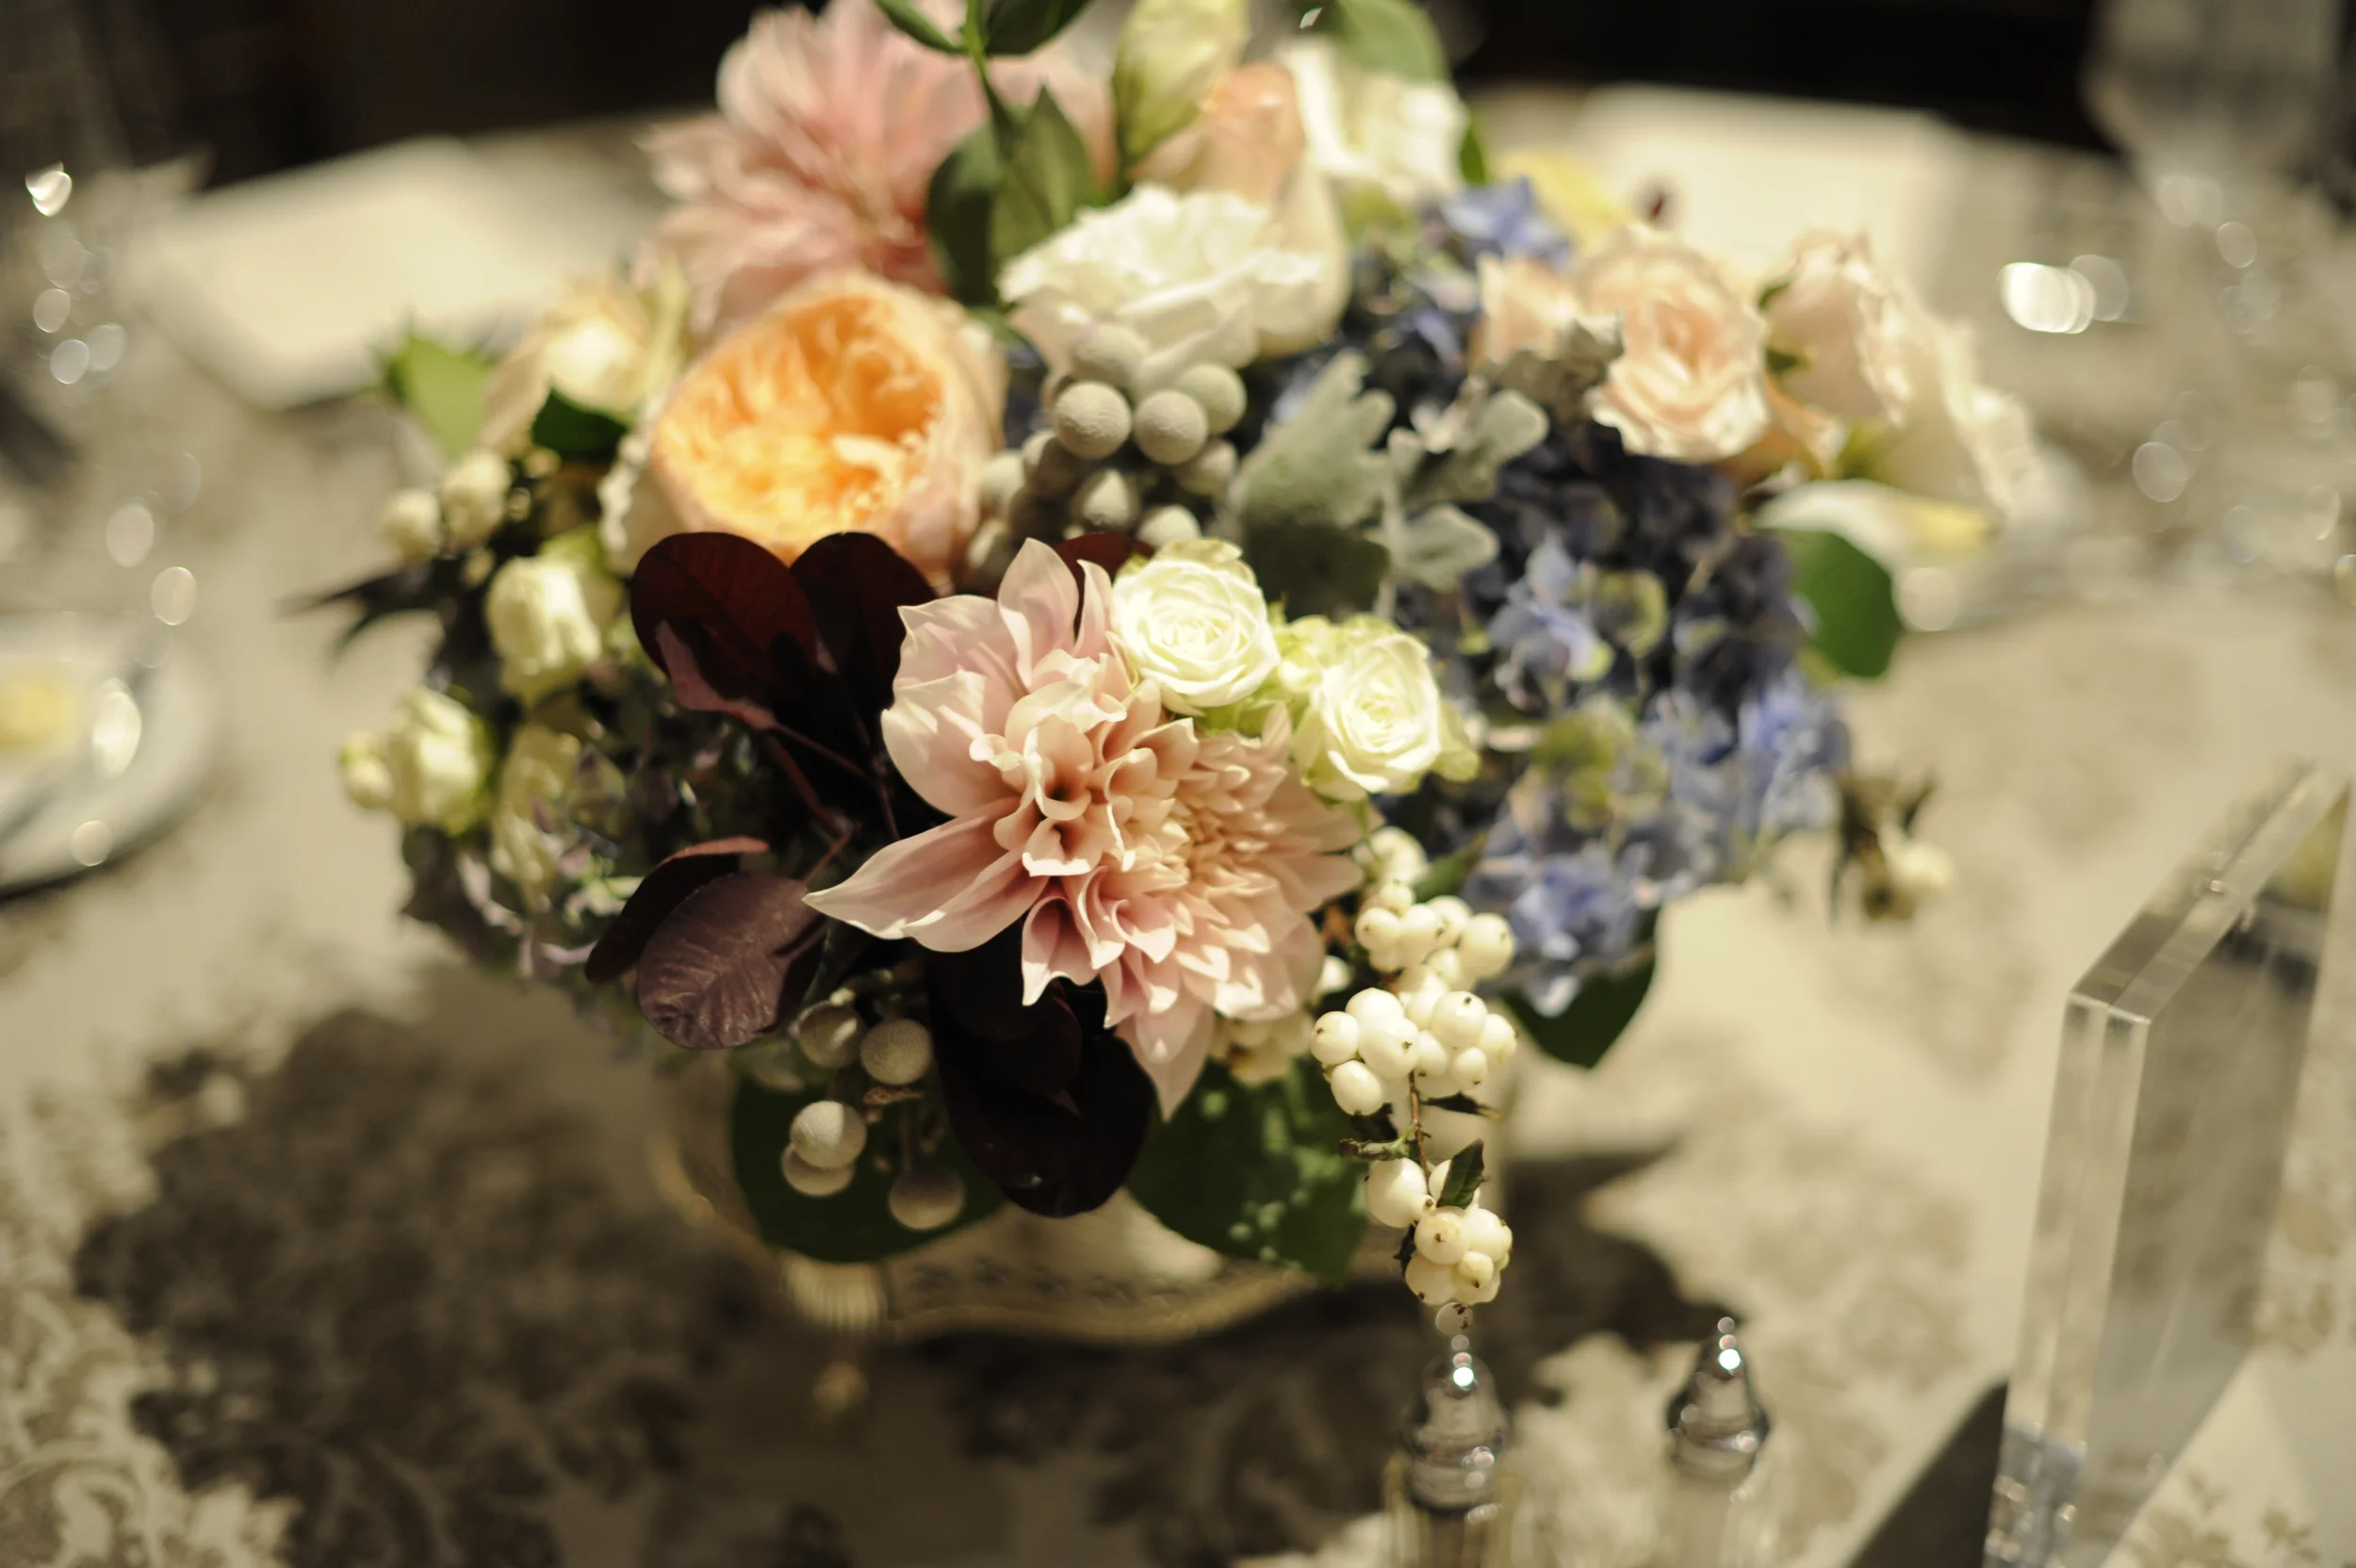
Donor Dinner
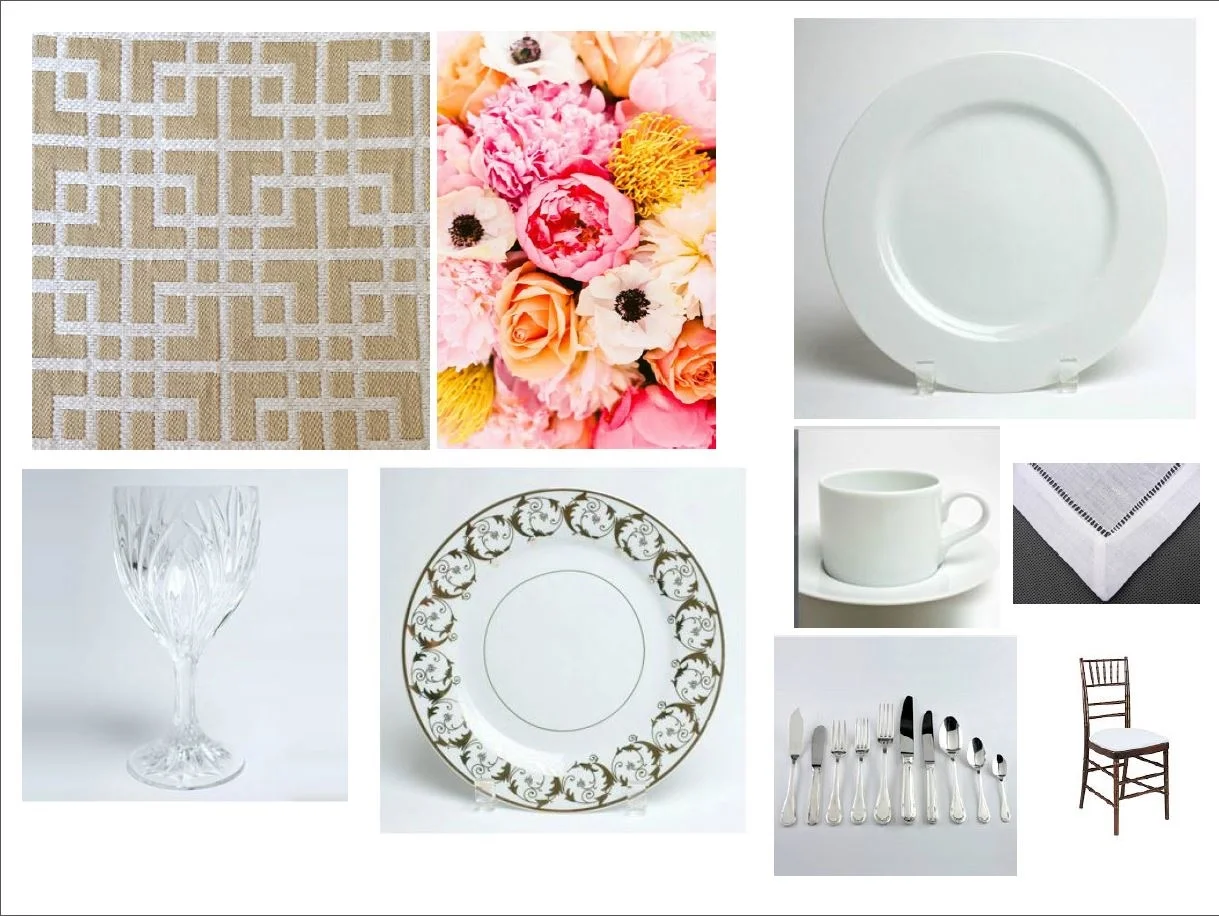
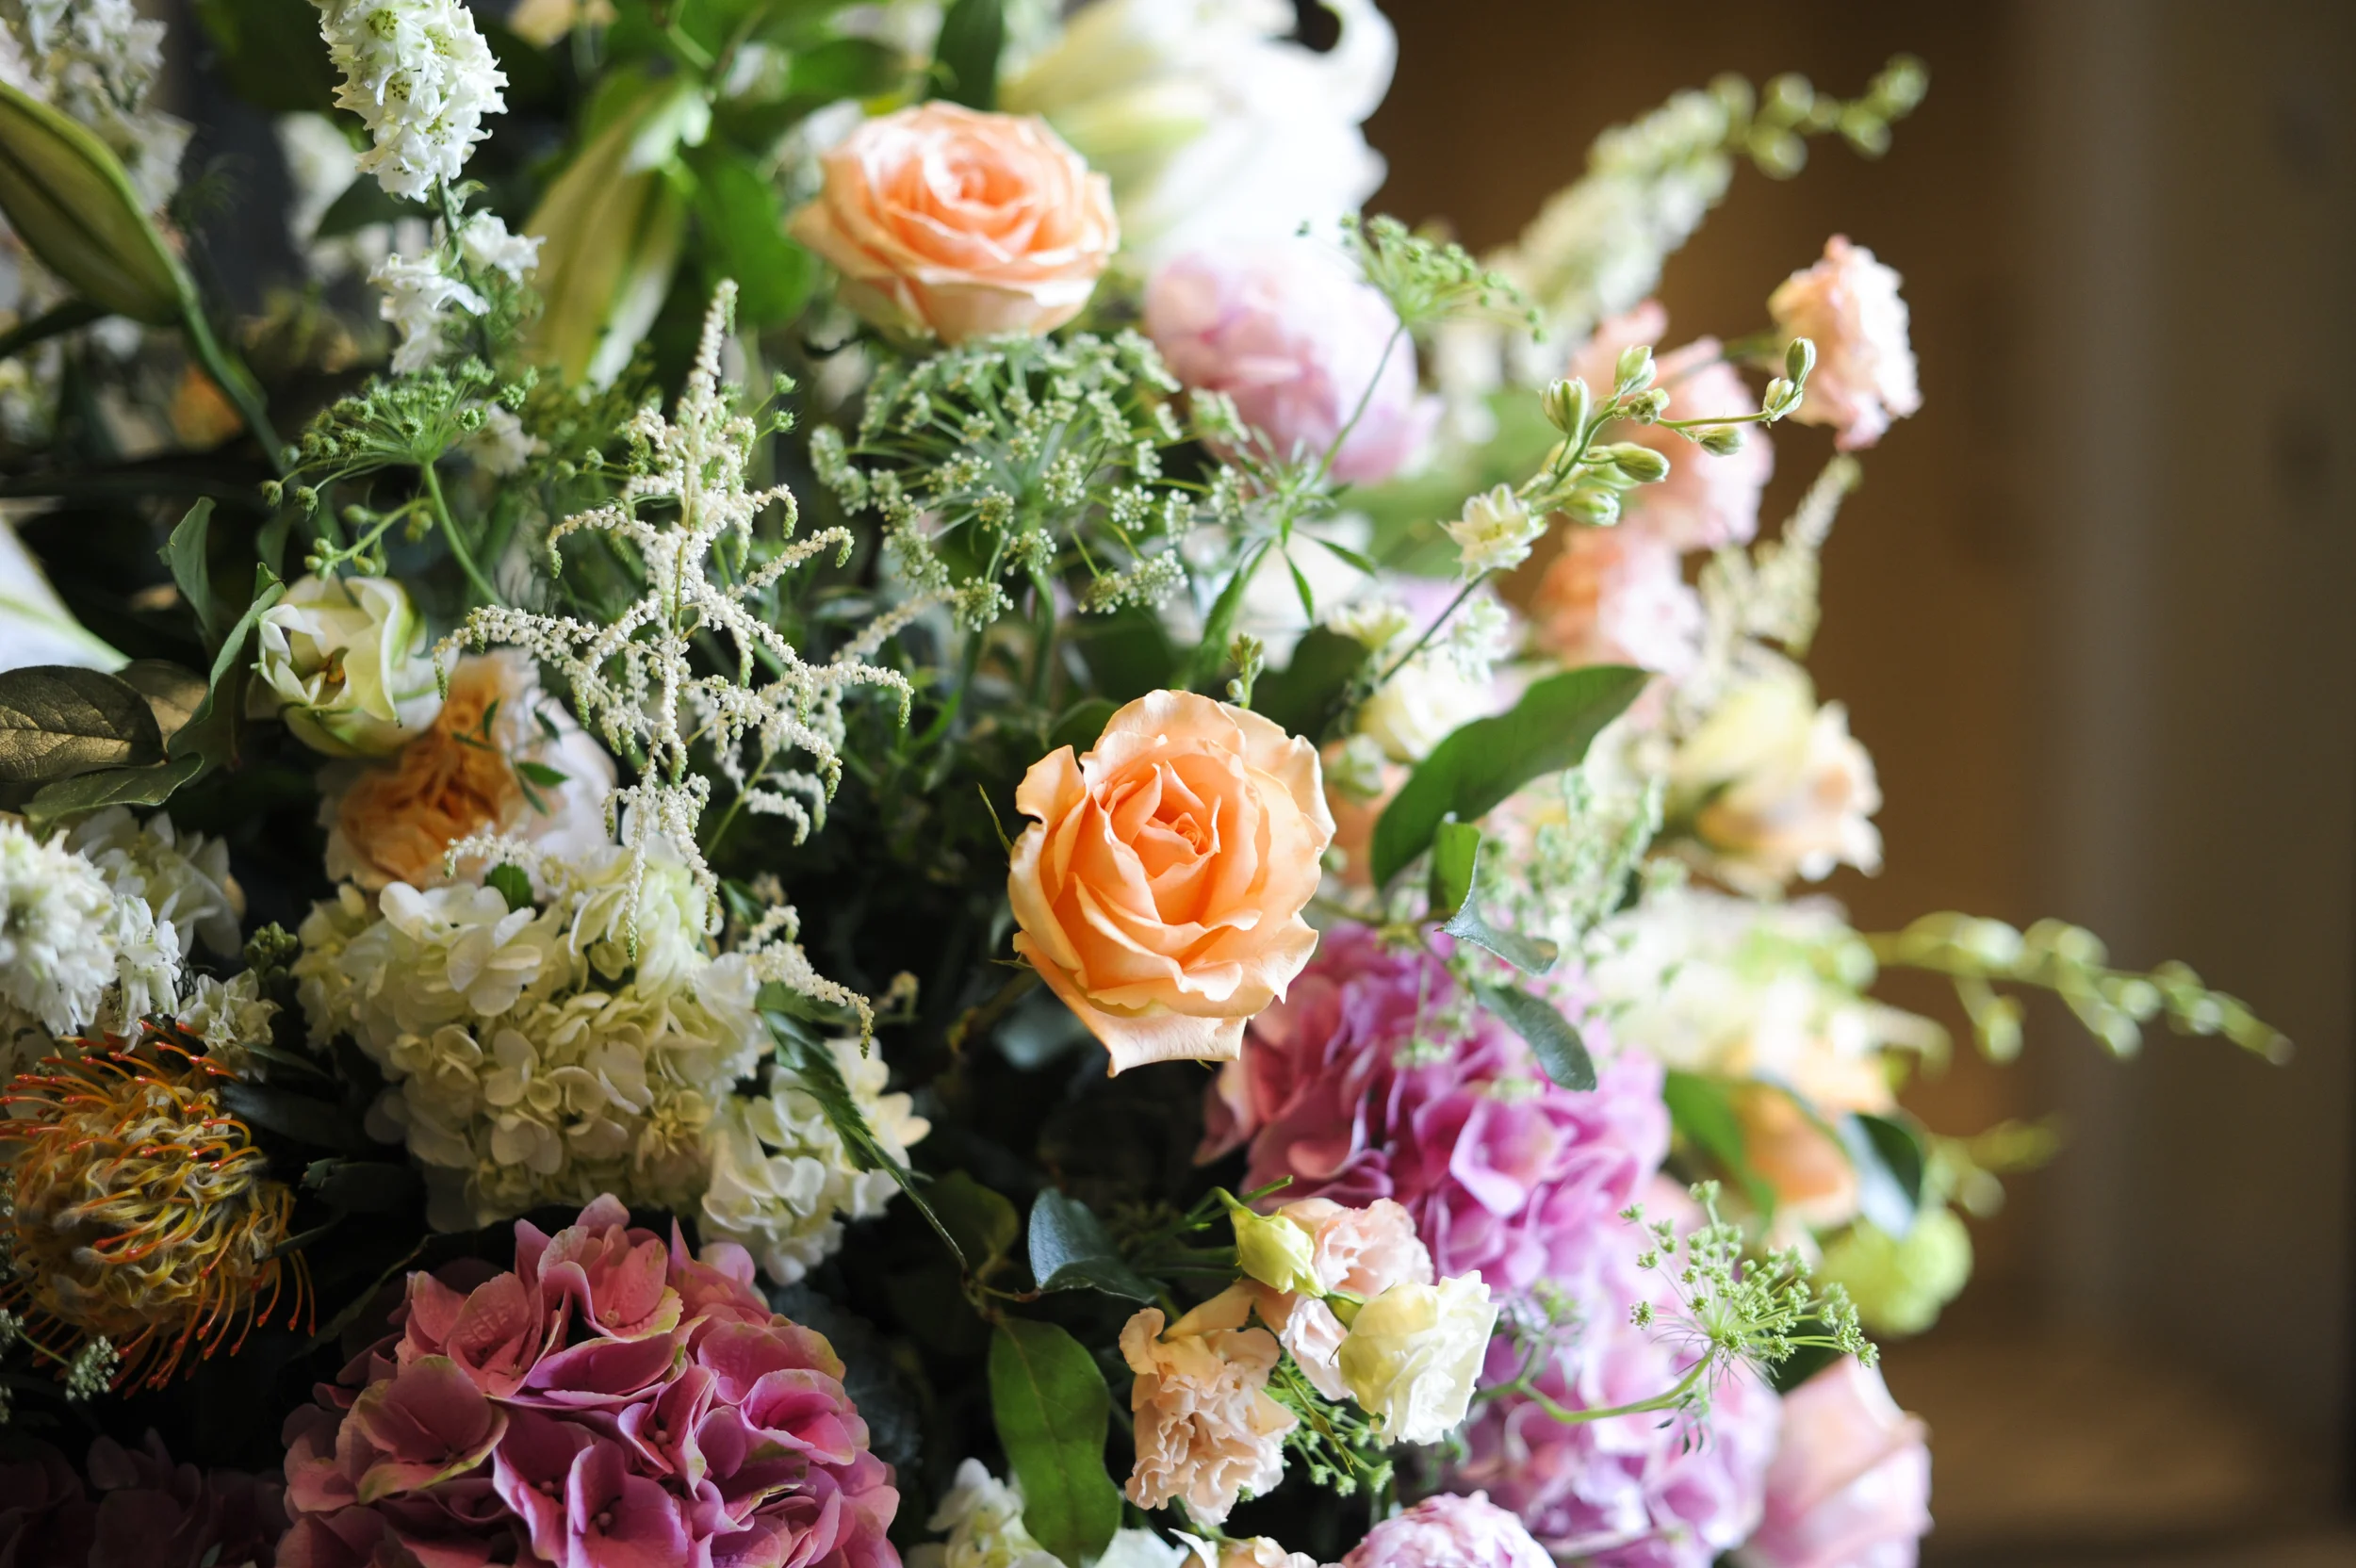
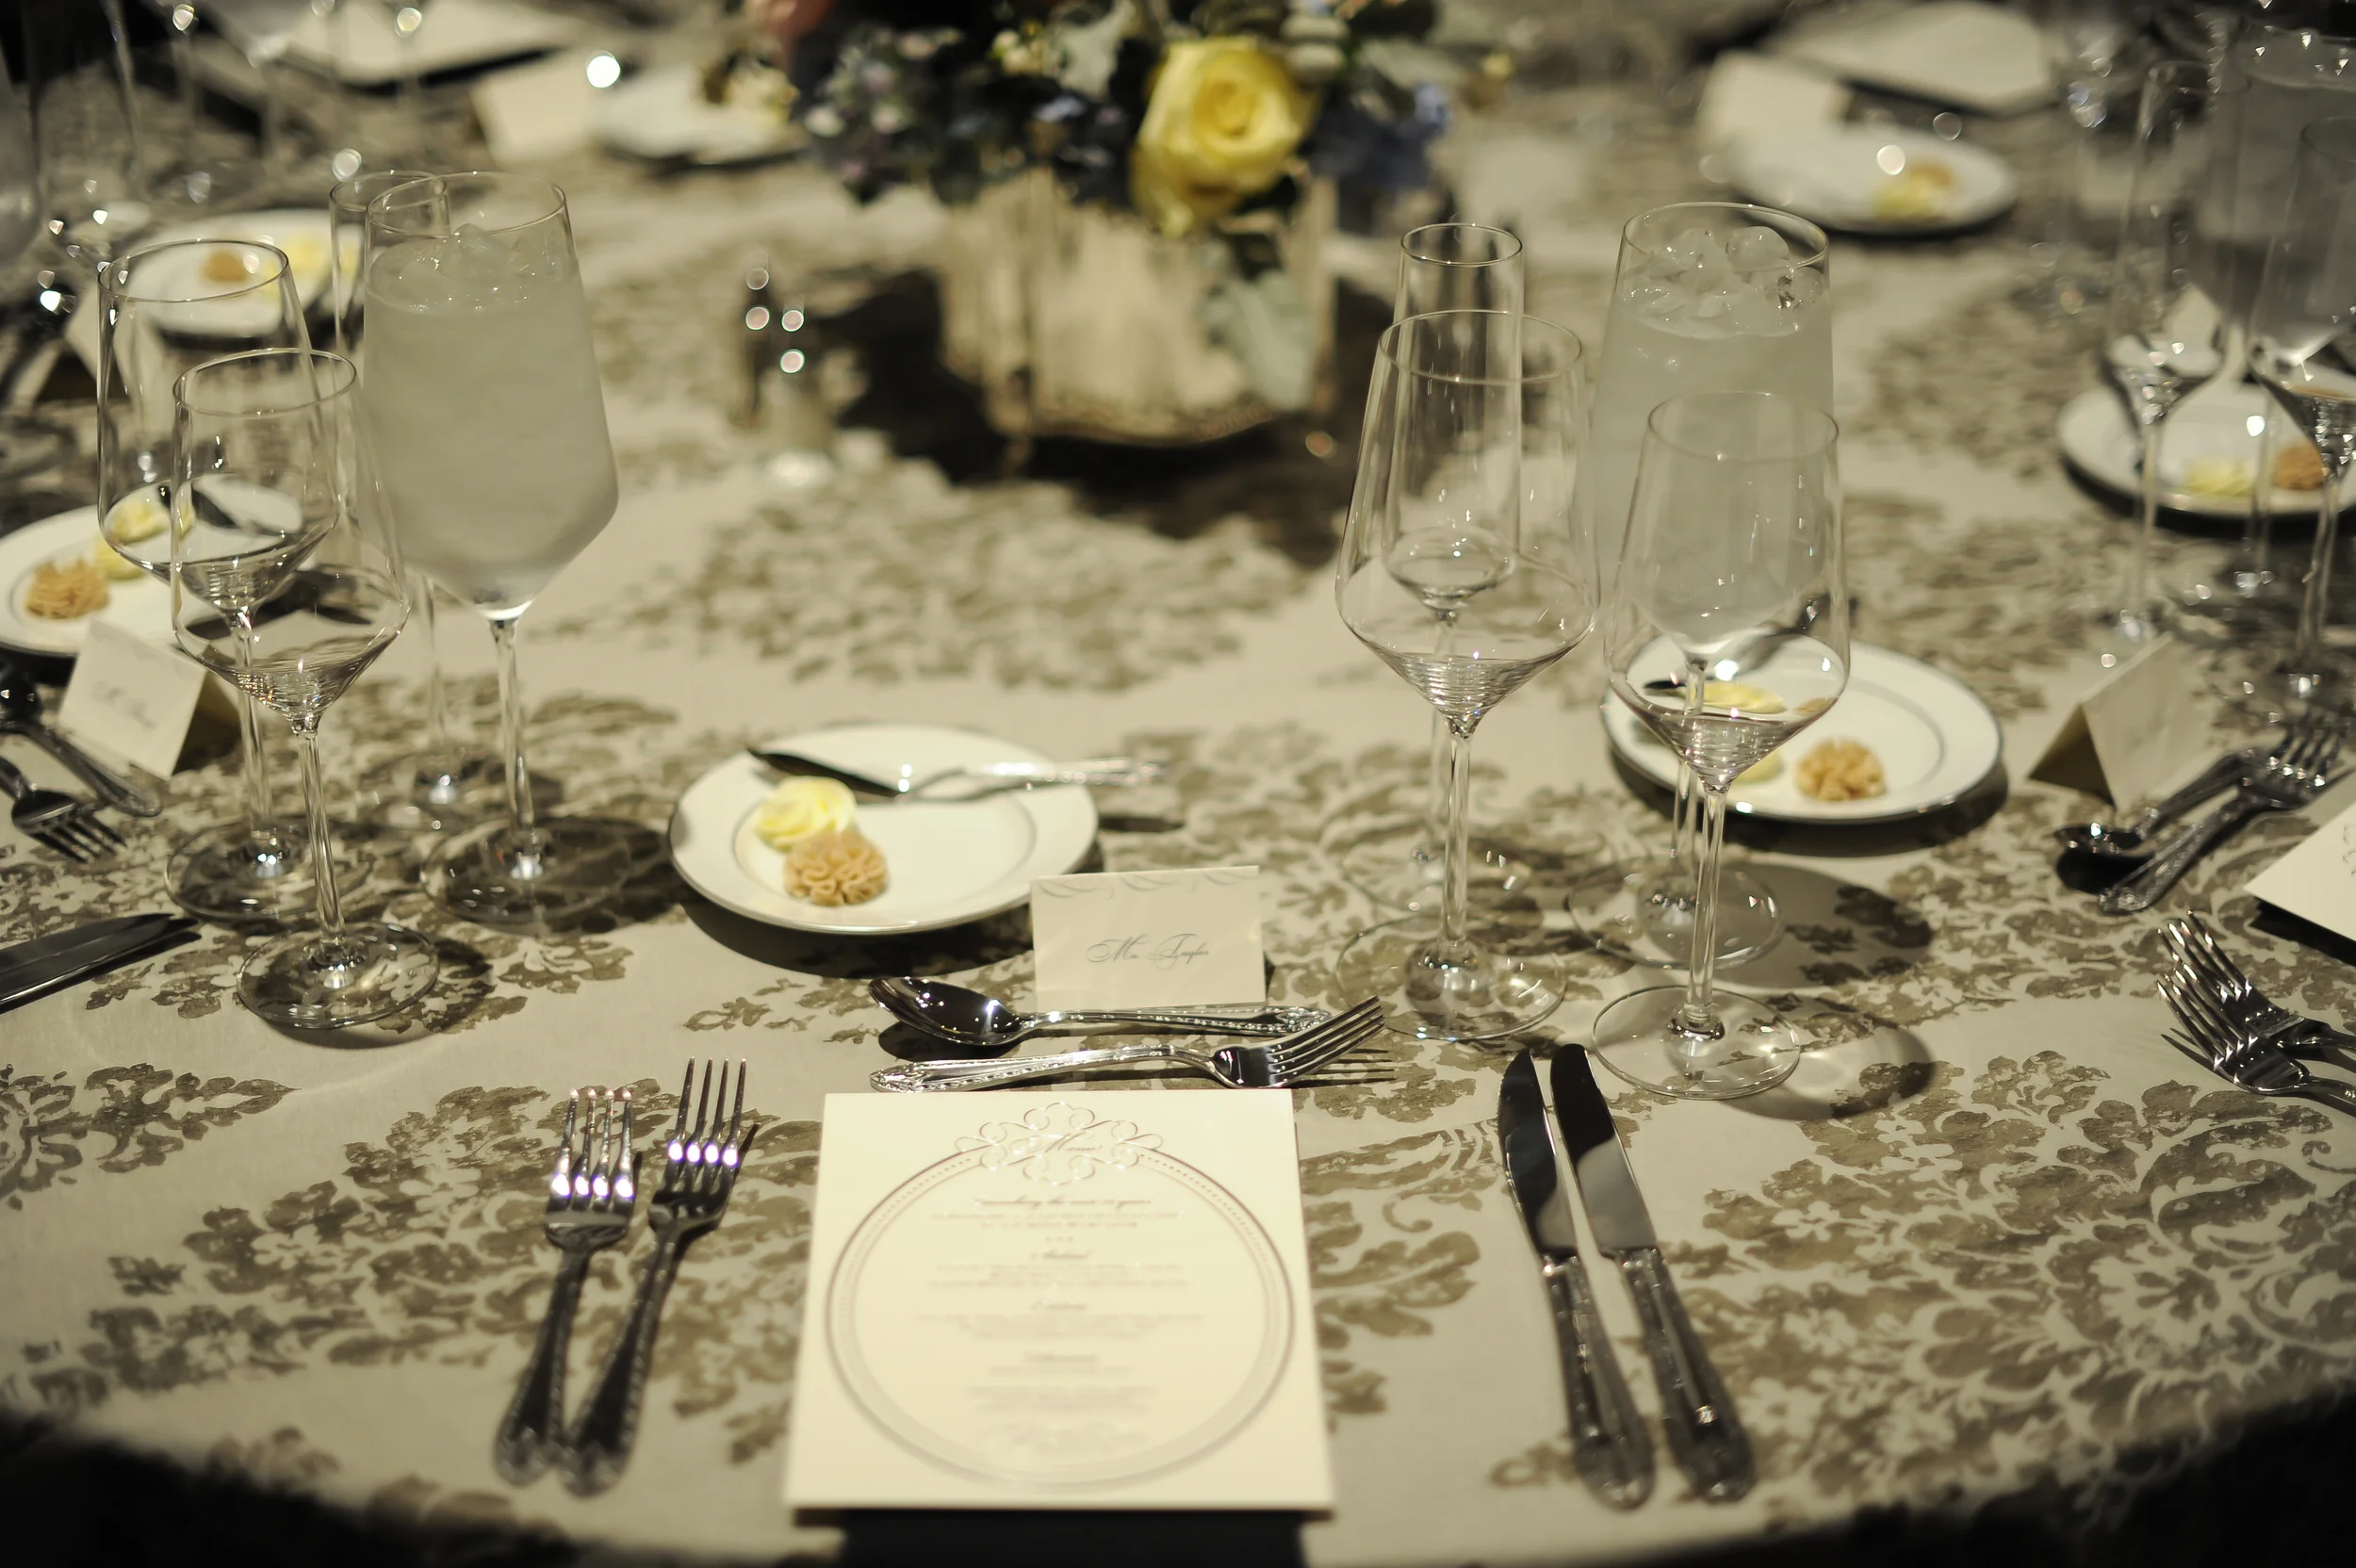
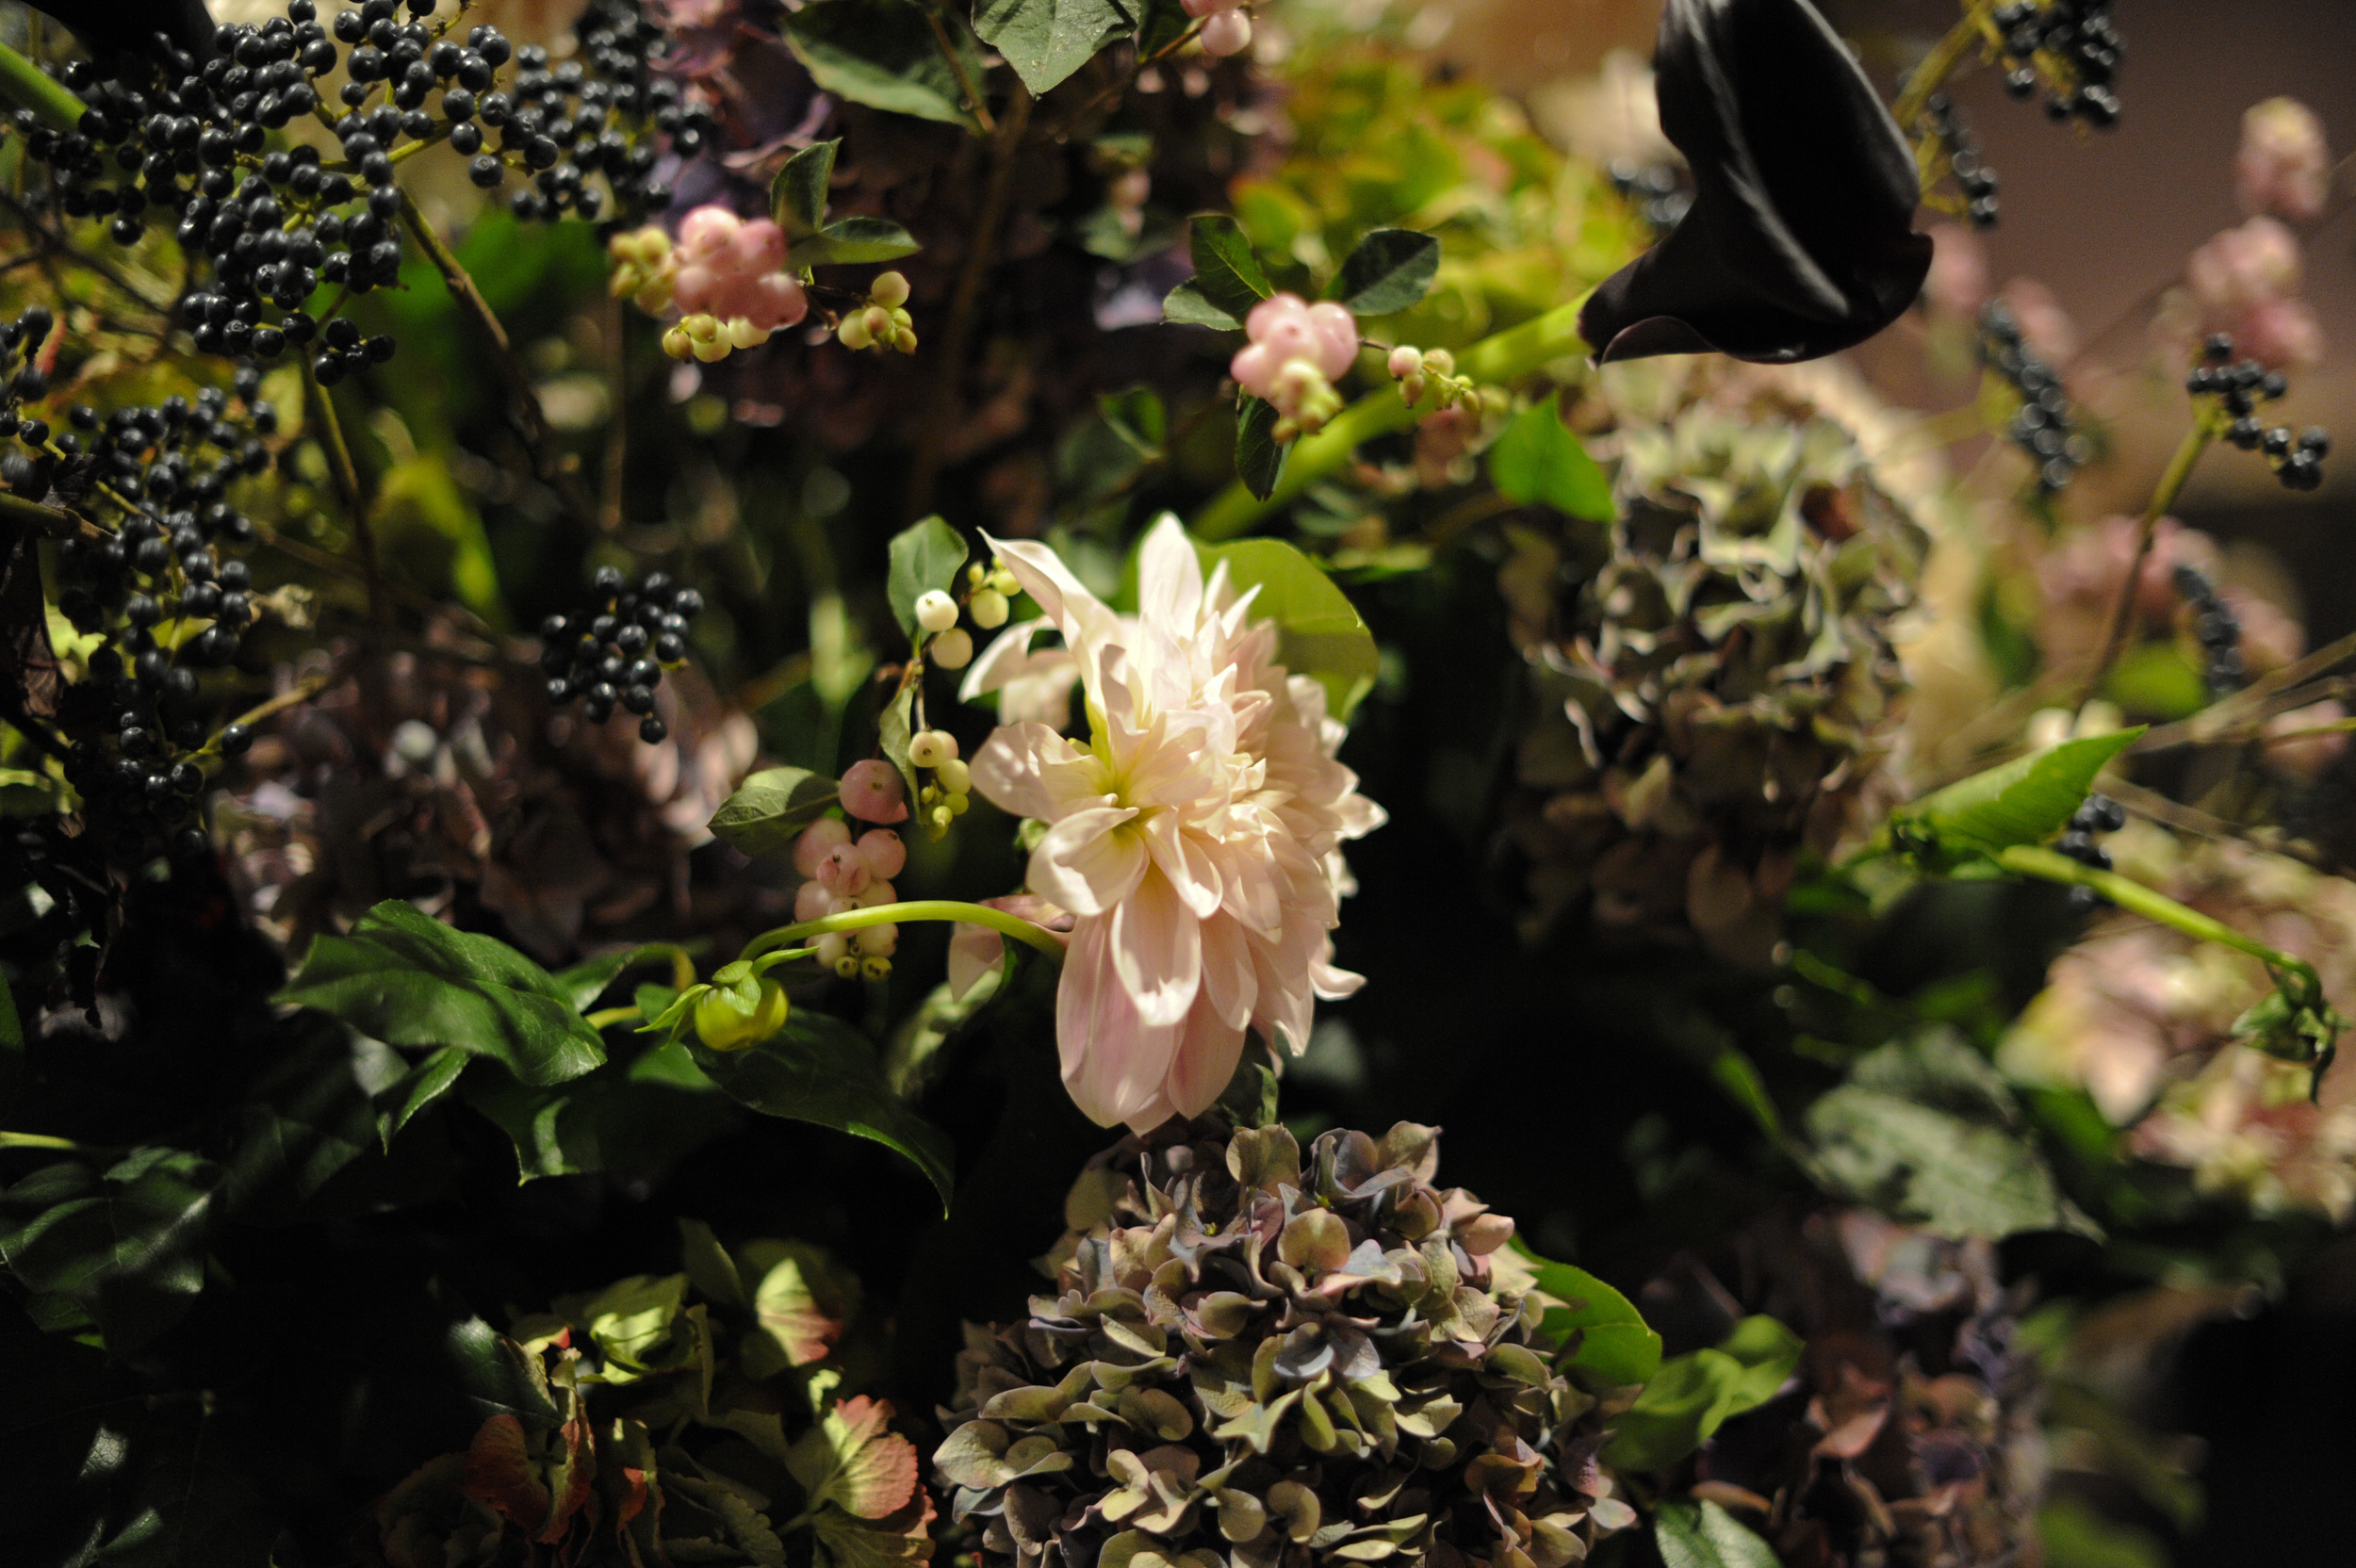
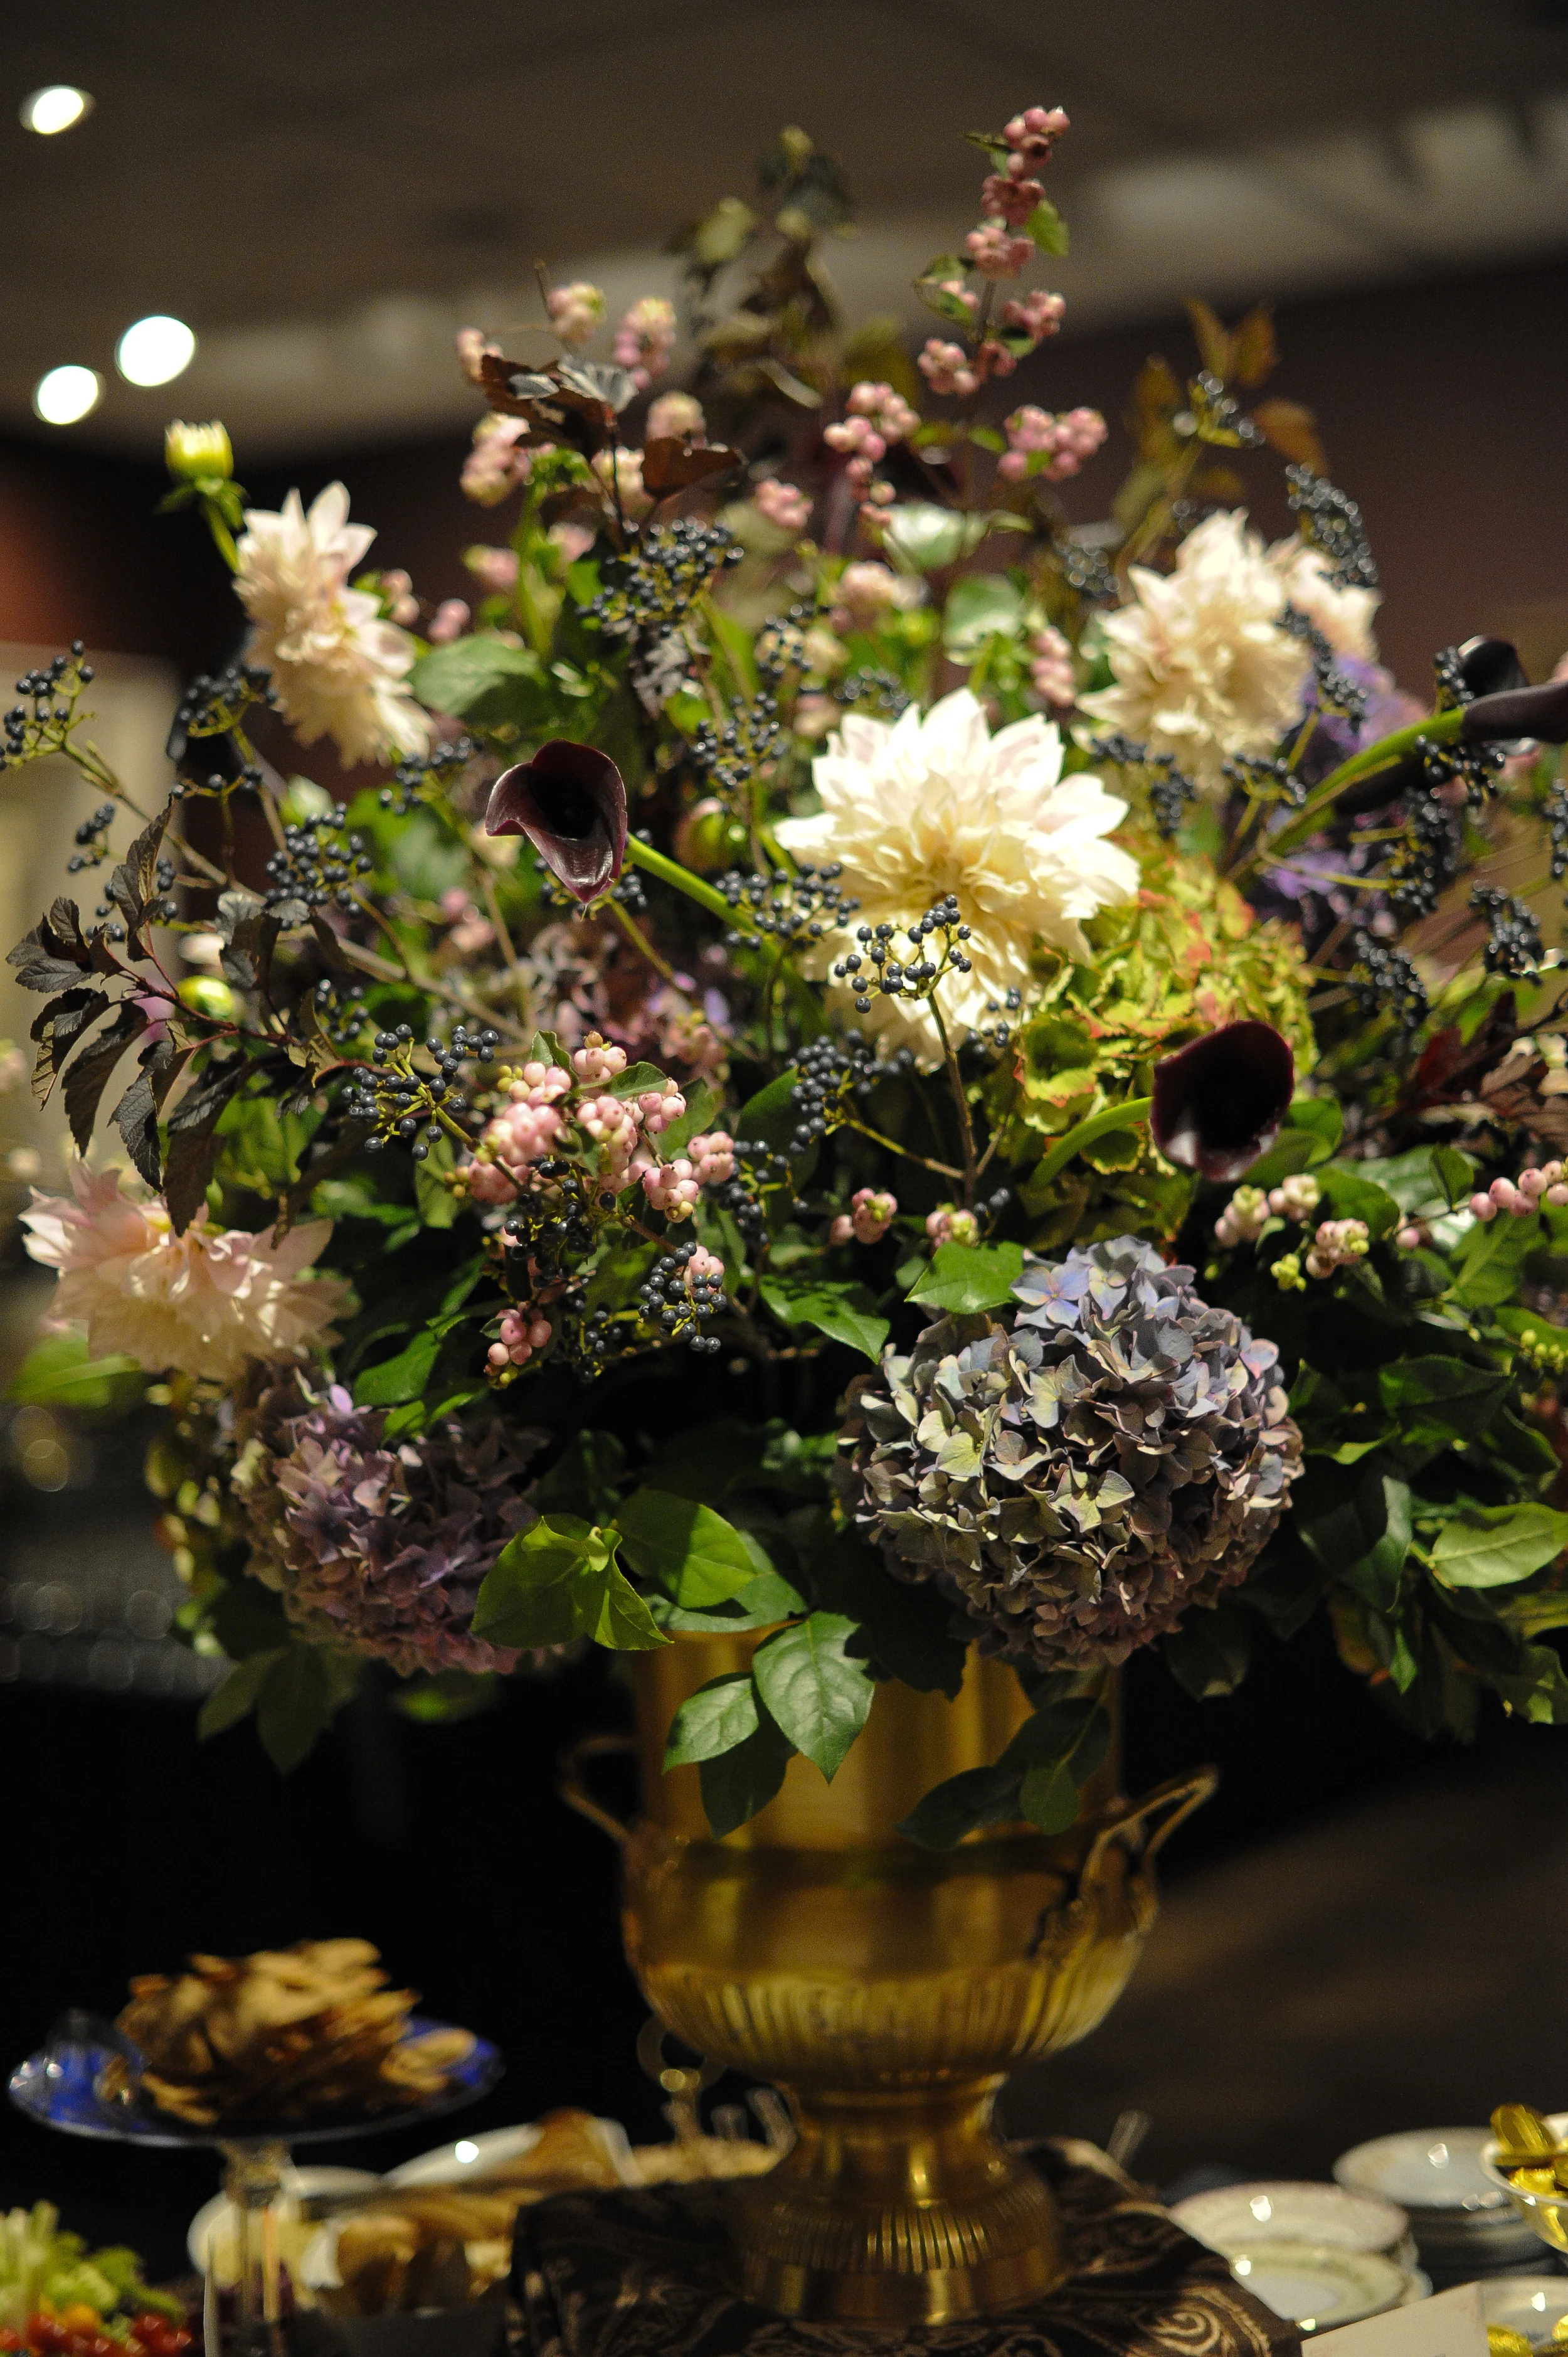
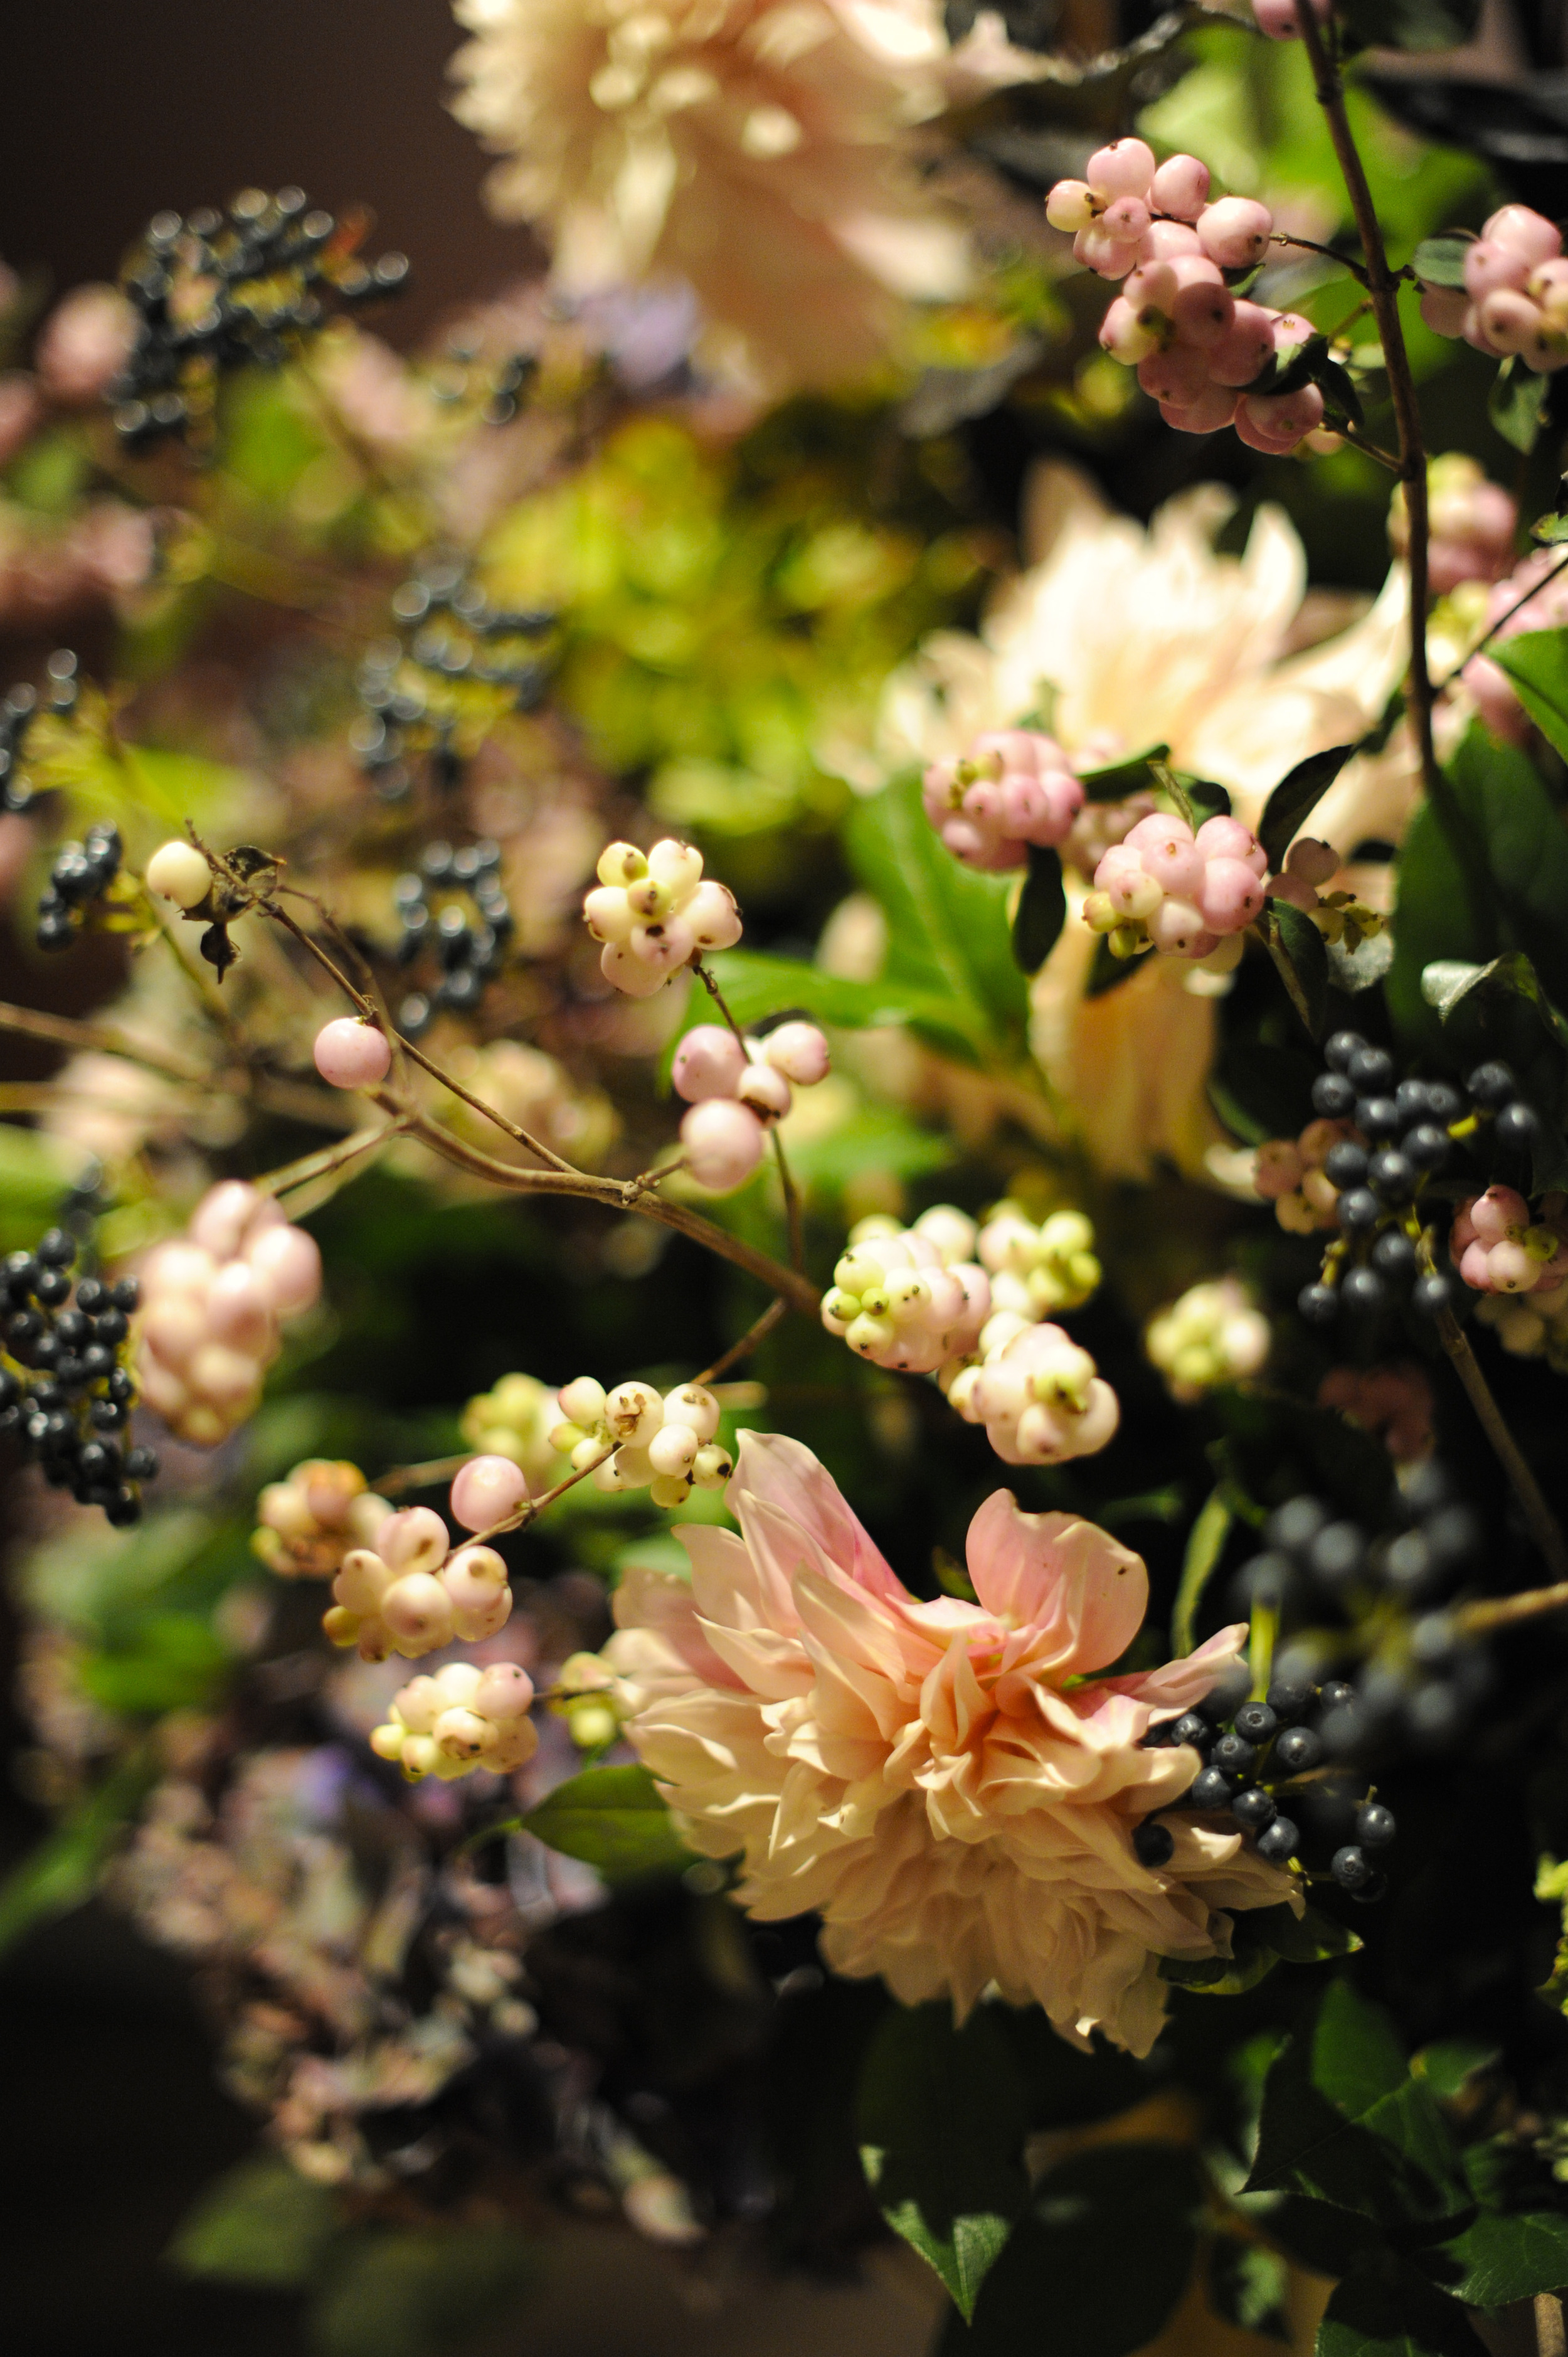
I am super pleased with the way this business formal dinner turned out. I have a tendency to make everything super formal. So it was a nice challenge to scale it back a bit. BUT You don’t want it to look like every other old boring dinner! Best way to do this, is to lighten the linen, yet keep a pattern. However it may not be fussy or busy. Choosing a more simple china and glassware helped. Pick a really interesting, almost undone floral arrangement. I love it when they look like still life paintings.
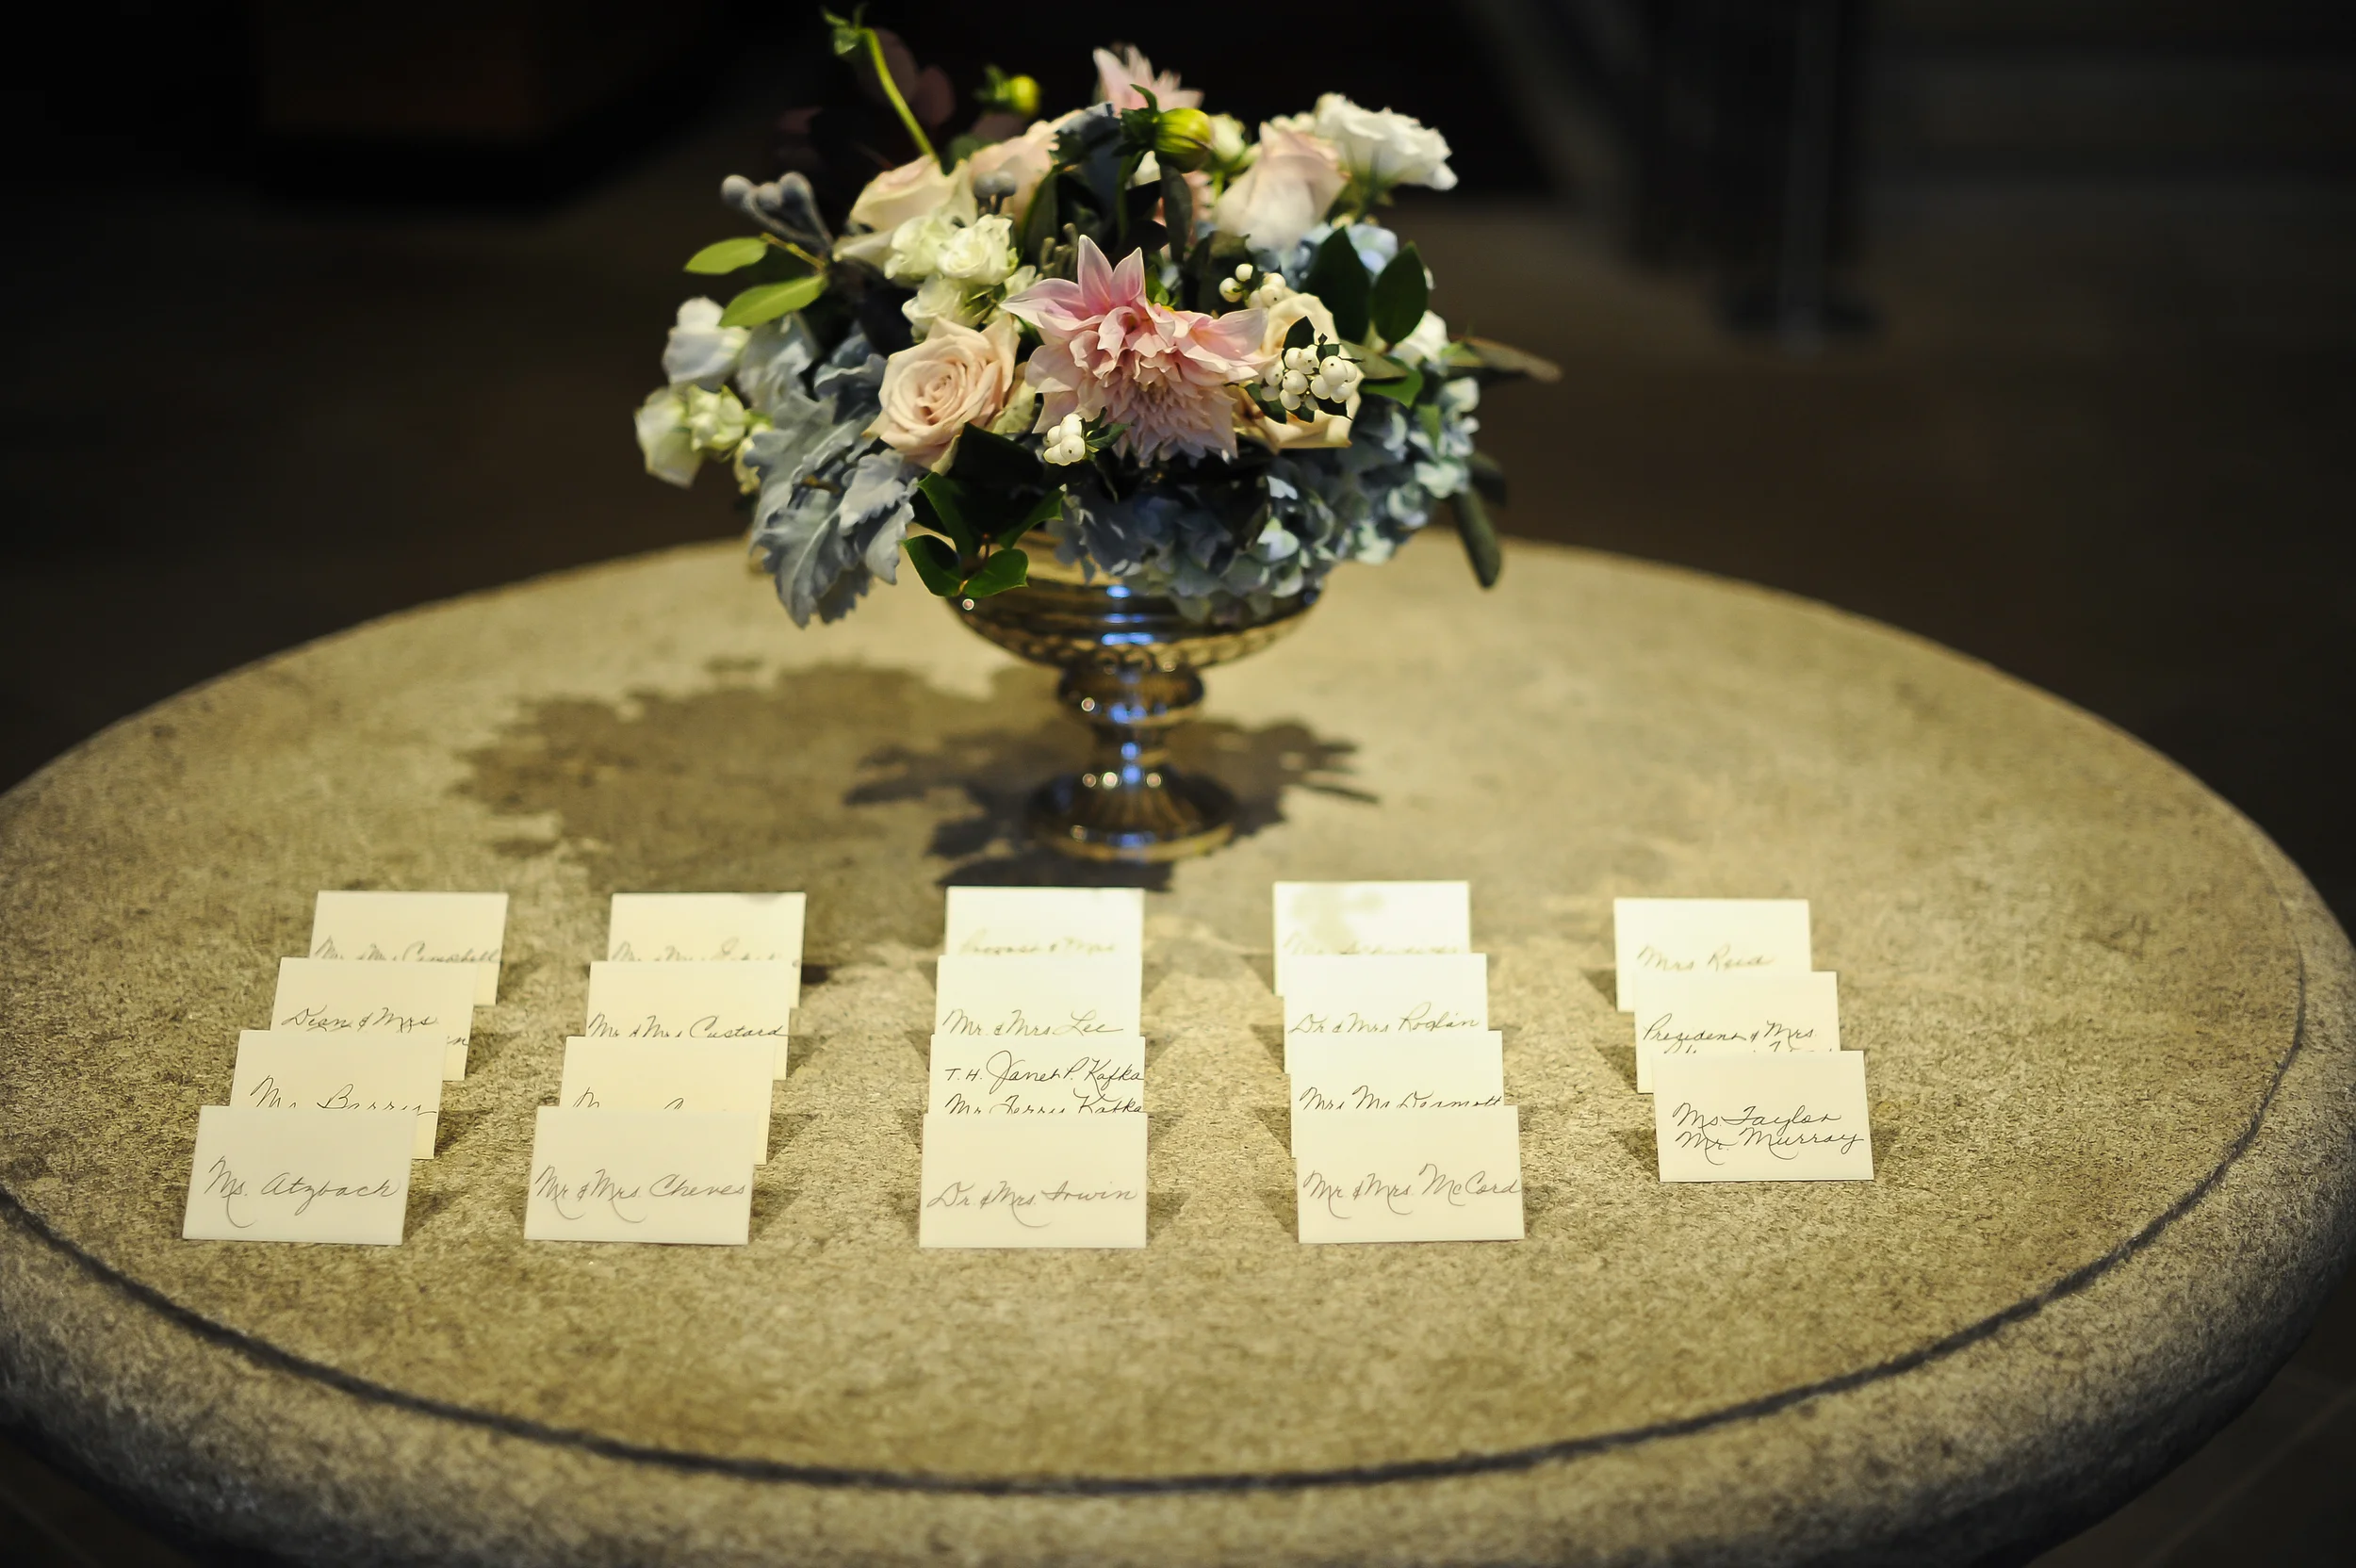
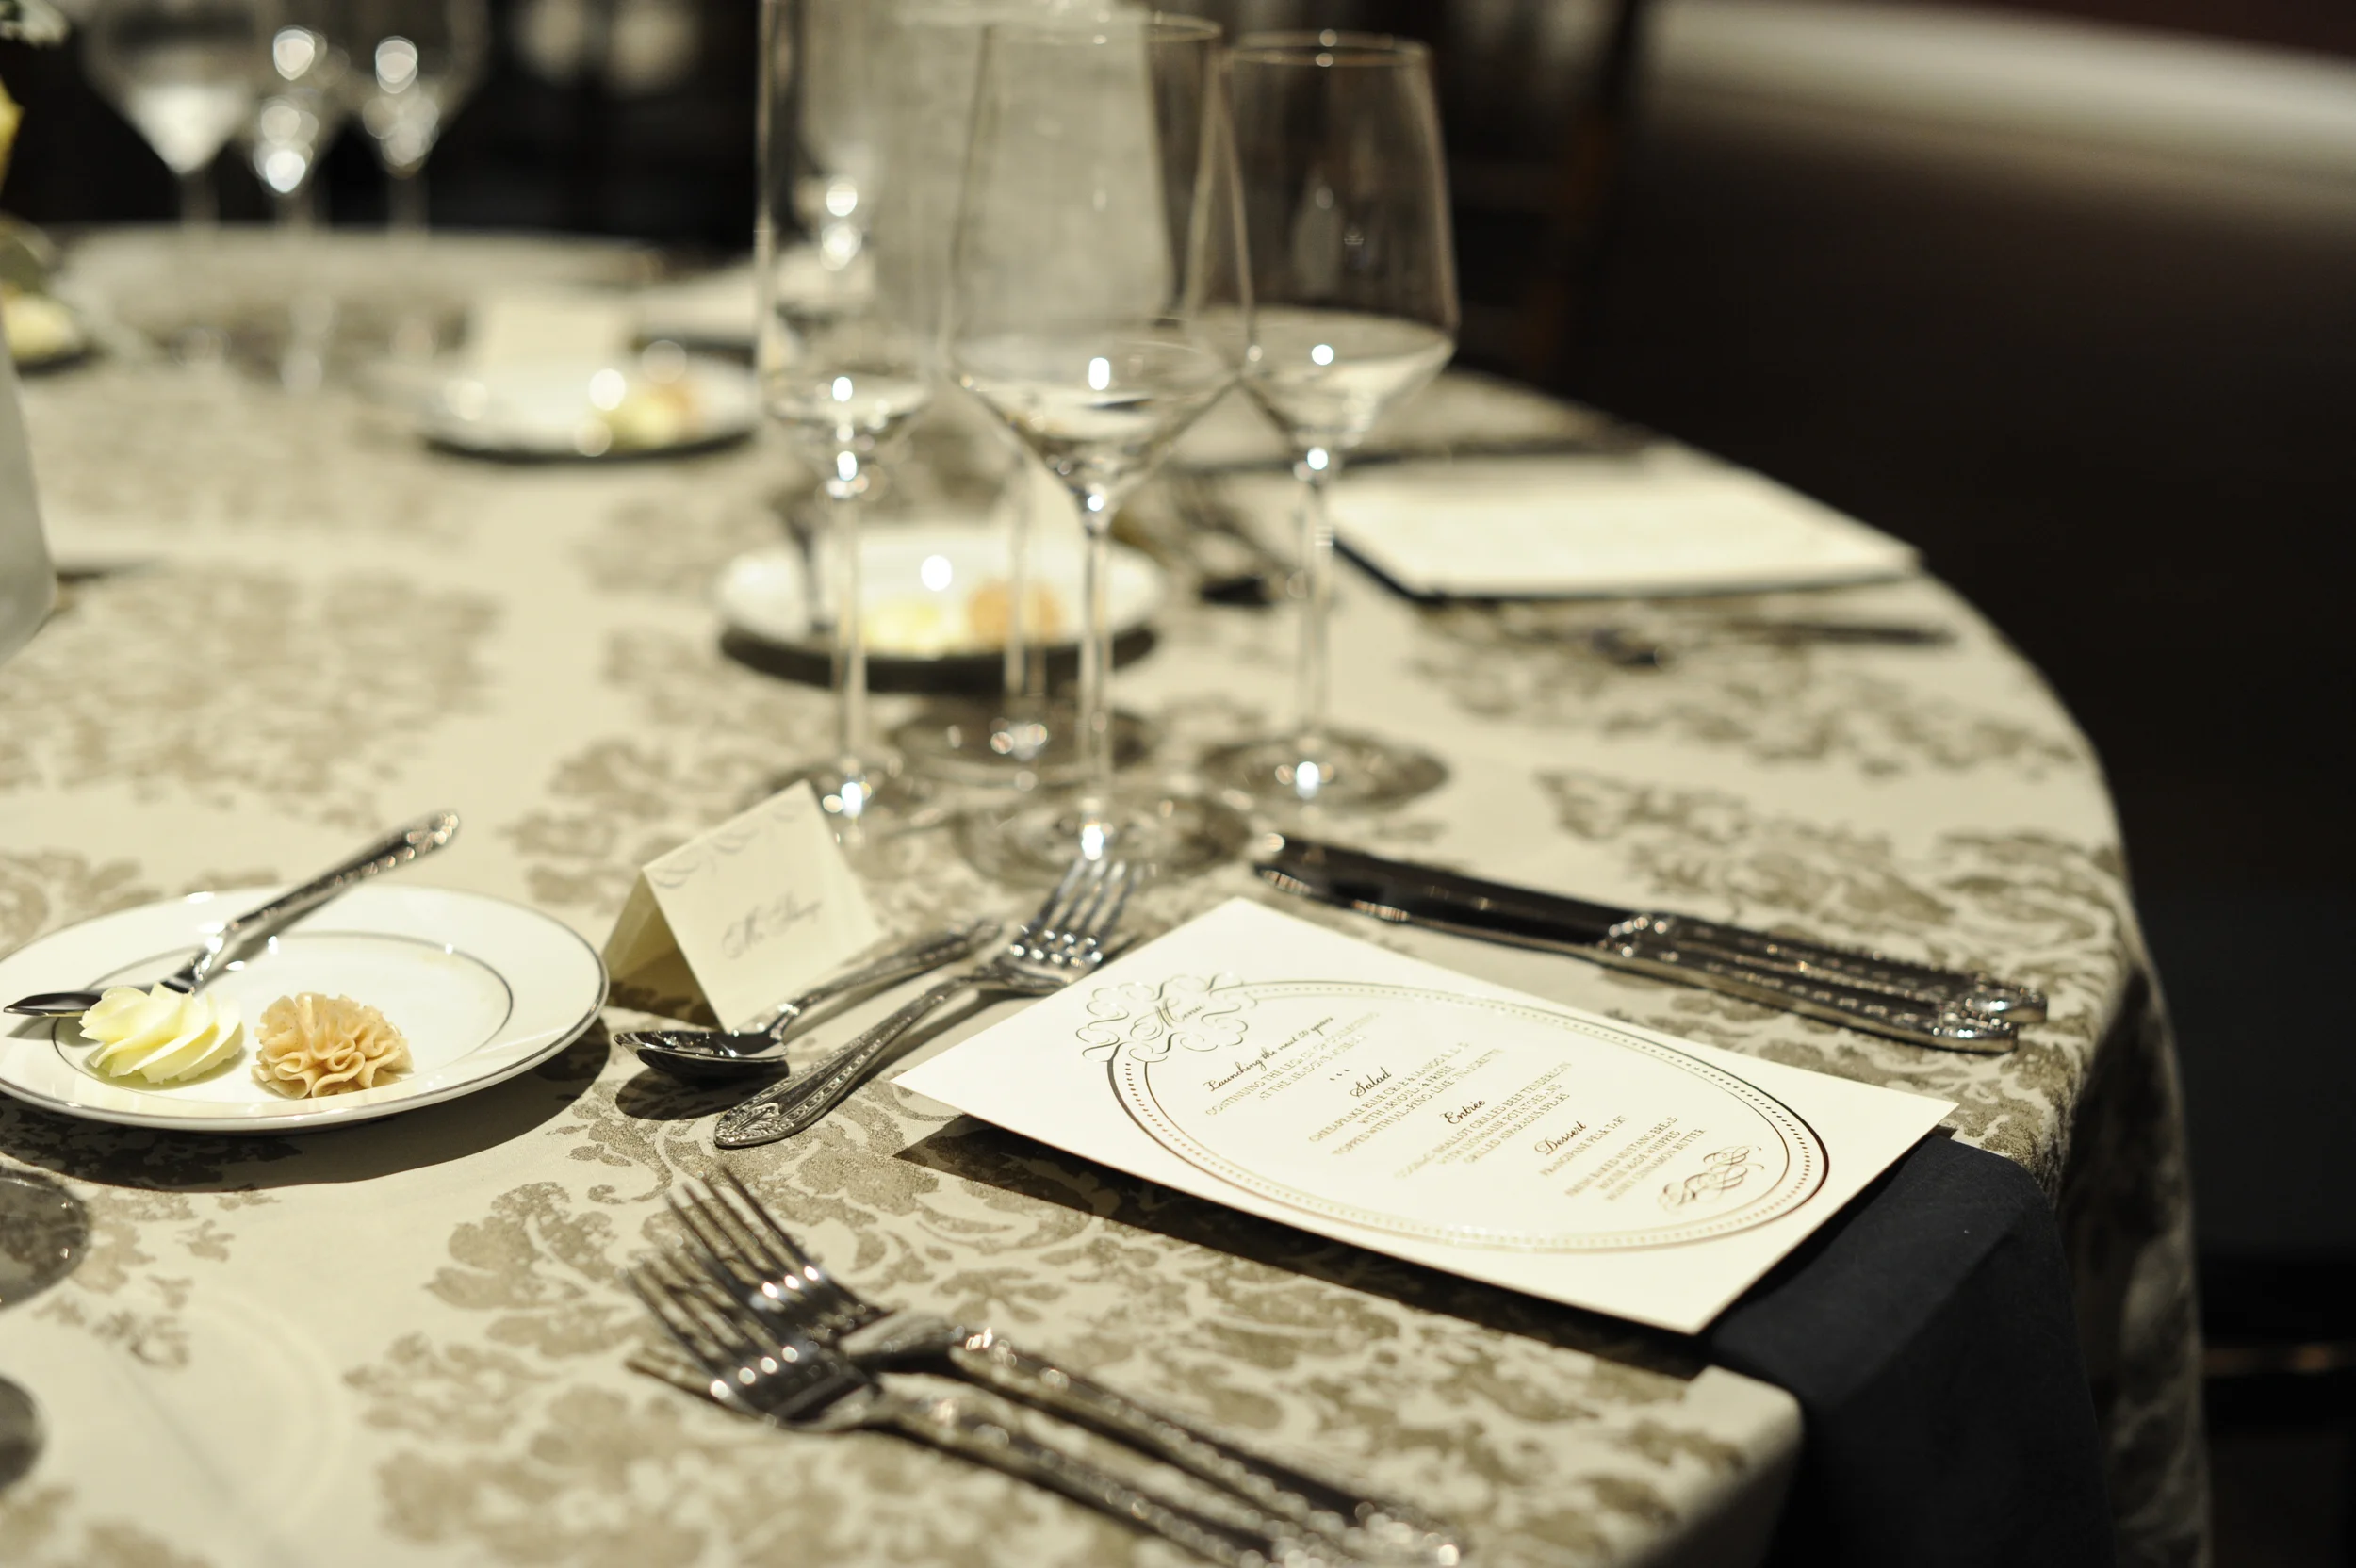
Another way to turn your event back towards the formal side, is to have place and menu cards. These beautiful silver foil menu cards are from Stamped Paper Co. They are perfect! Silver foil, but still whimsical.
You have to keep right on that edge, just between a celebration dinner and a black tie dinner. Fine line. You want everyone to be impressed but you do not want them feeling underdressed.


Sunday smoking
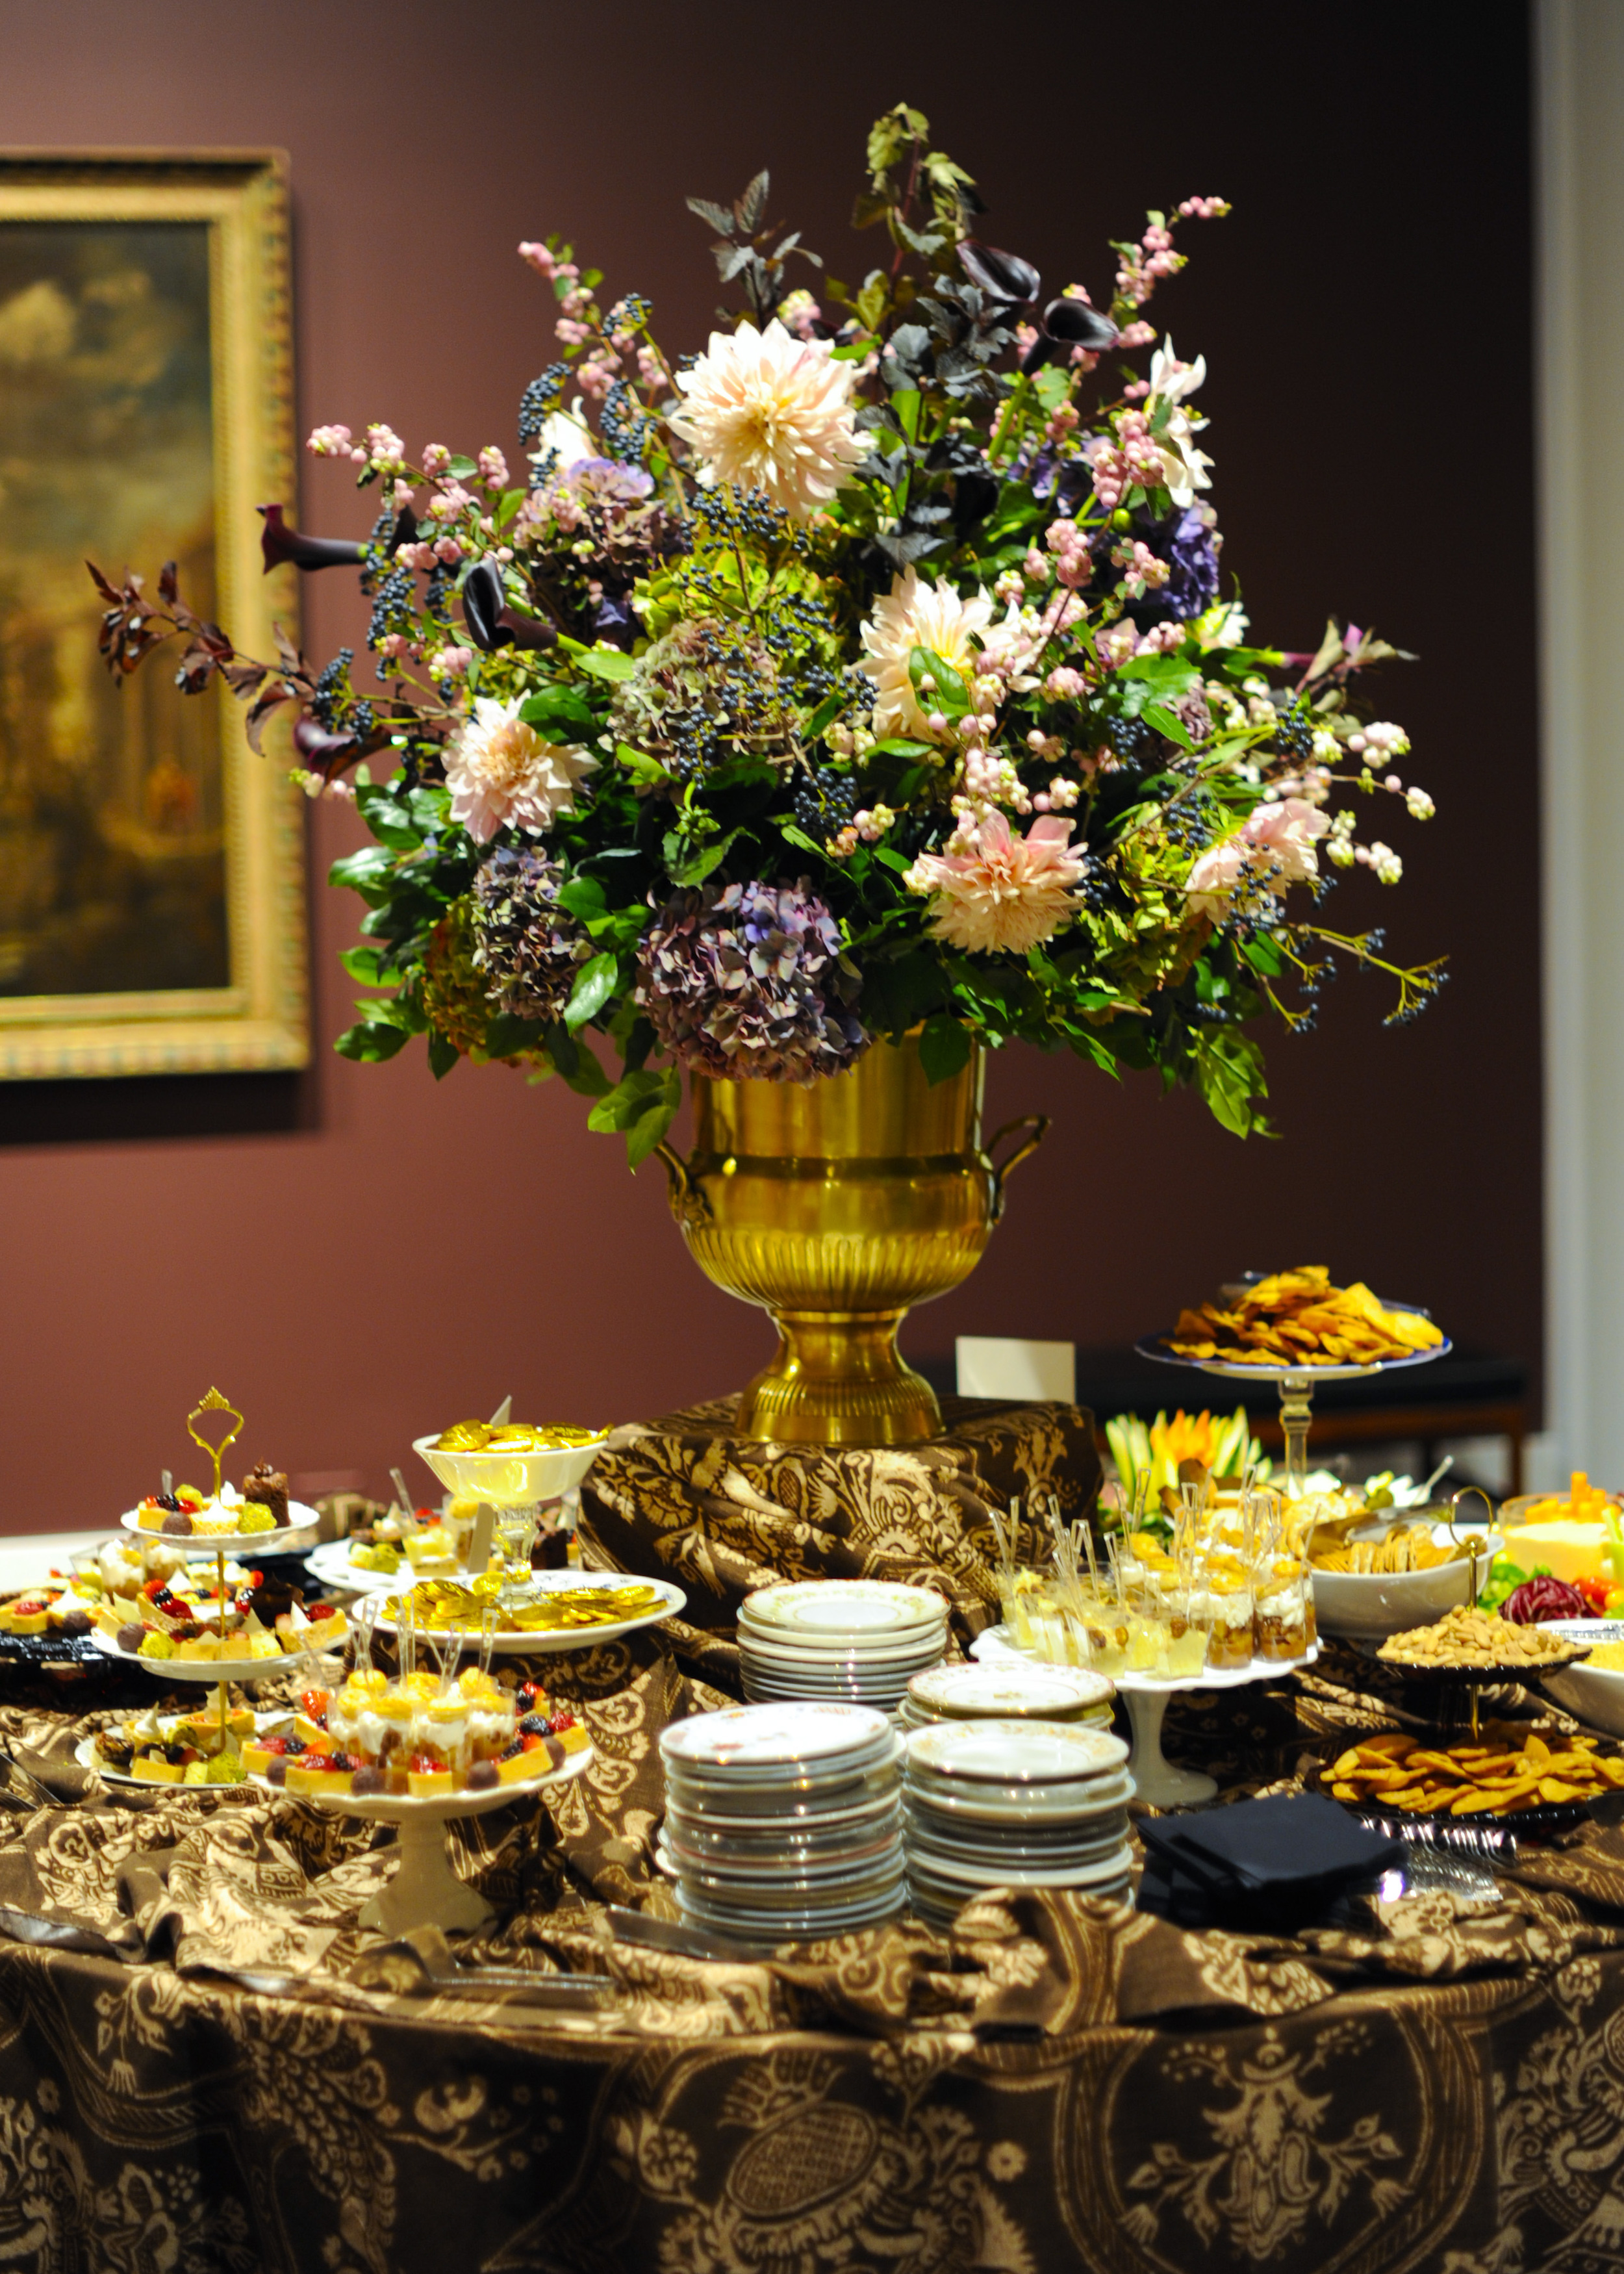
Launching the Next 50 Years: Continuing the Legacy of Collecting at the Meadows Museum
in art, Special Events
Last week at the Meadows was pretty busy. What with a HUGE announcement of the recent Francisco José de Goya y Lucientes acquisition. It is pretty epic! Over the past year the Meadows Museum has acquired 8 new works, ranging from Miguel Jacinto Meléndez to the Stewart Album. (you can see these beauties for free on Thursday nights after 5:00p.m.)
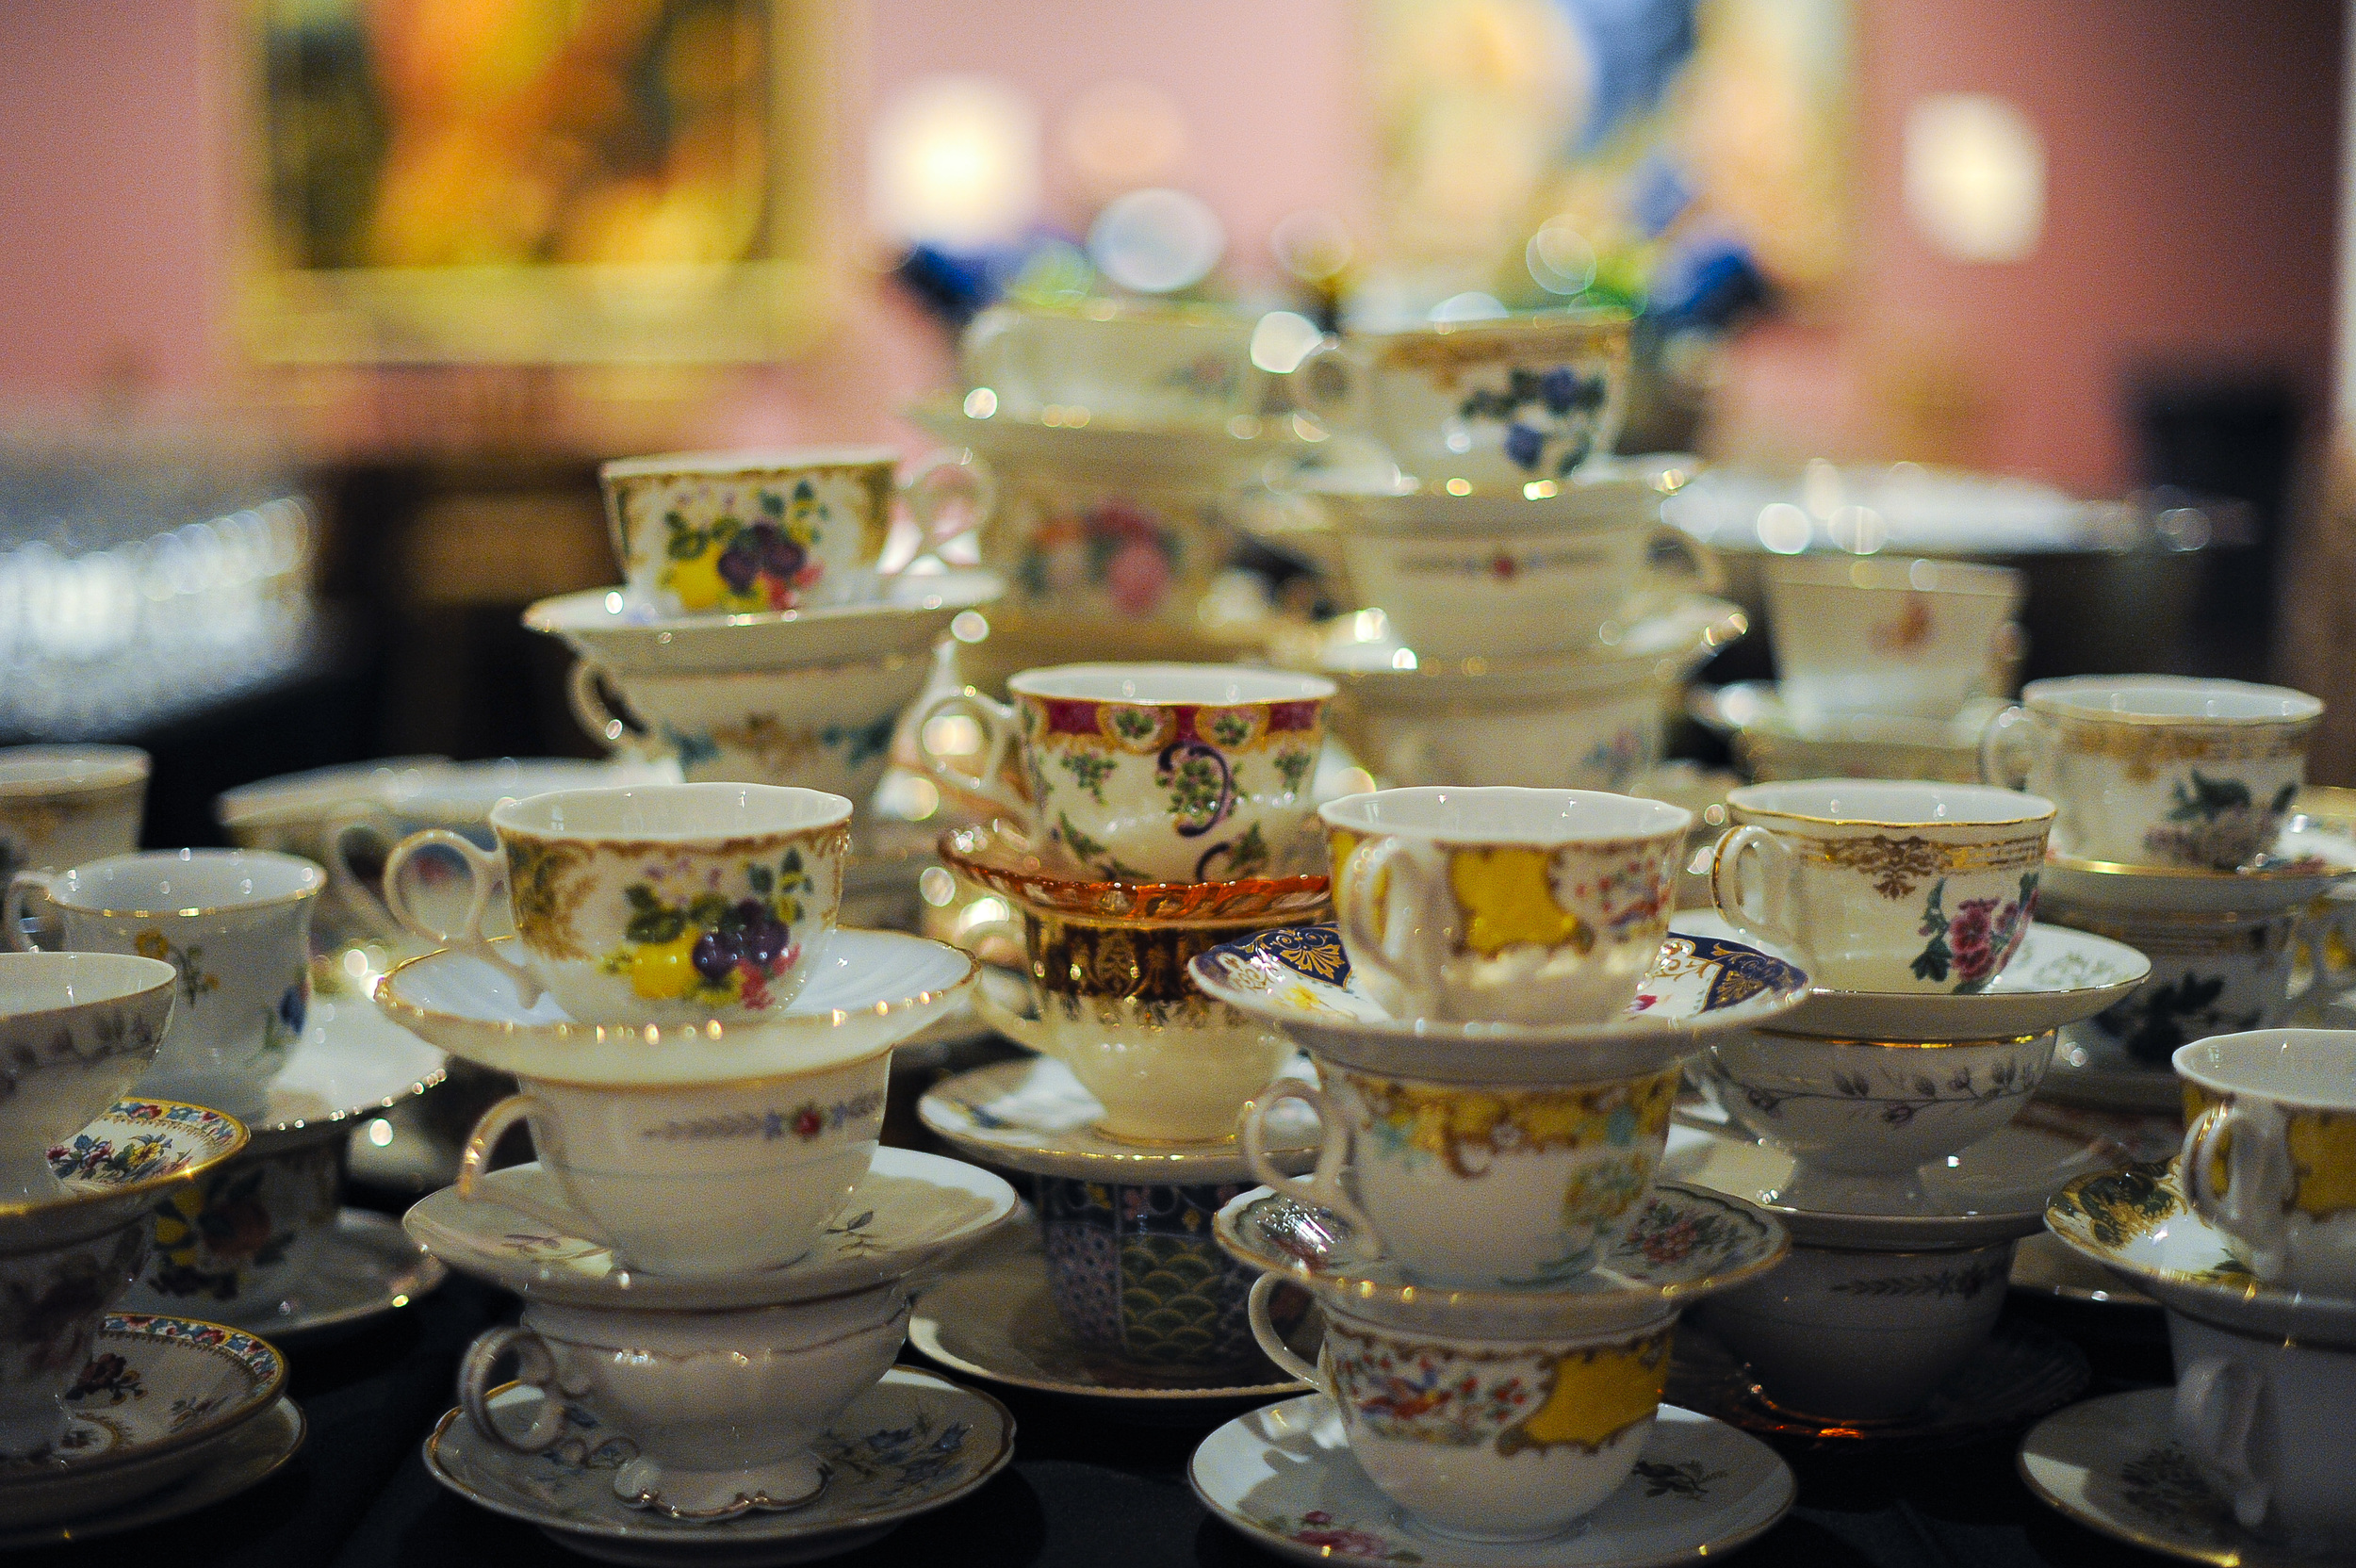
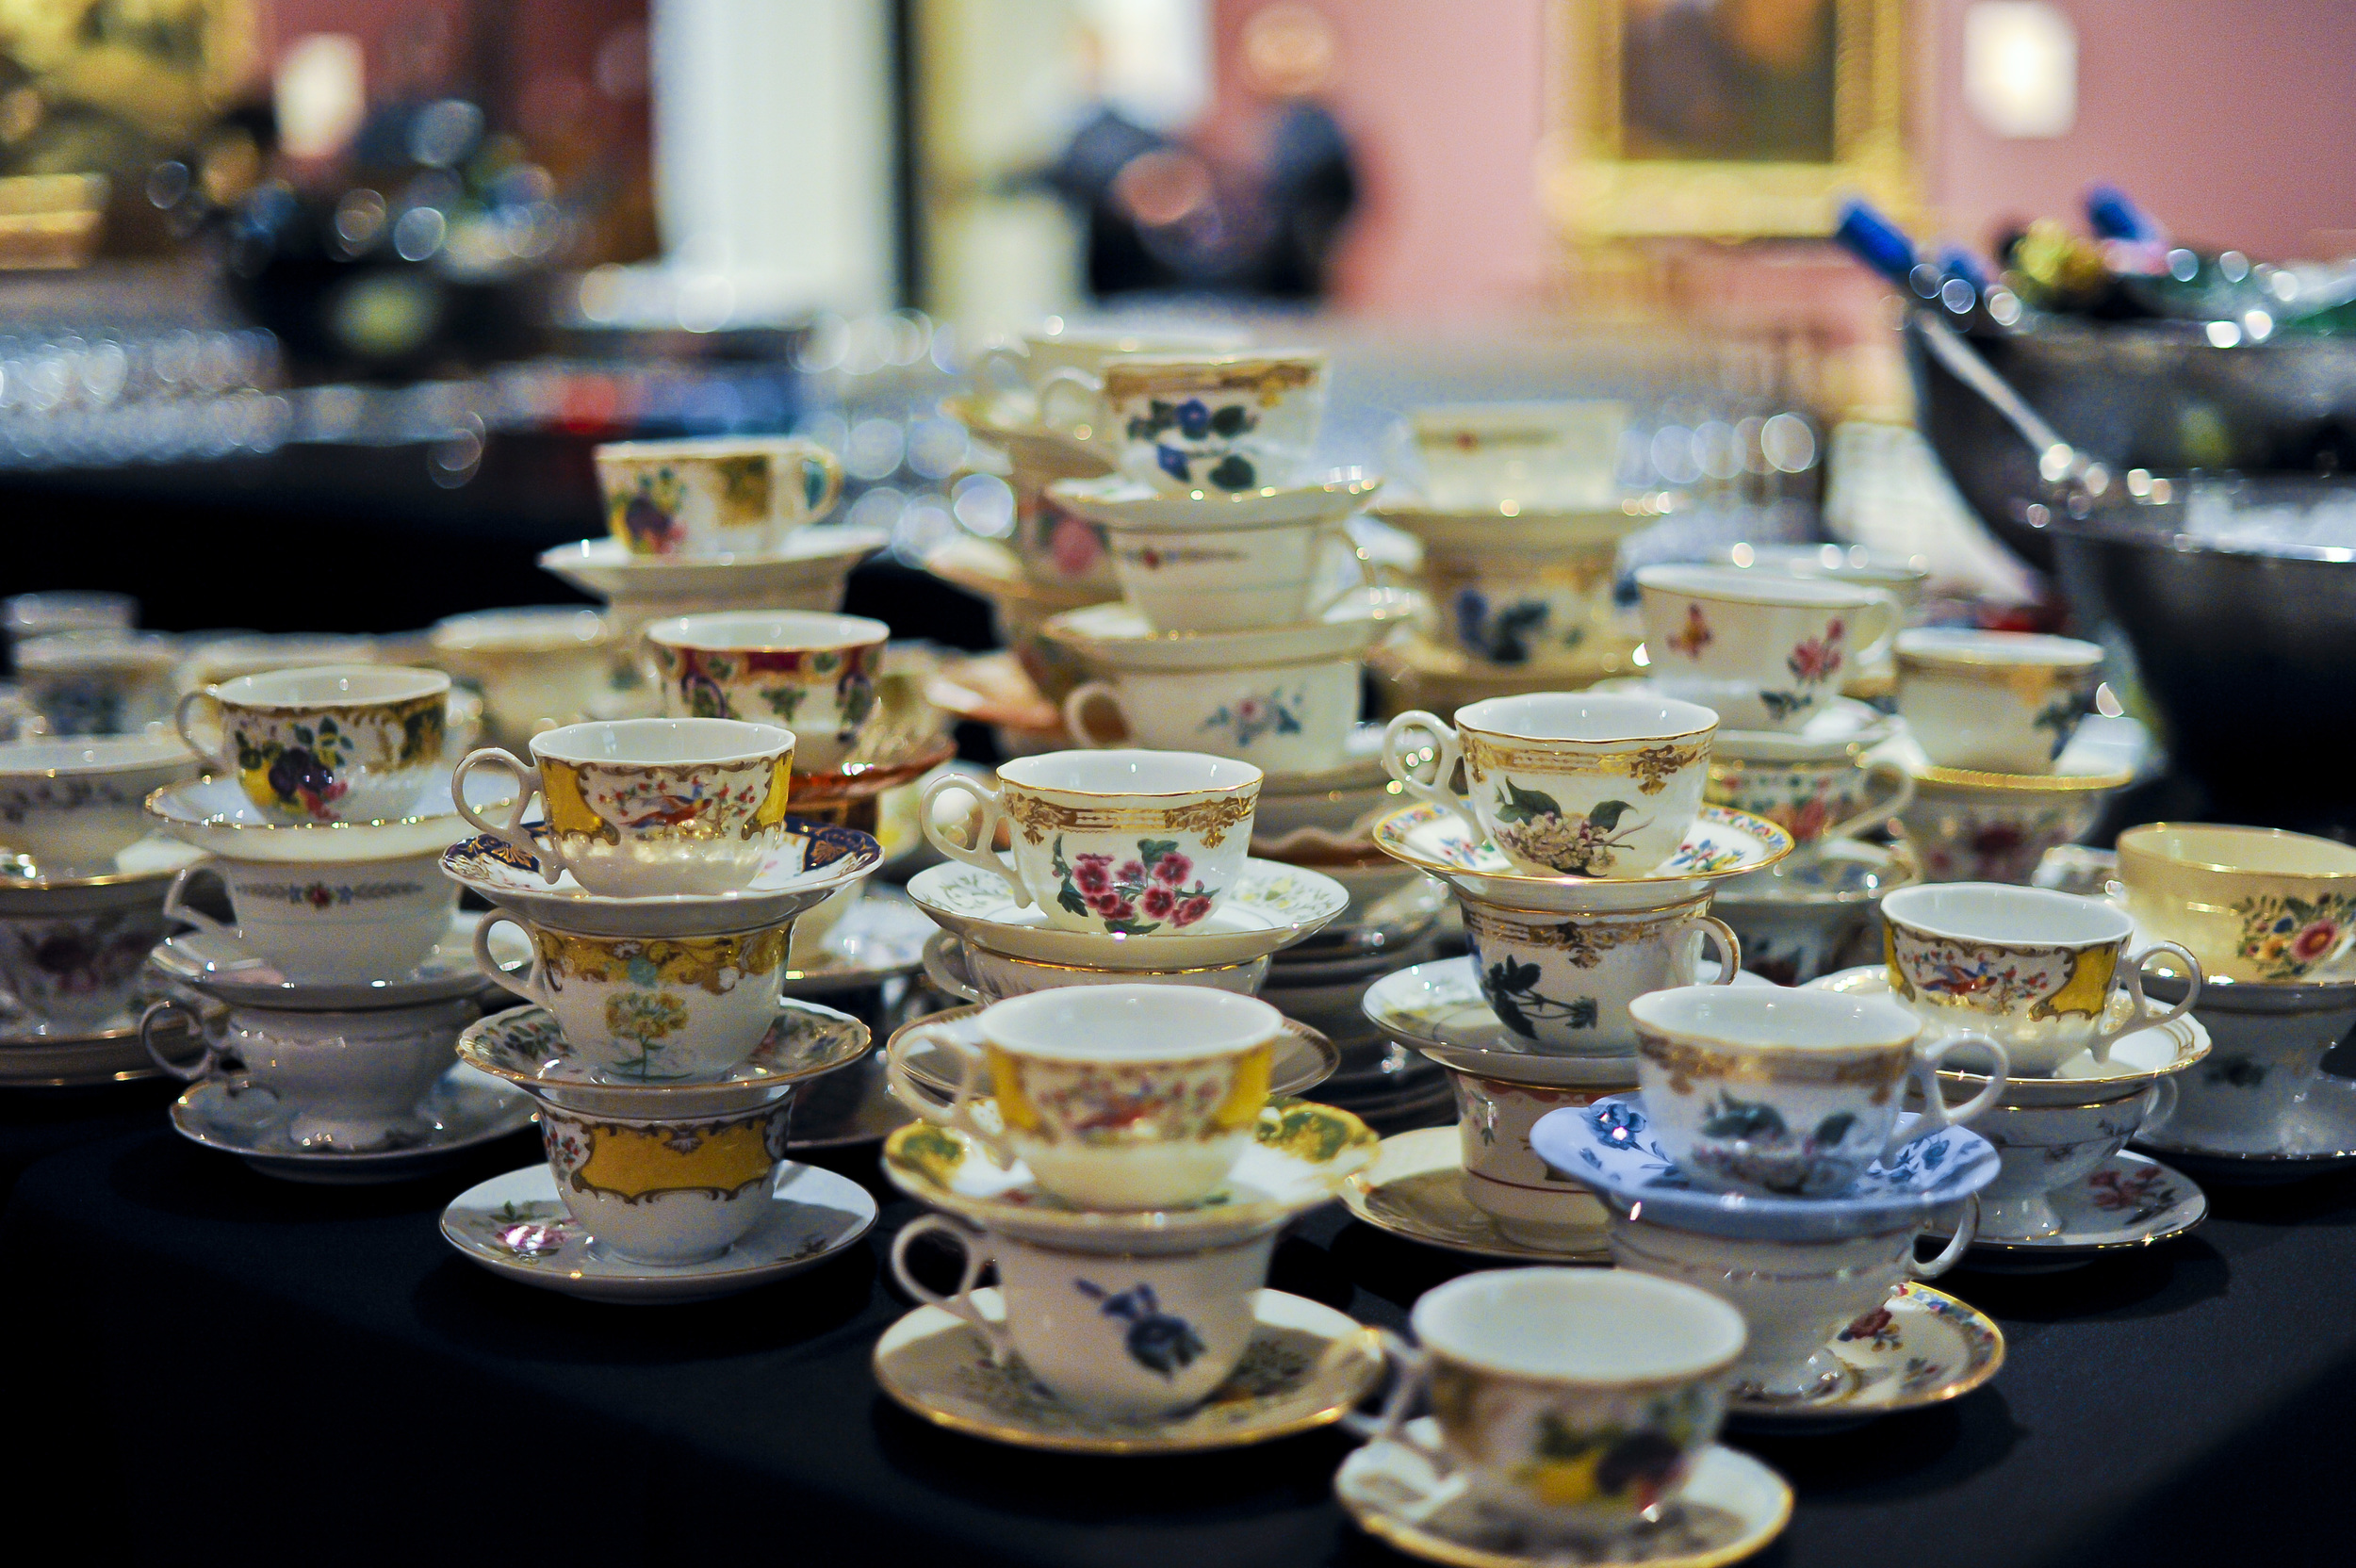
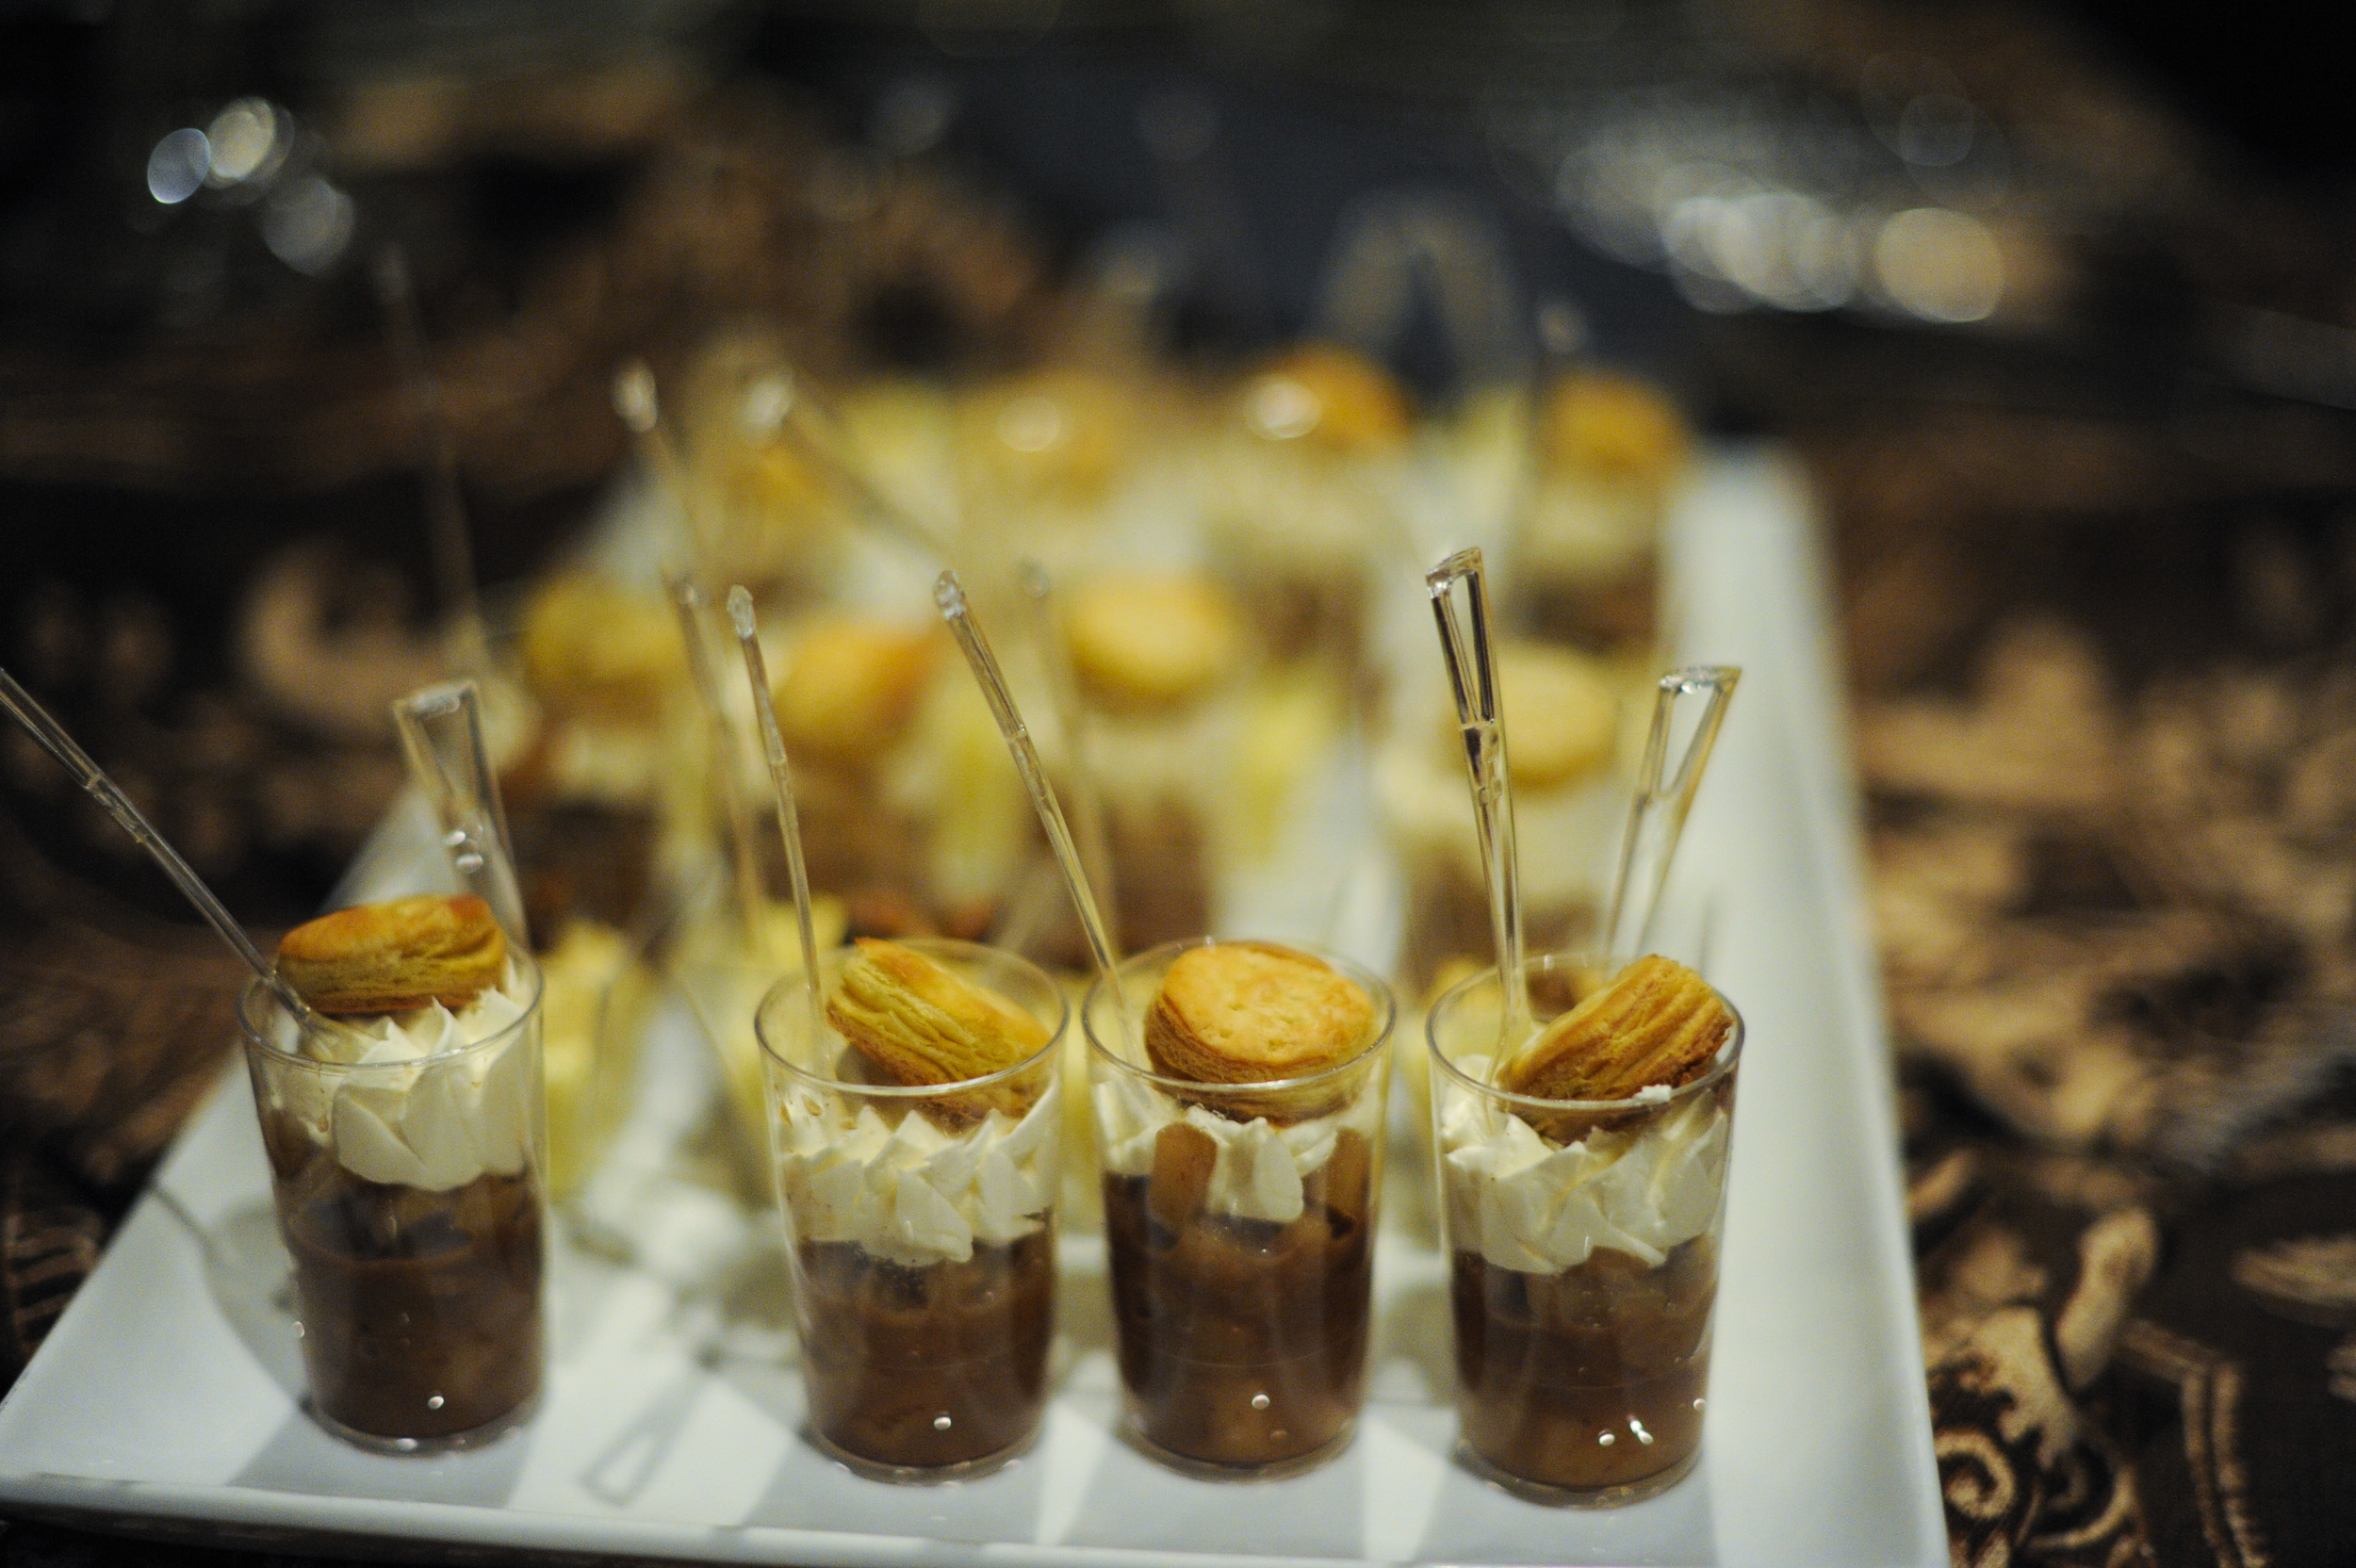
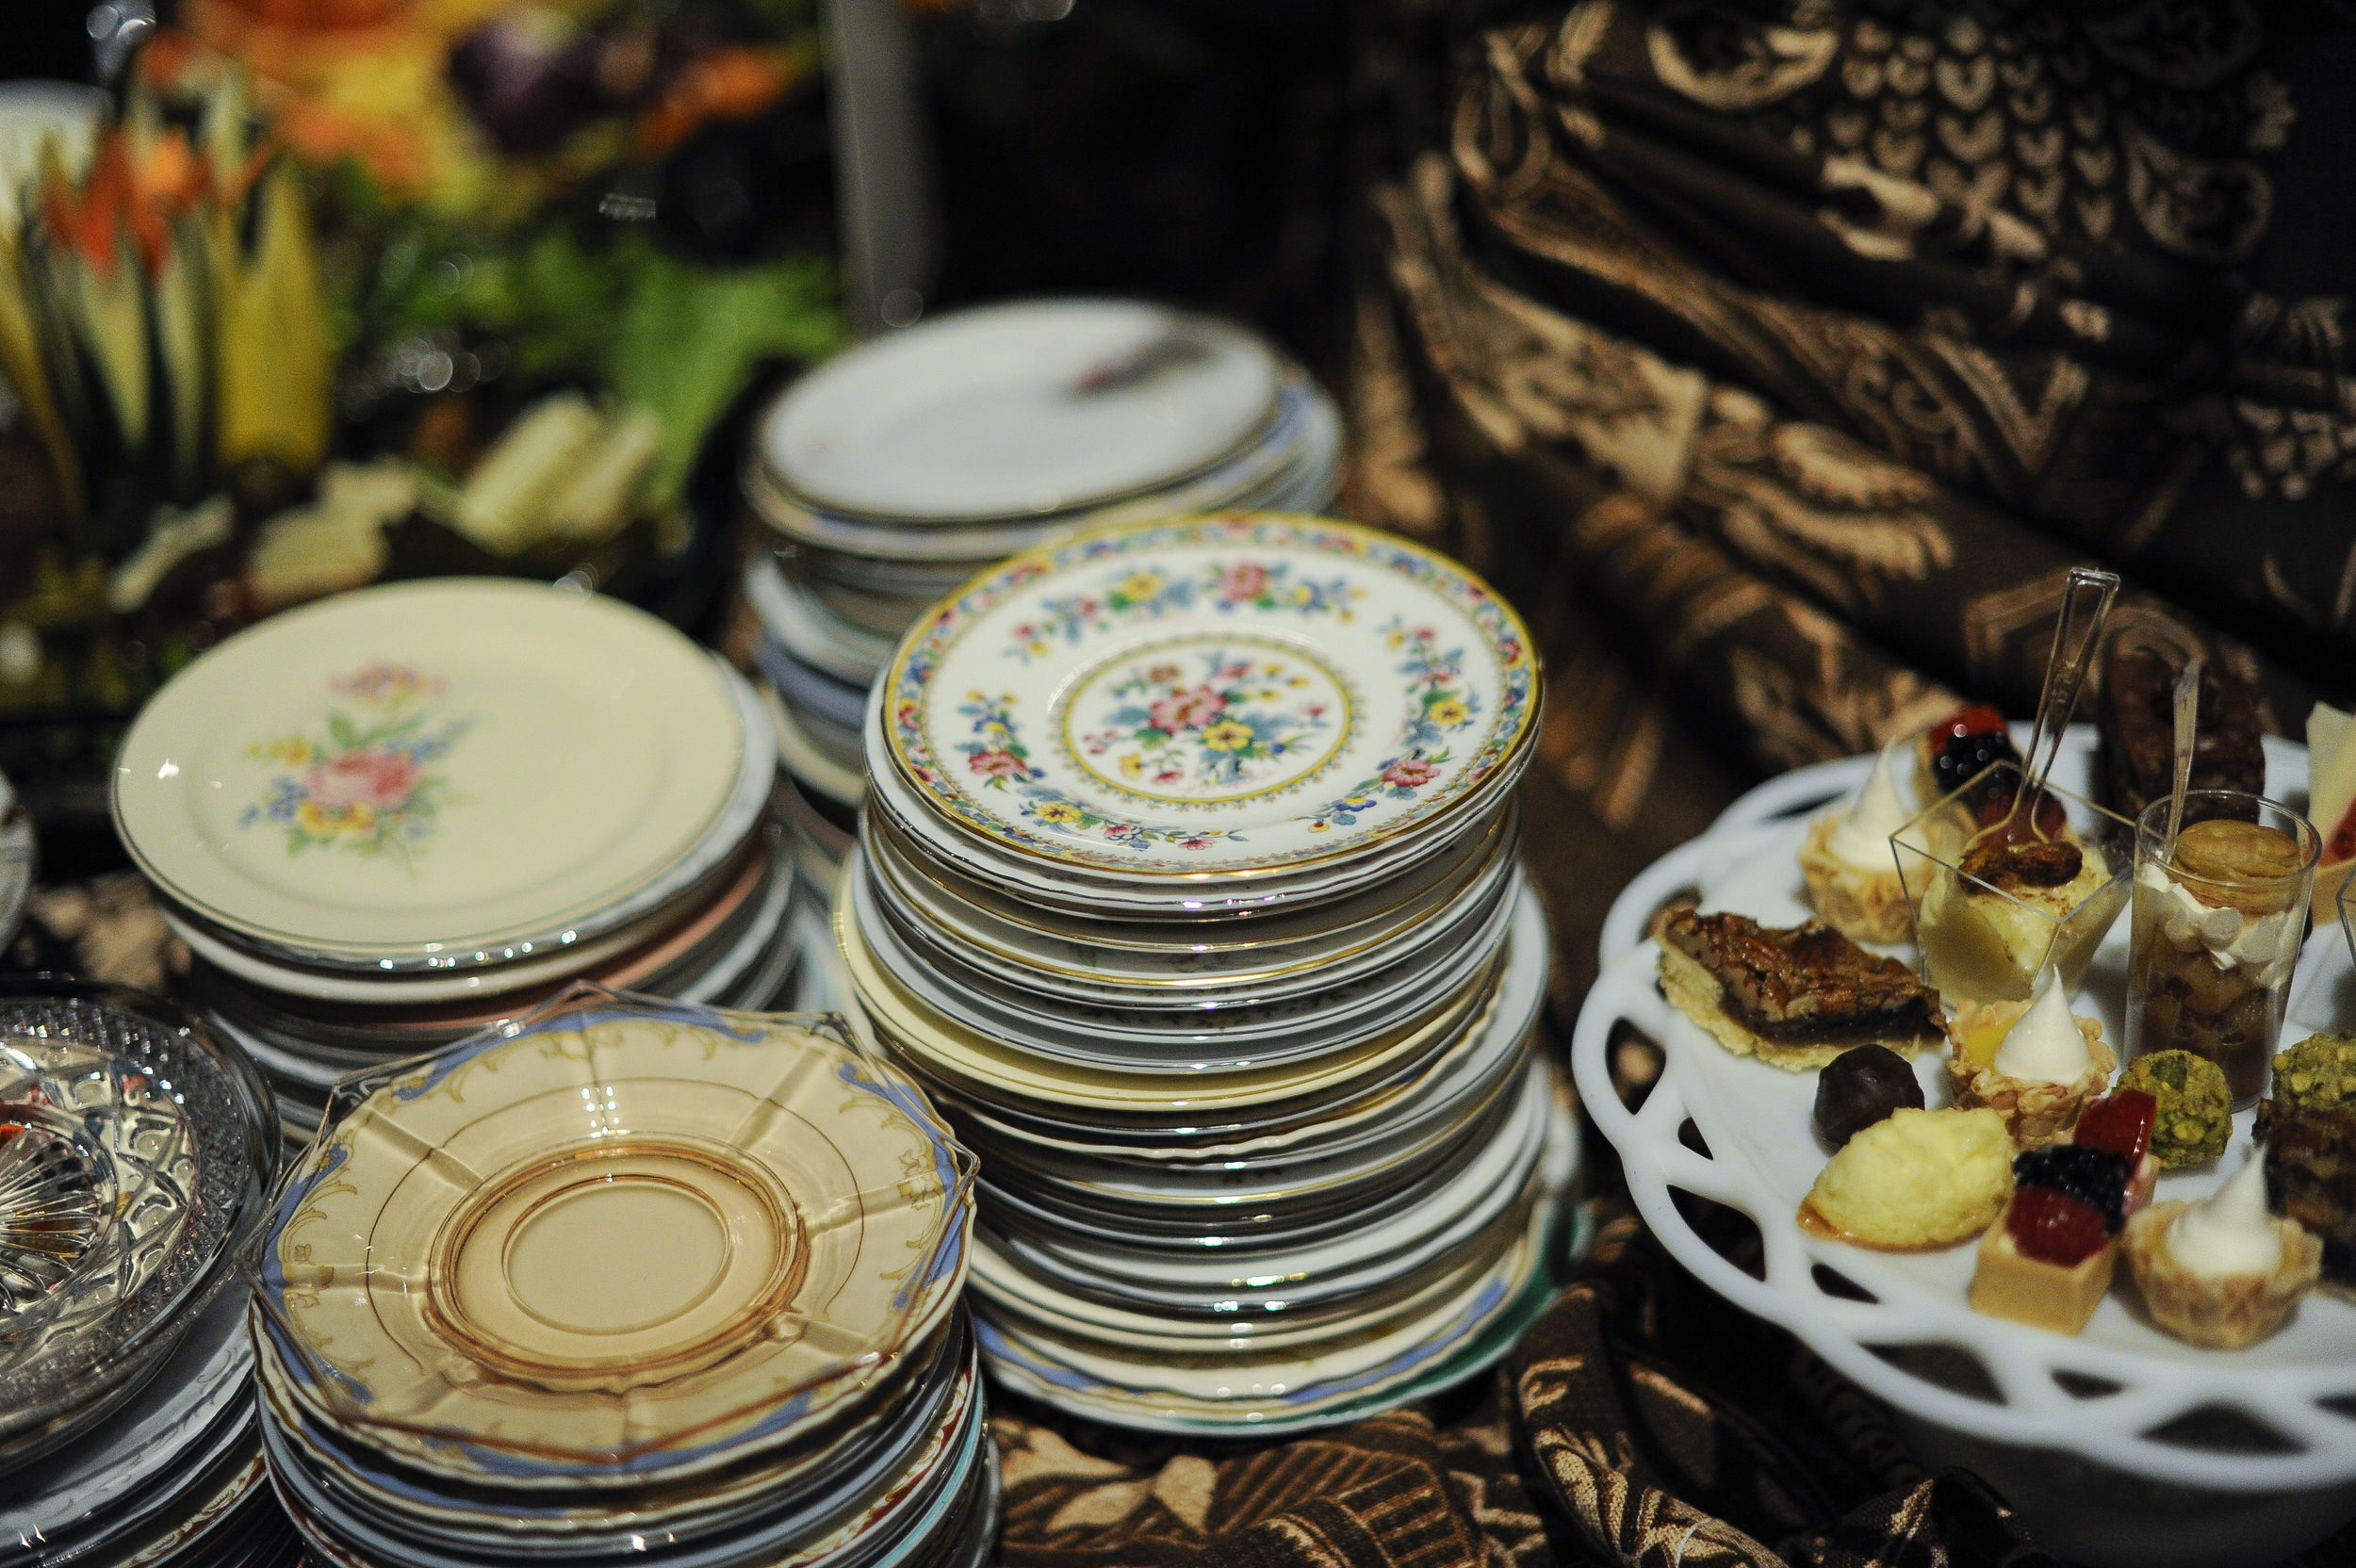
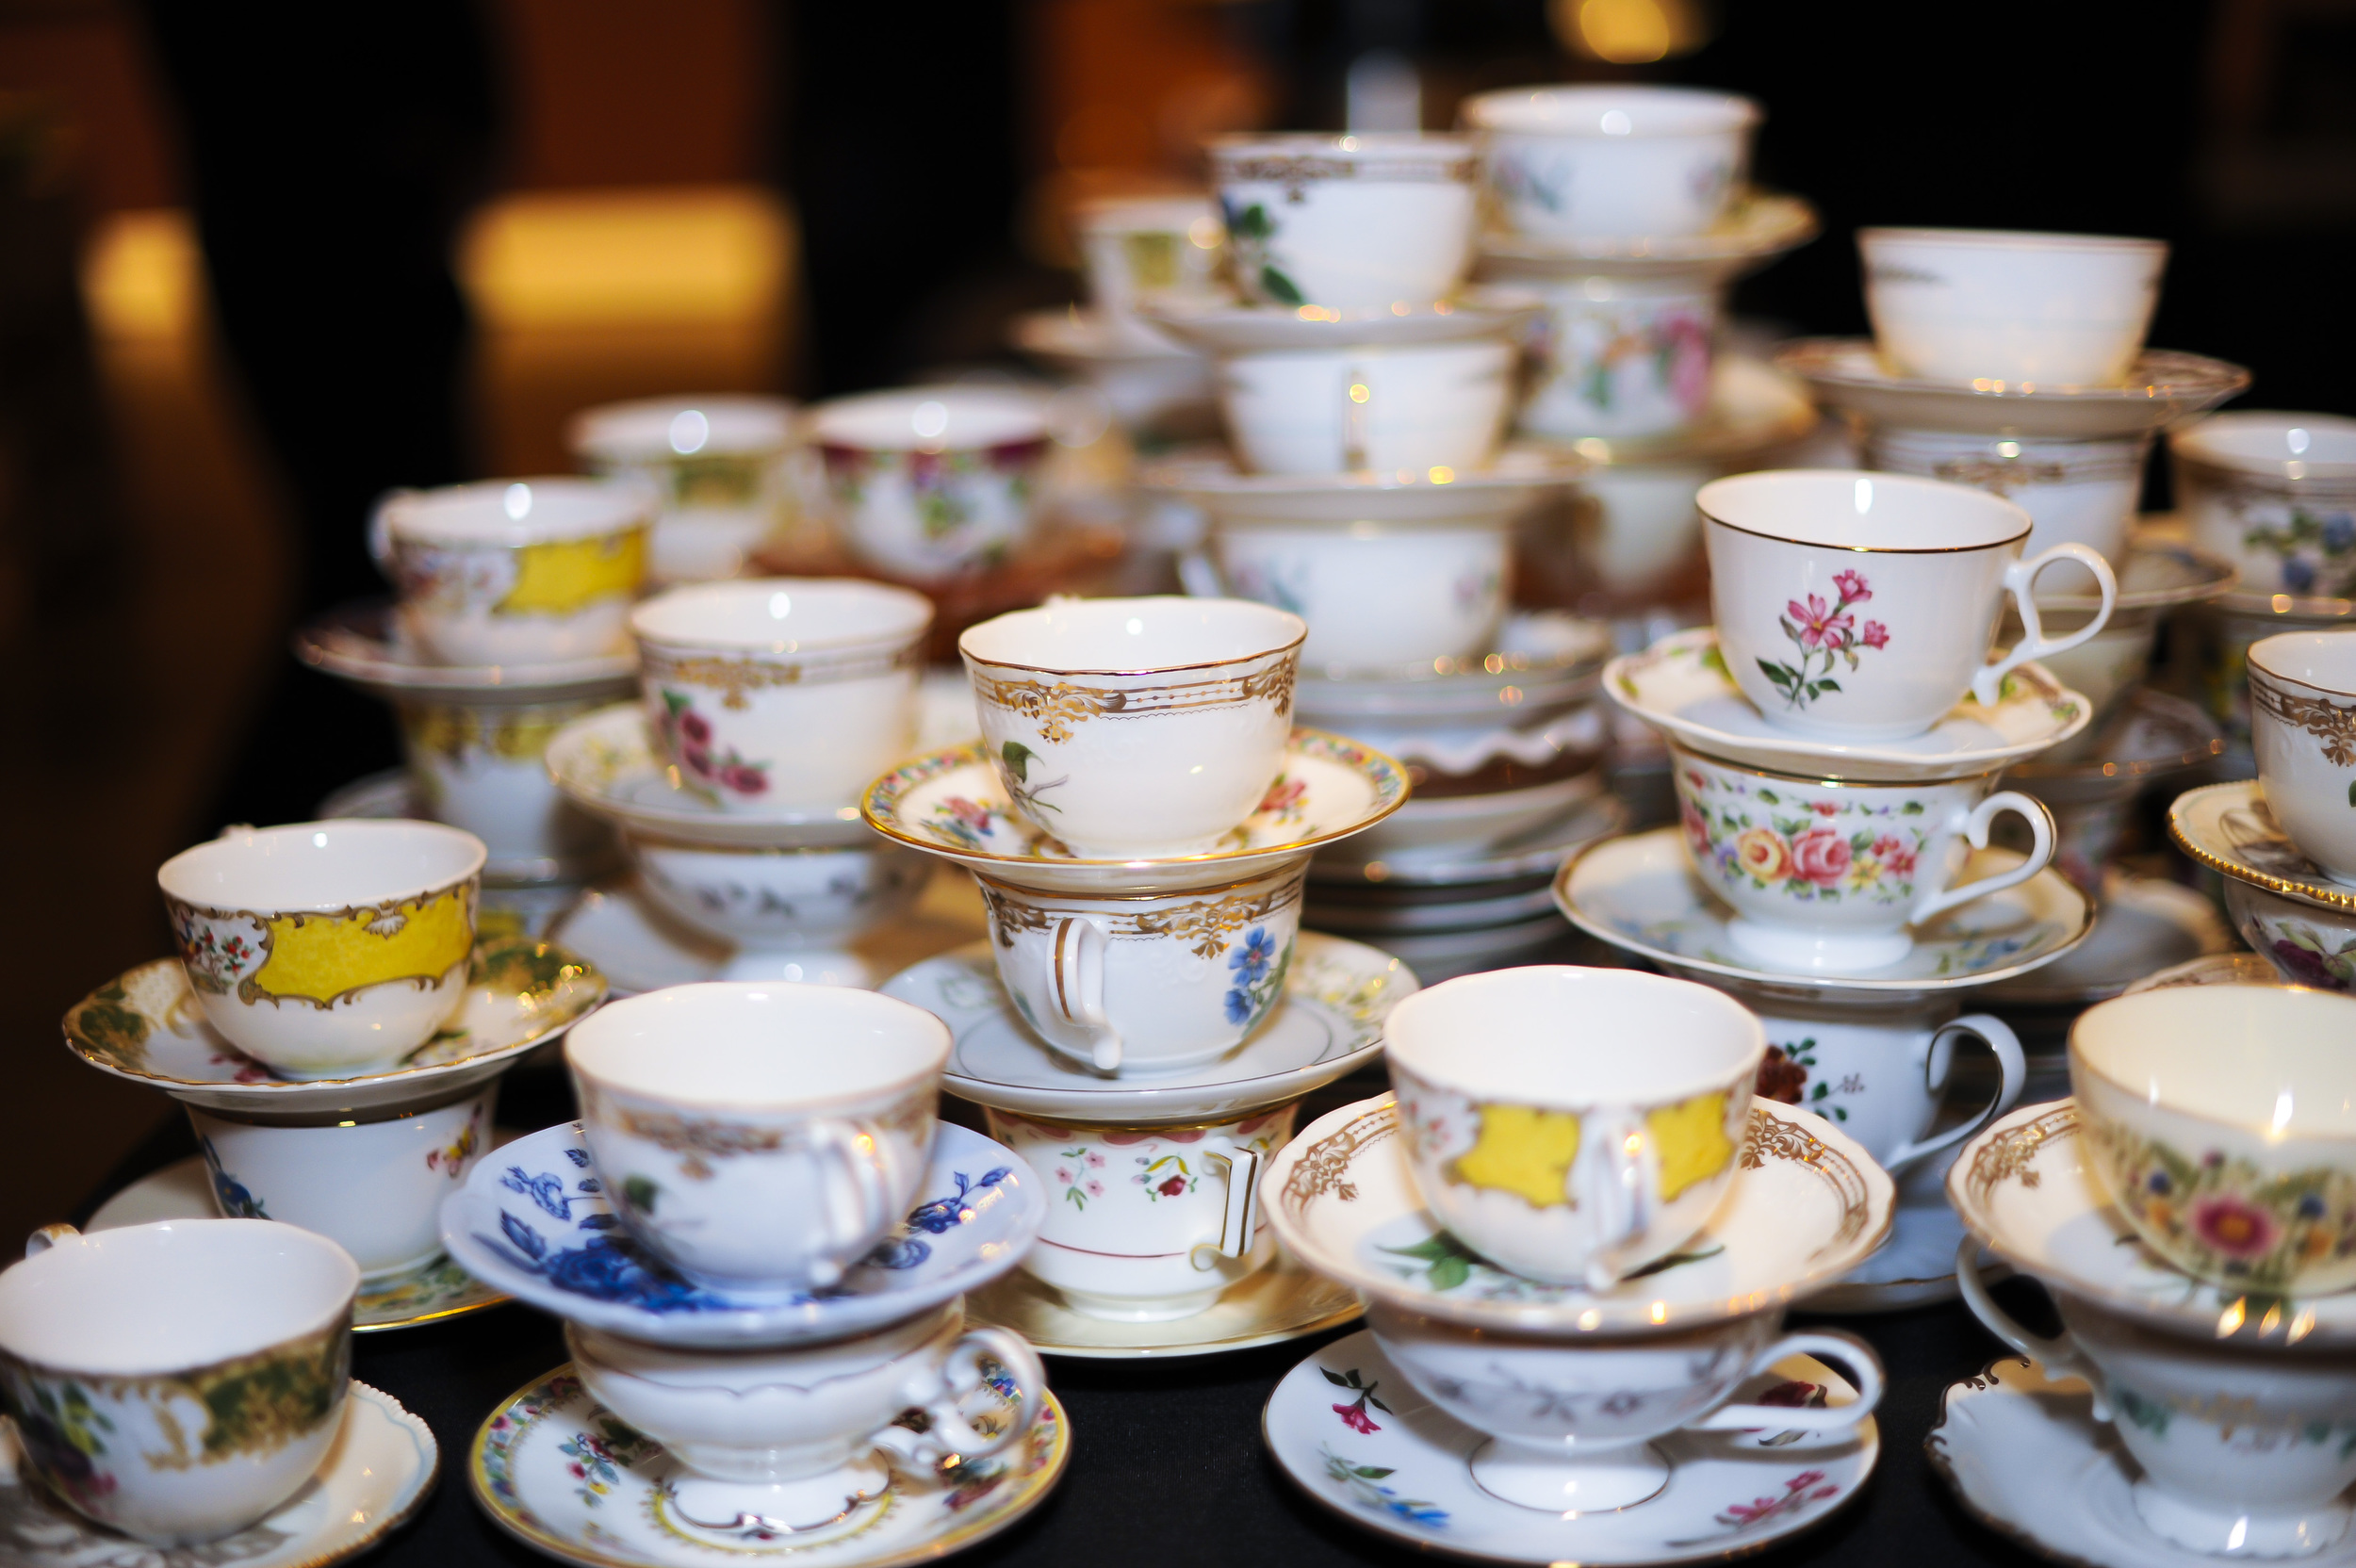
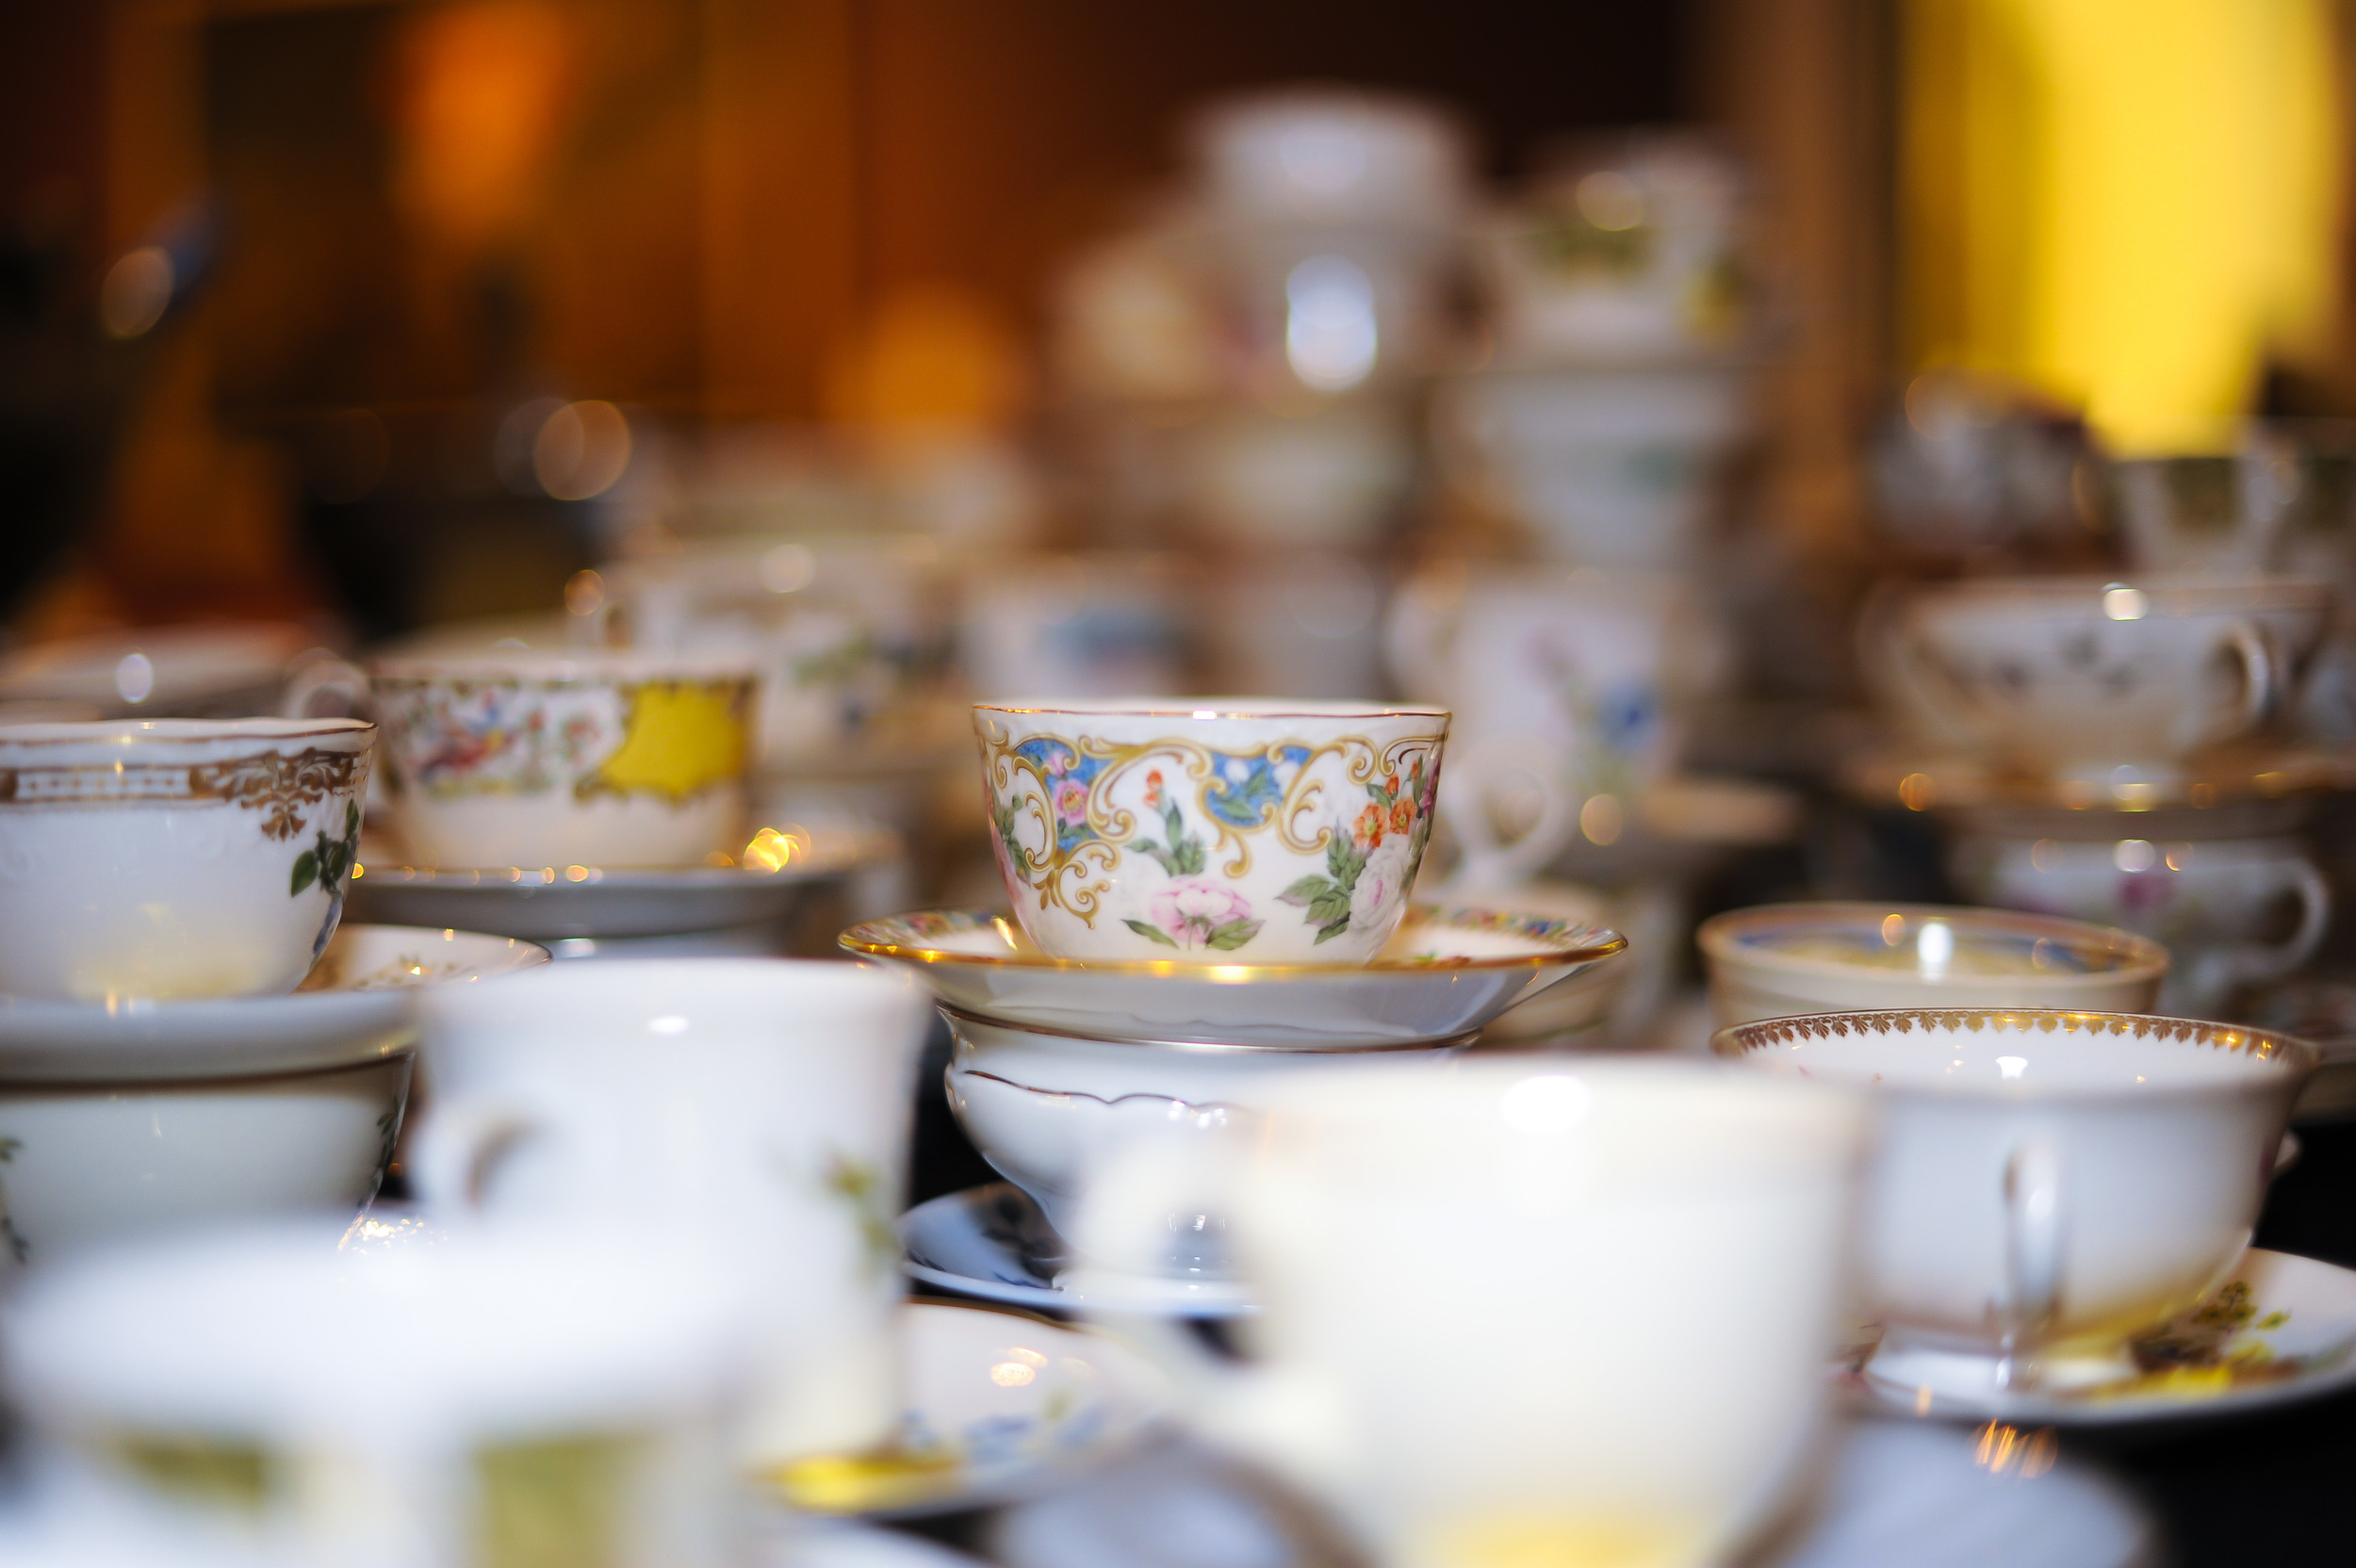
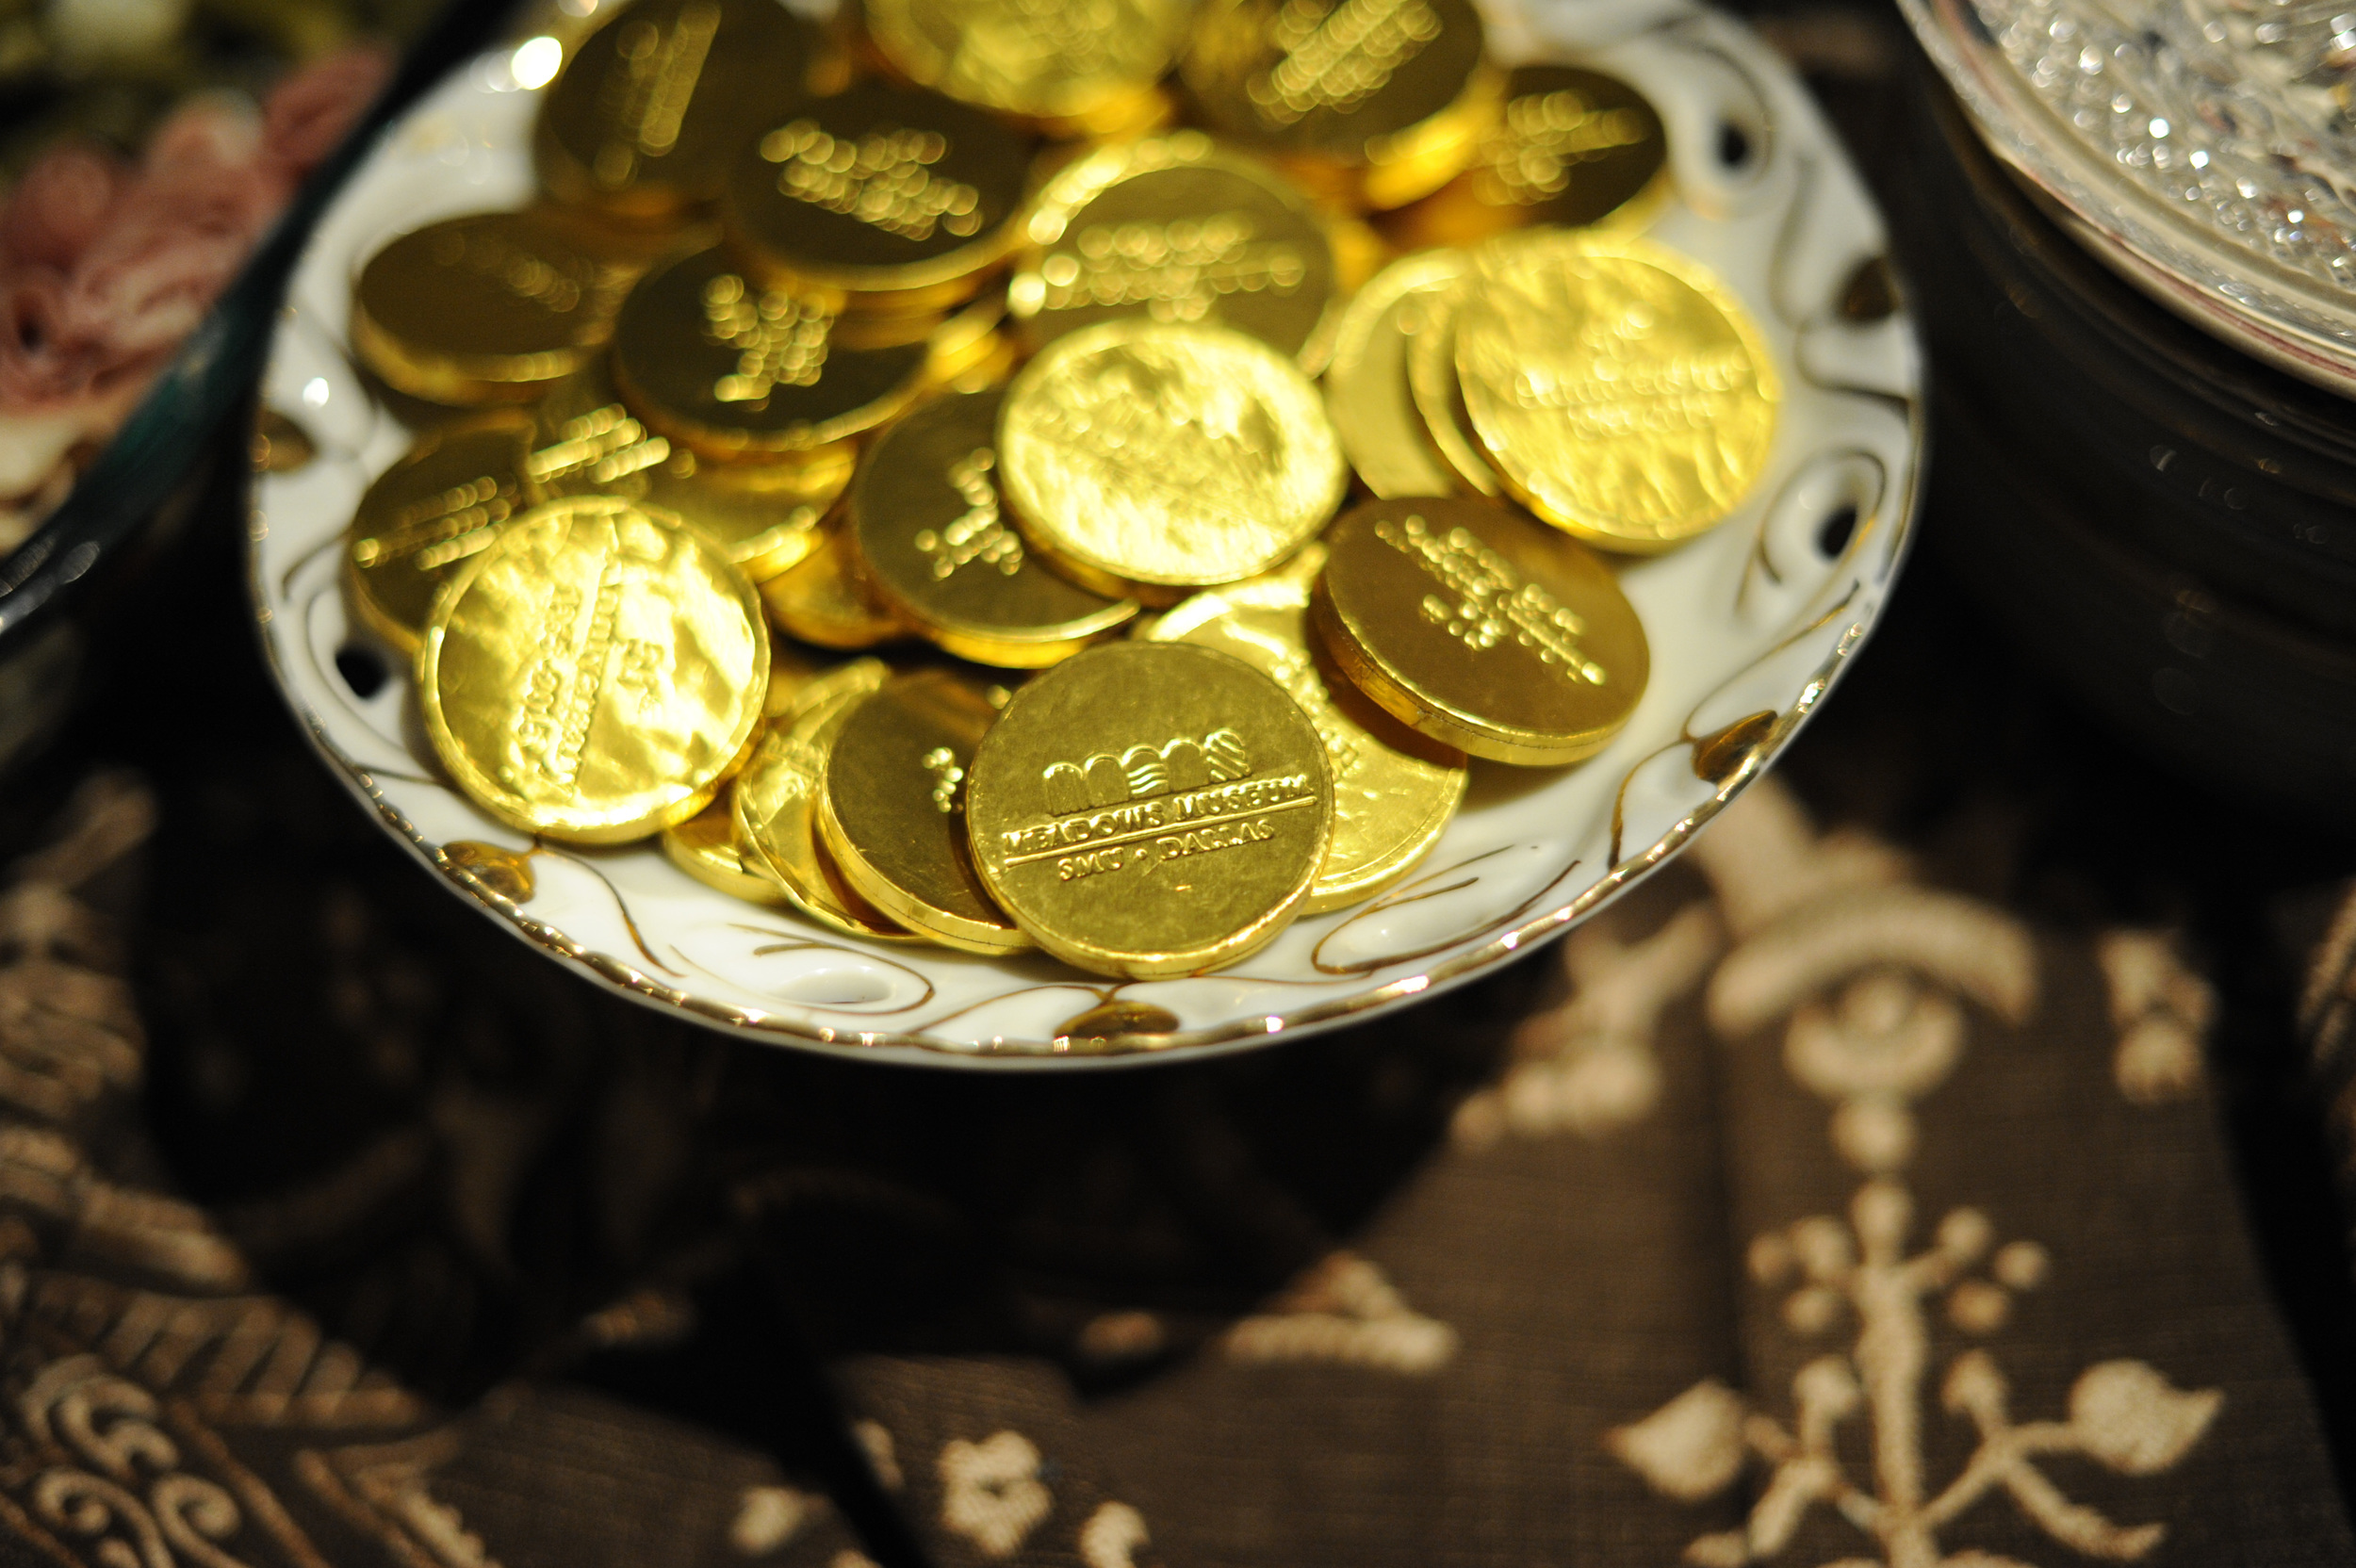
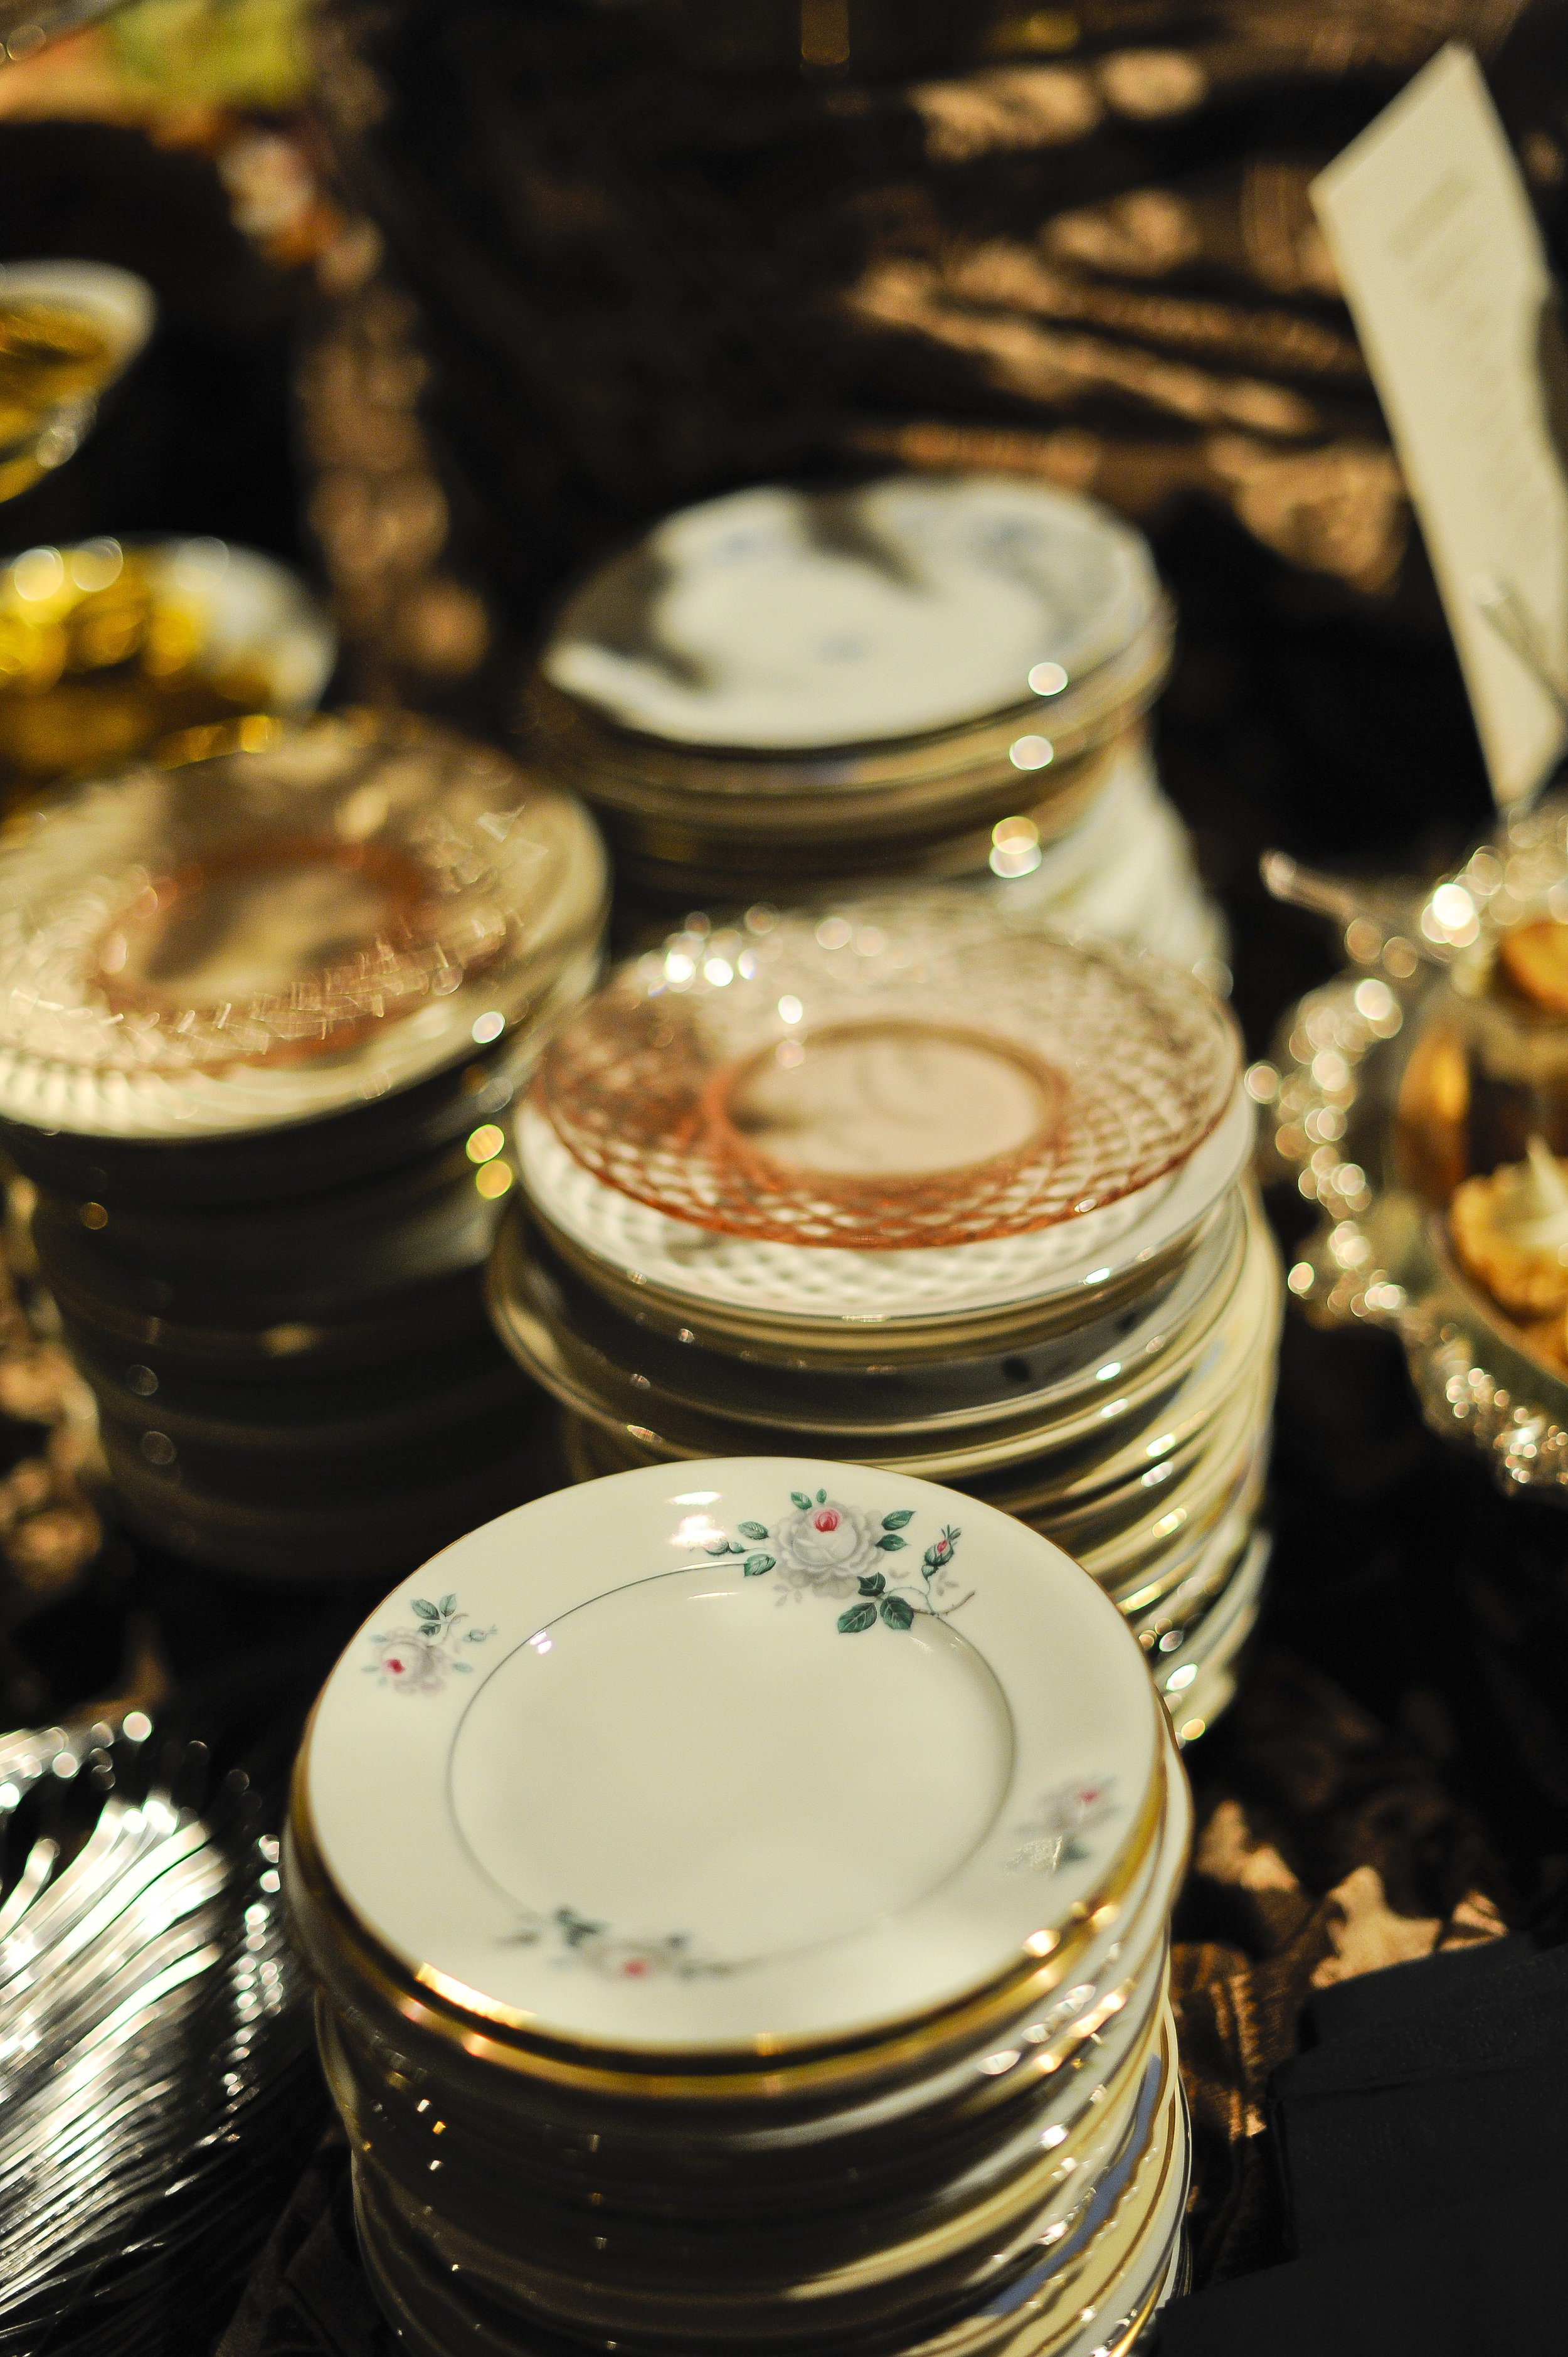
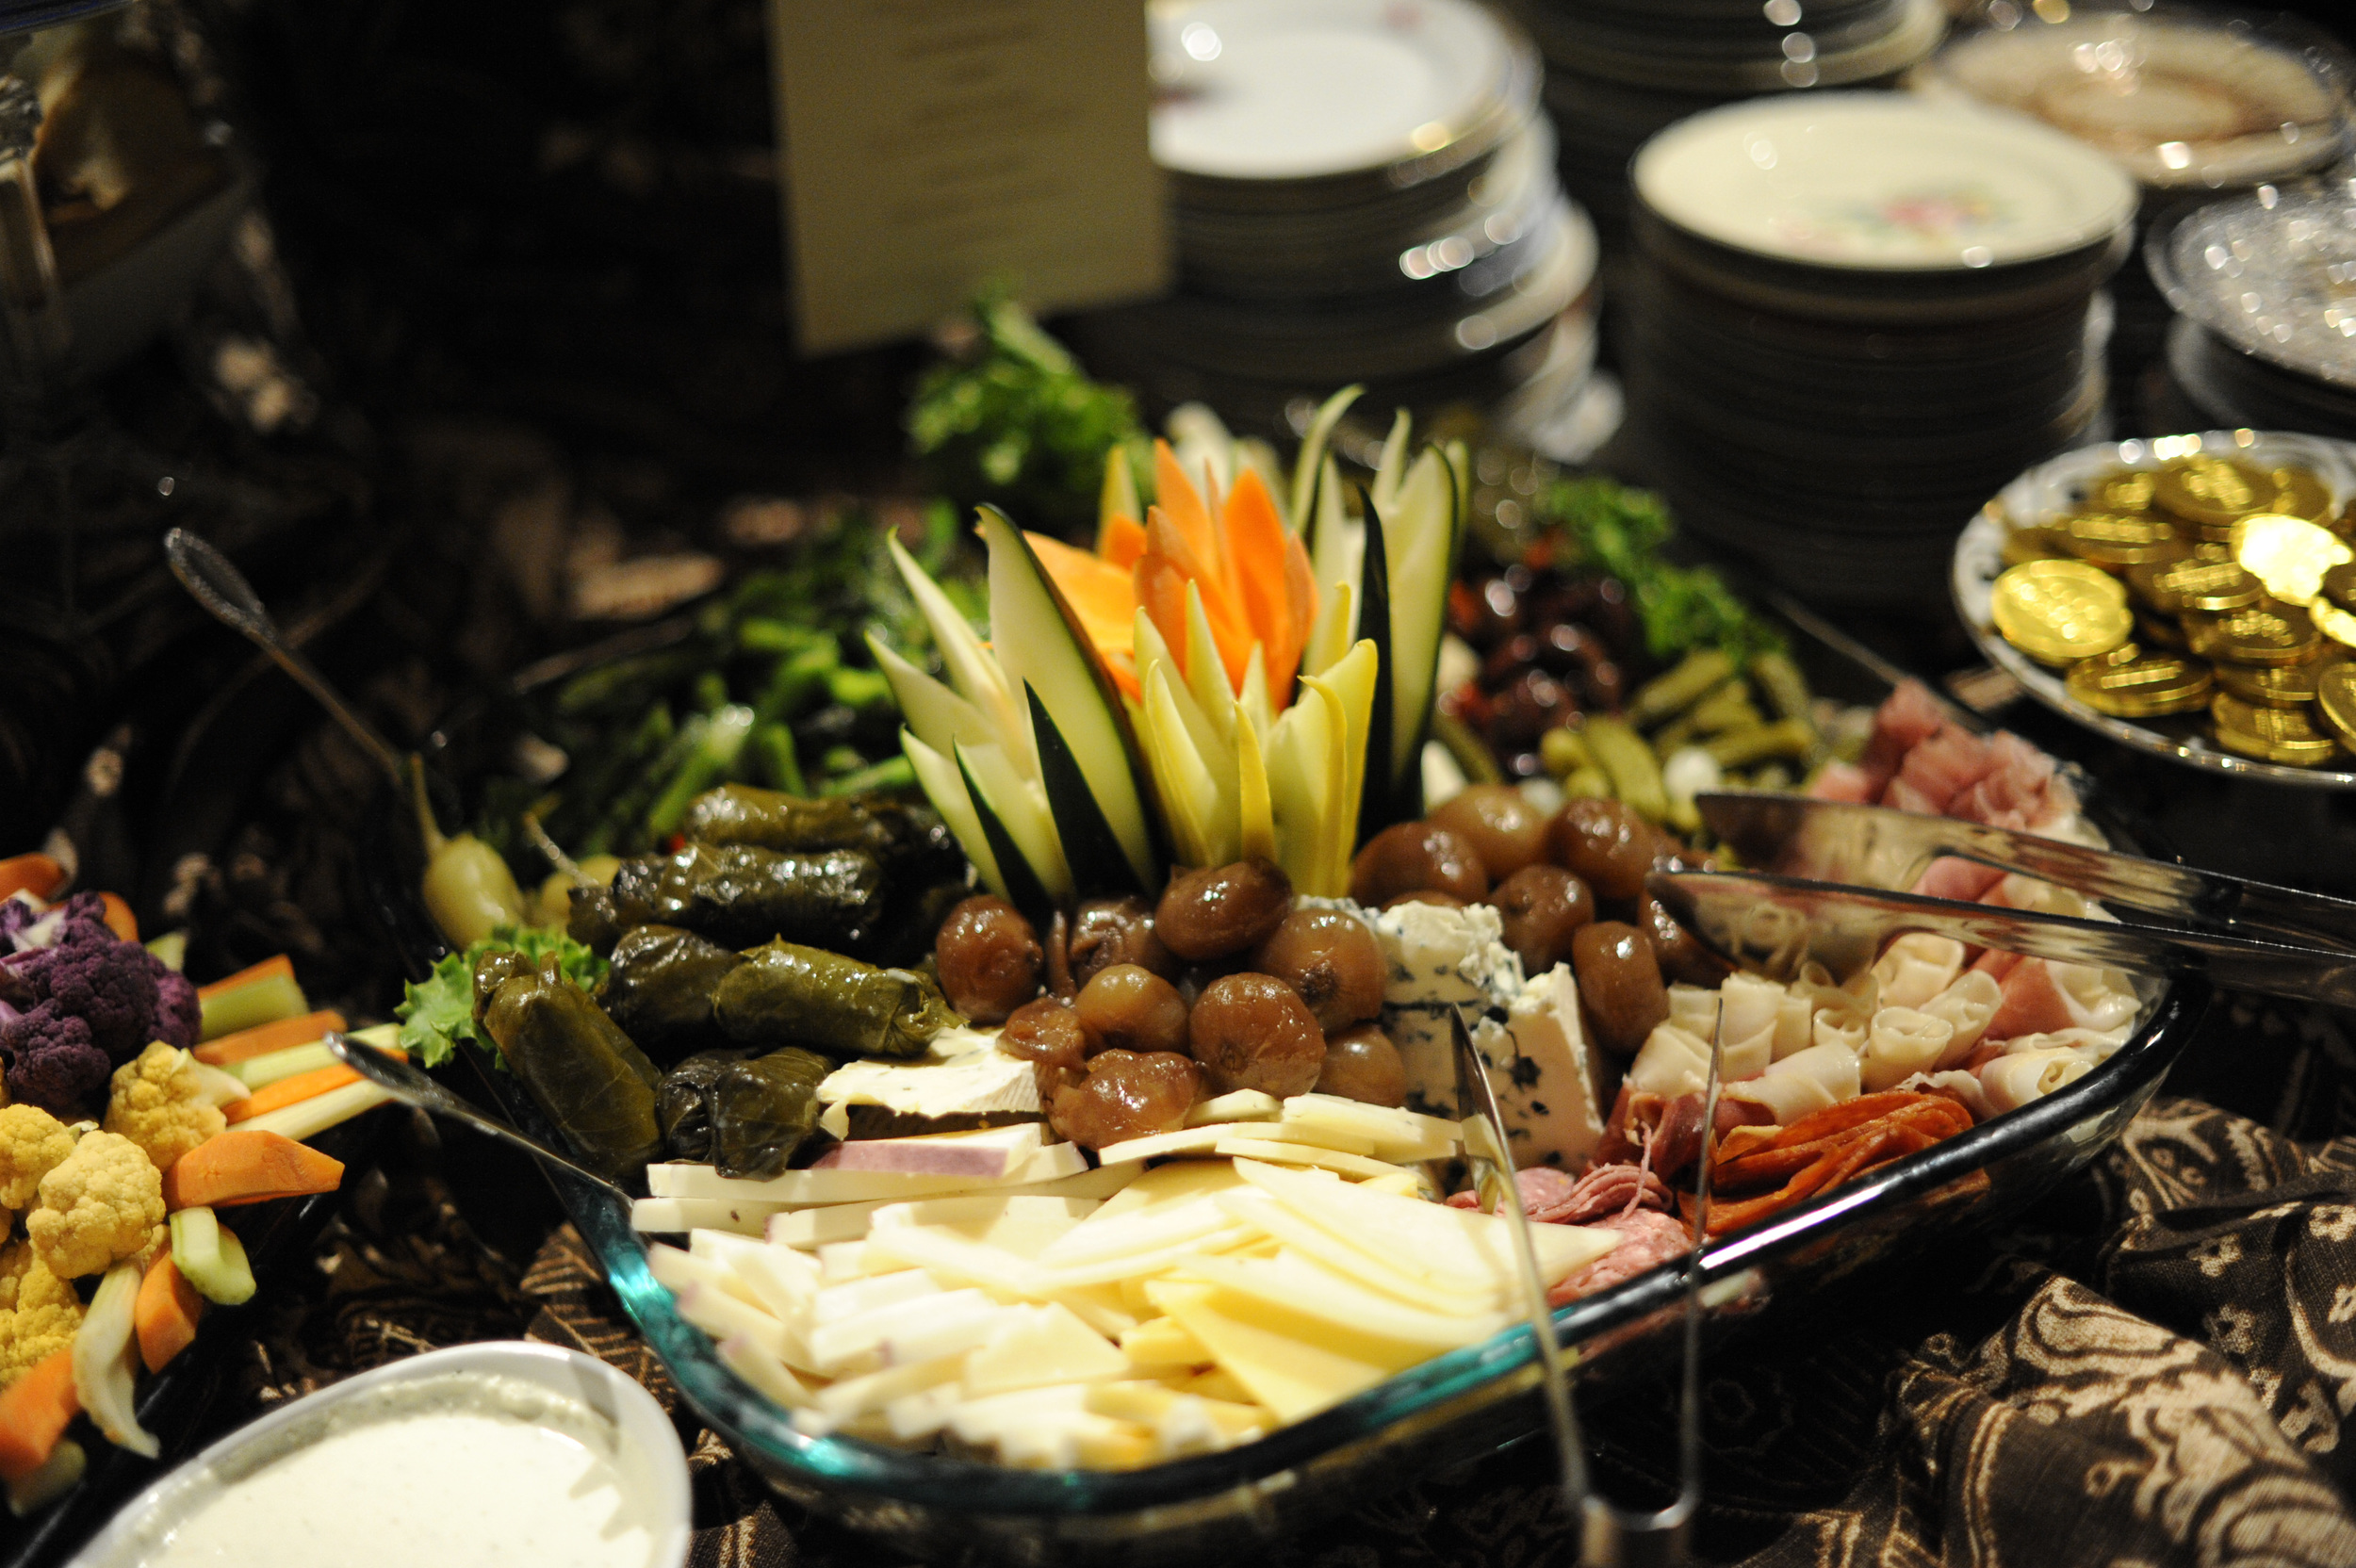
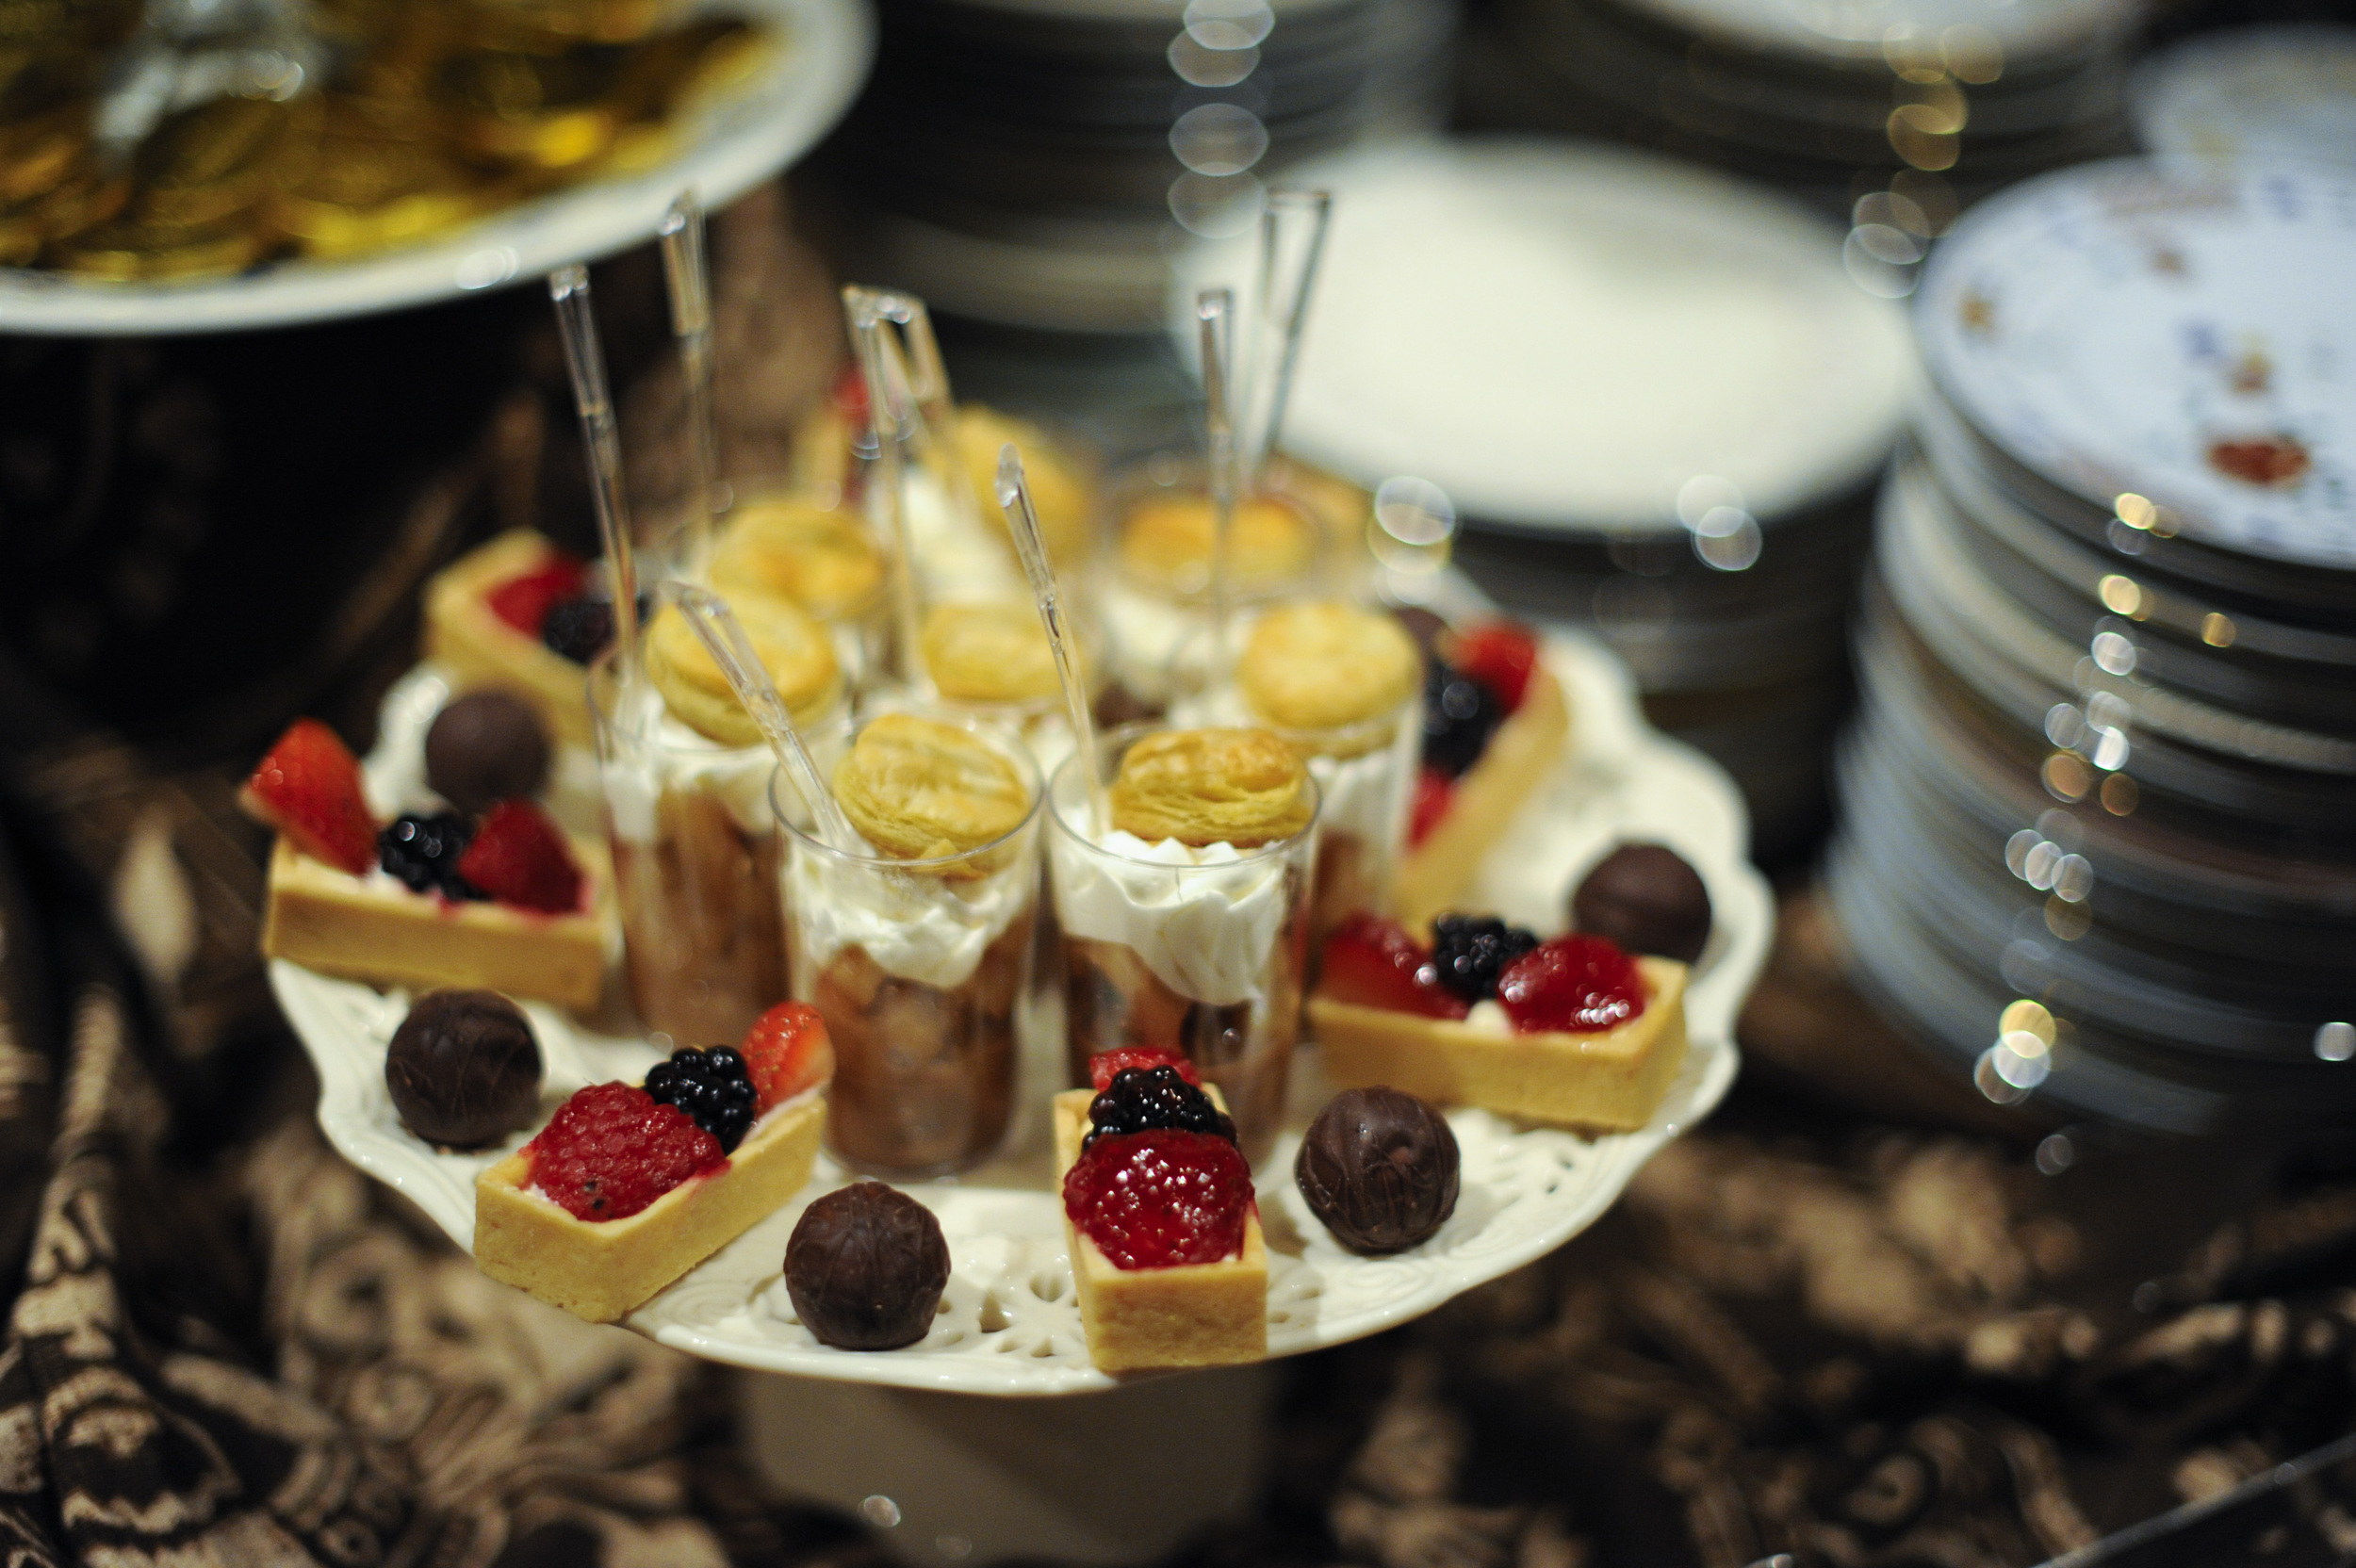
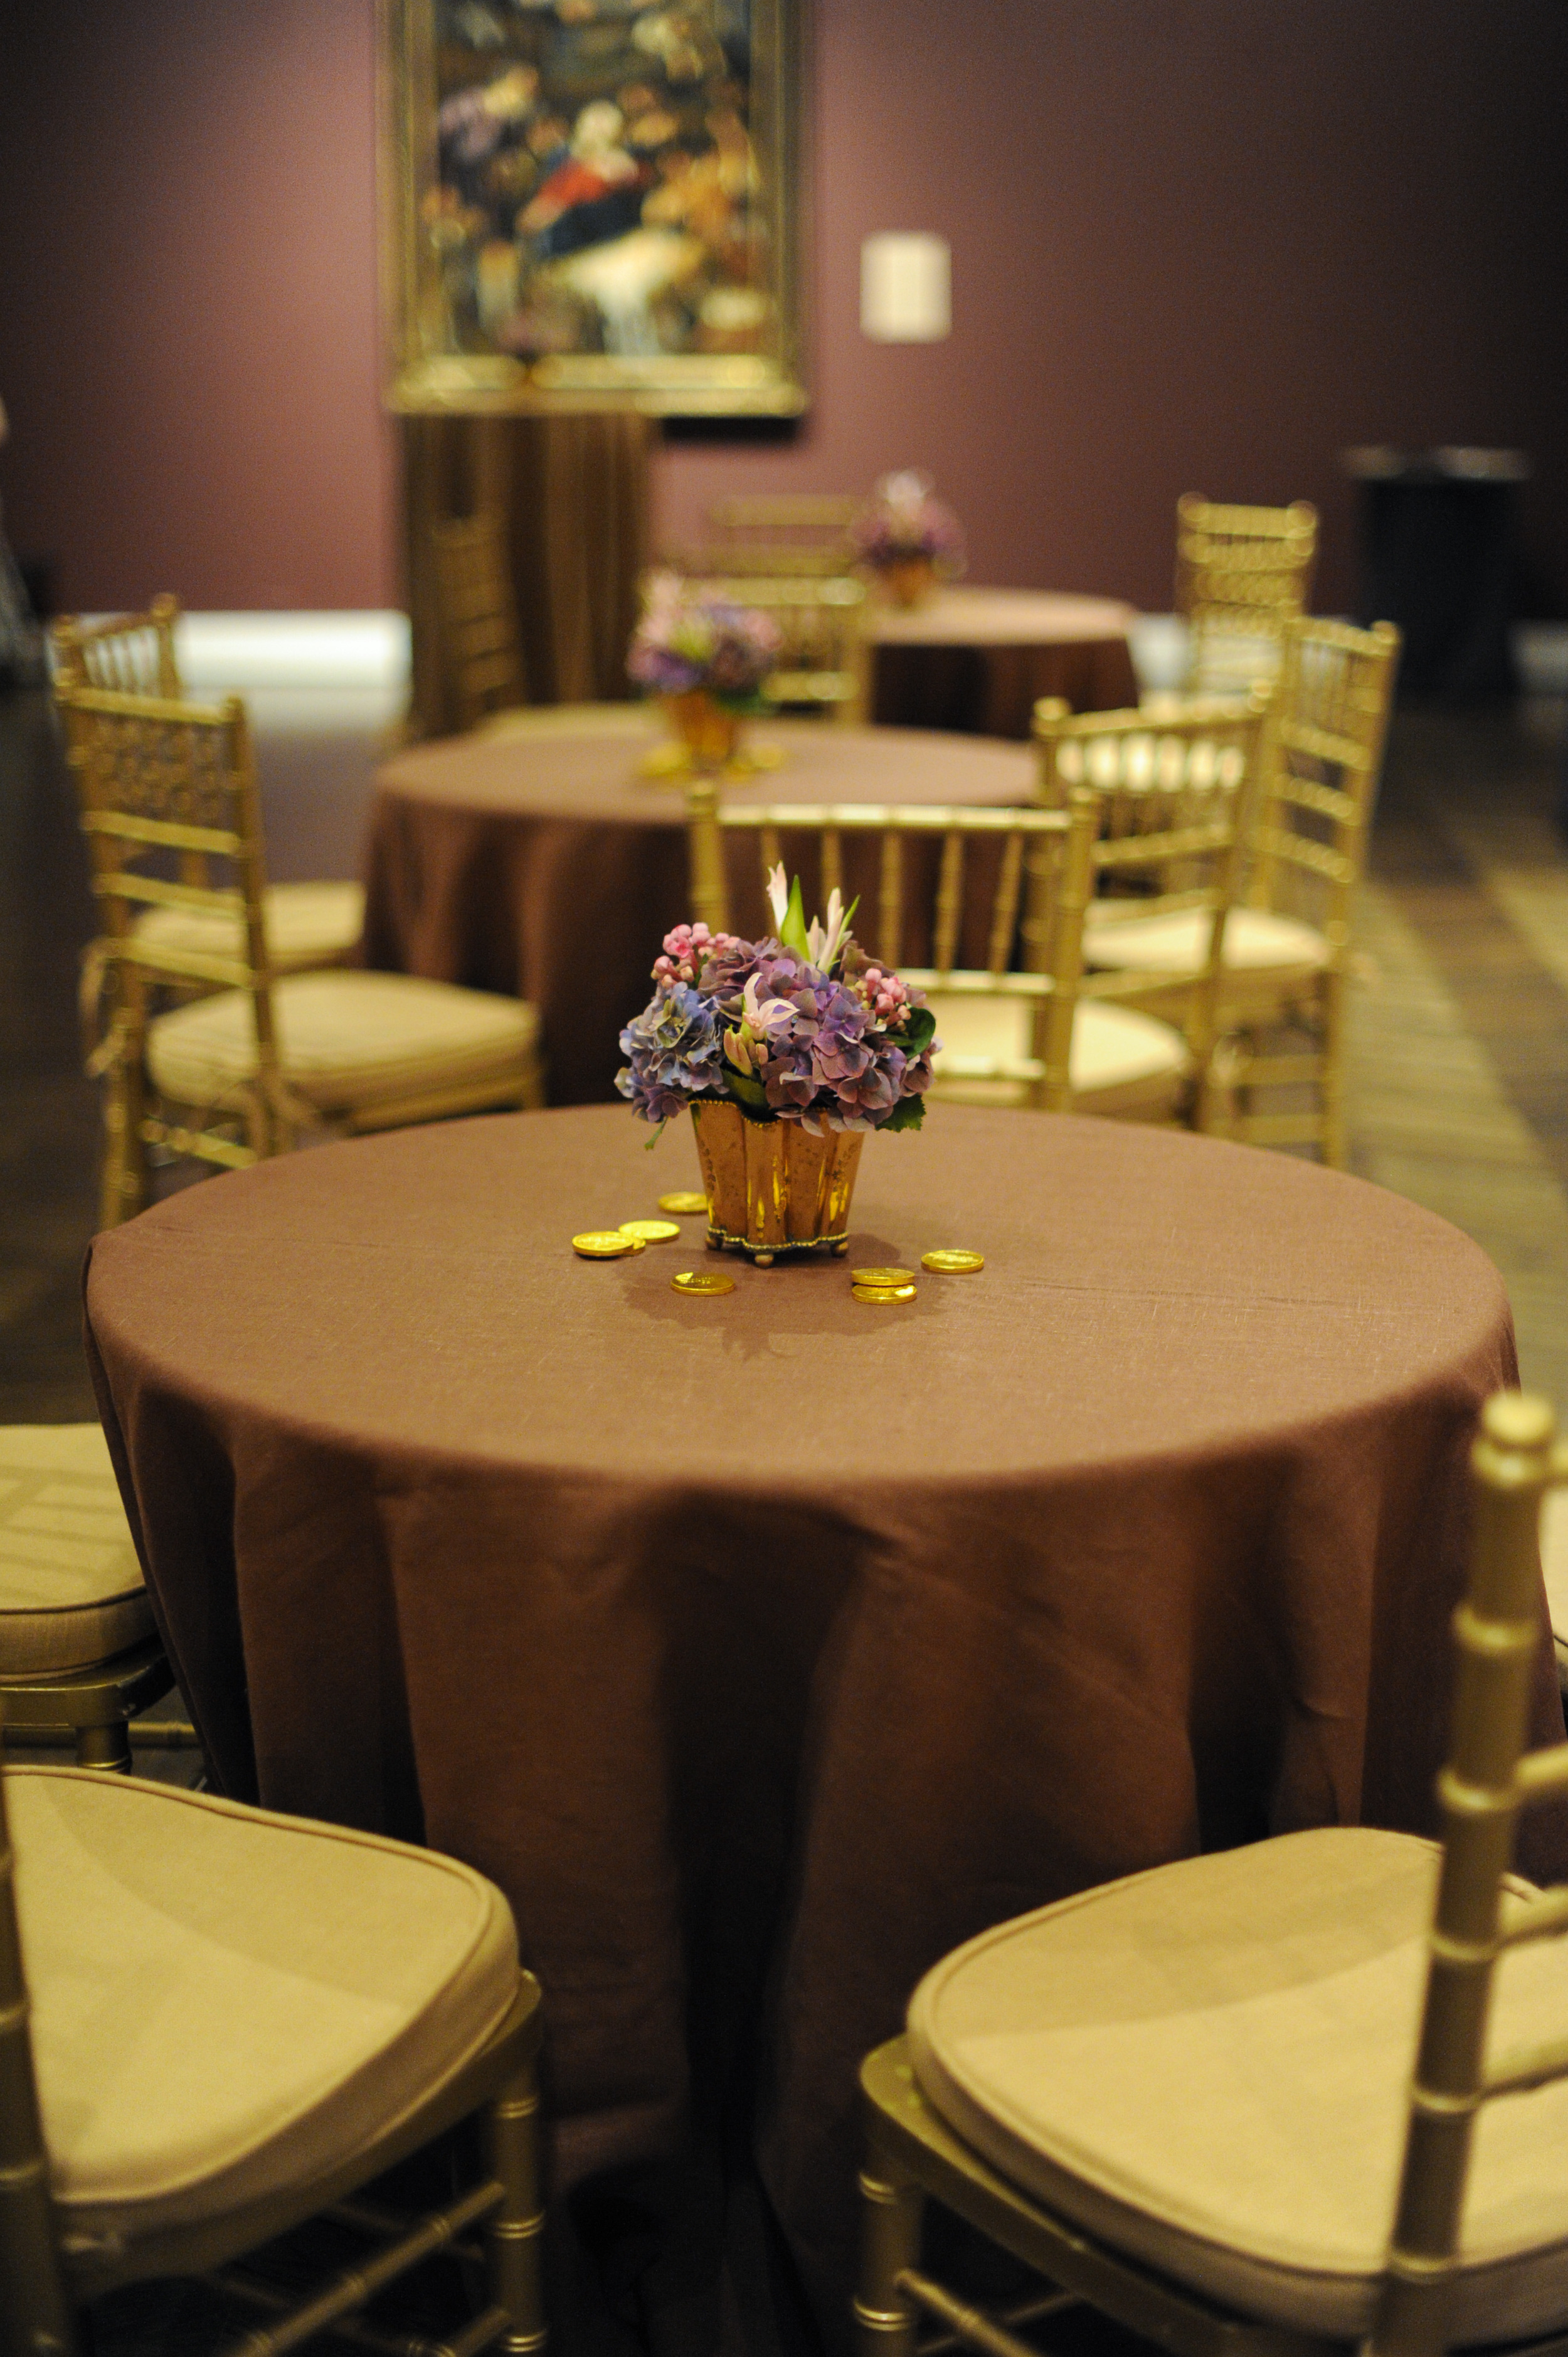
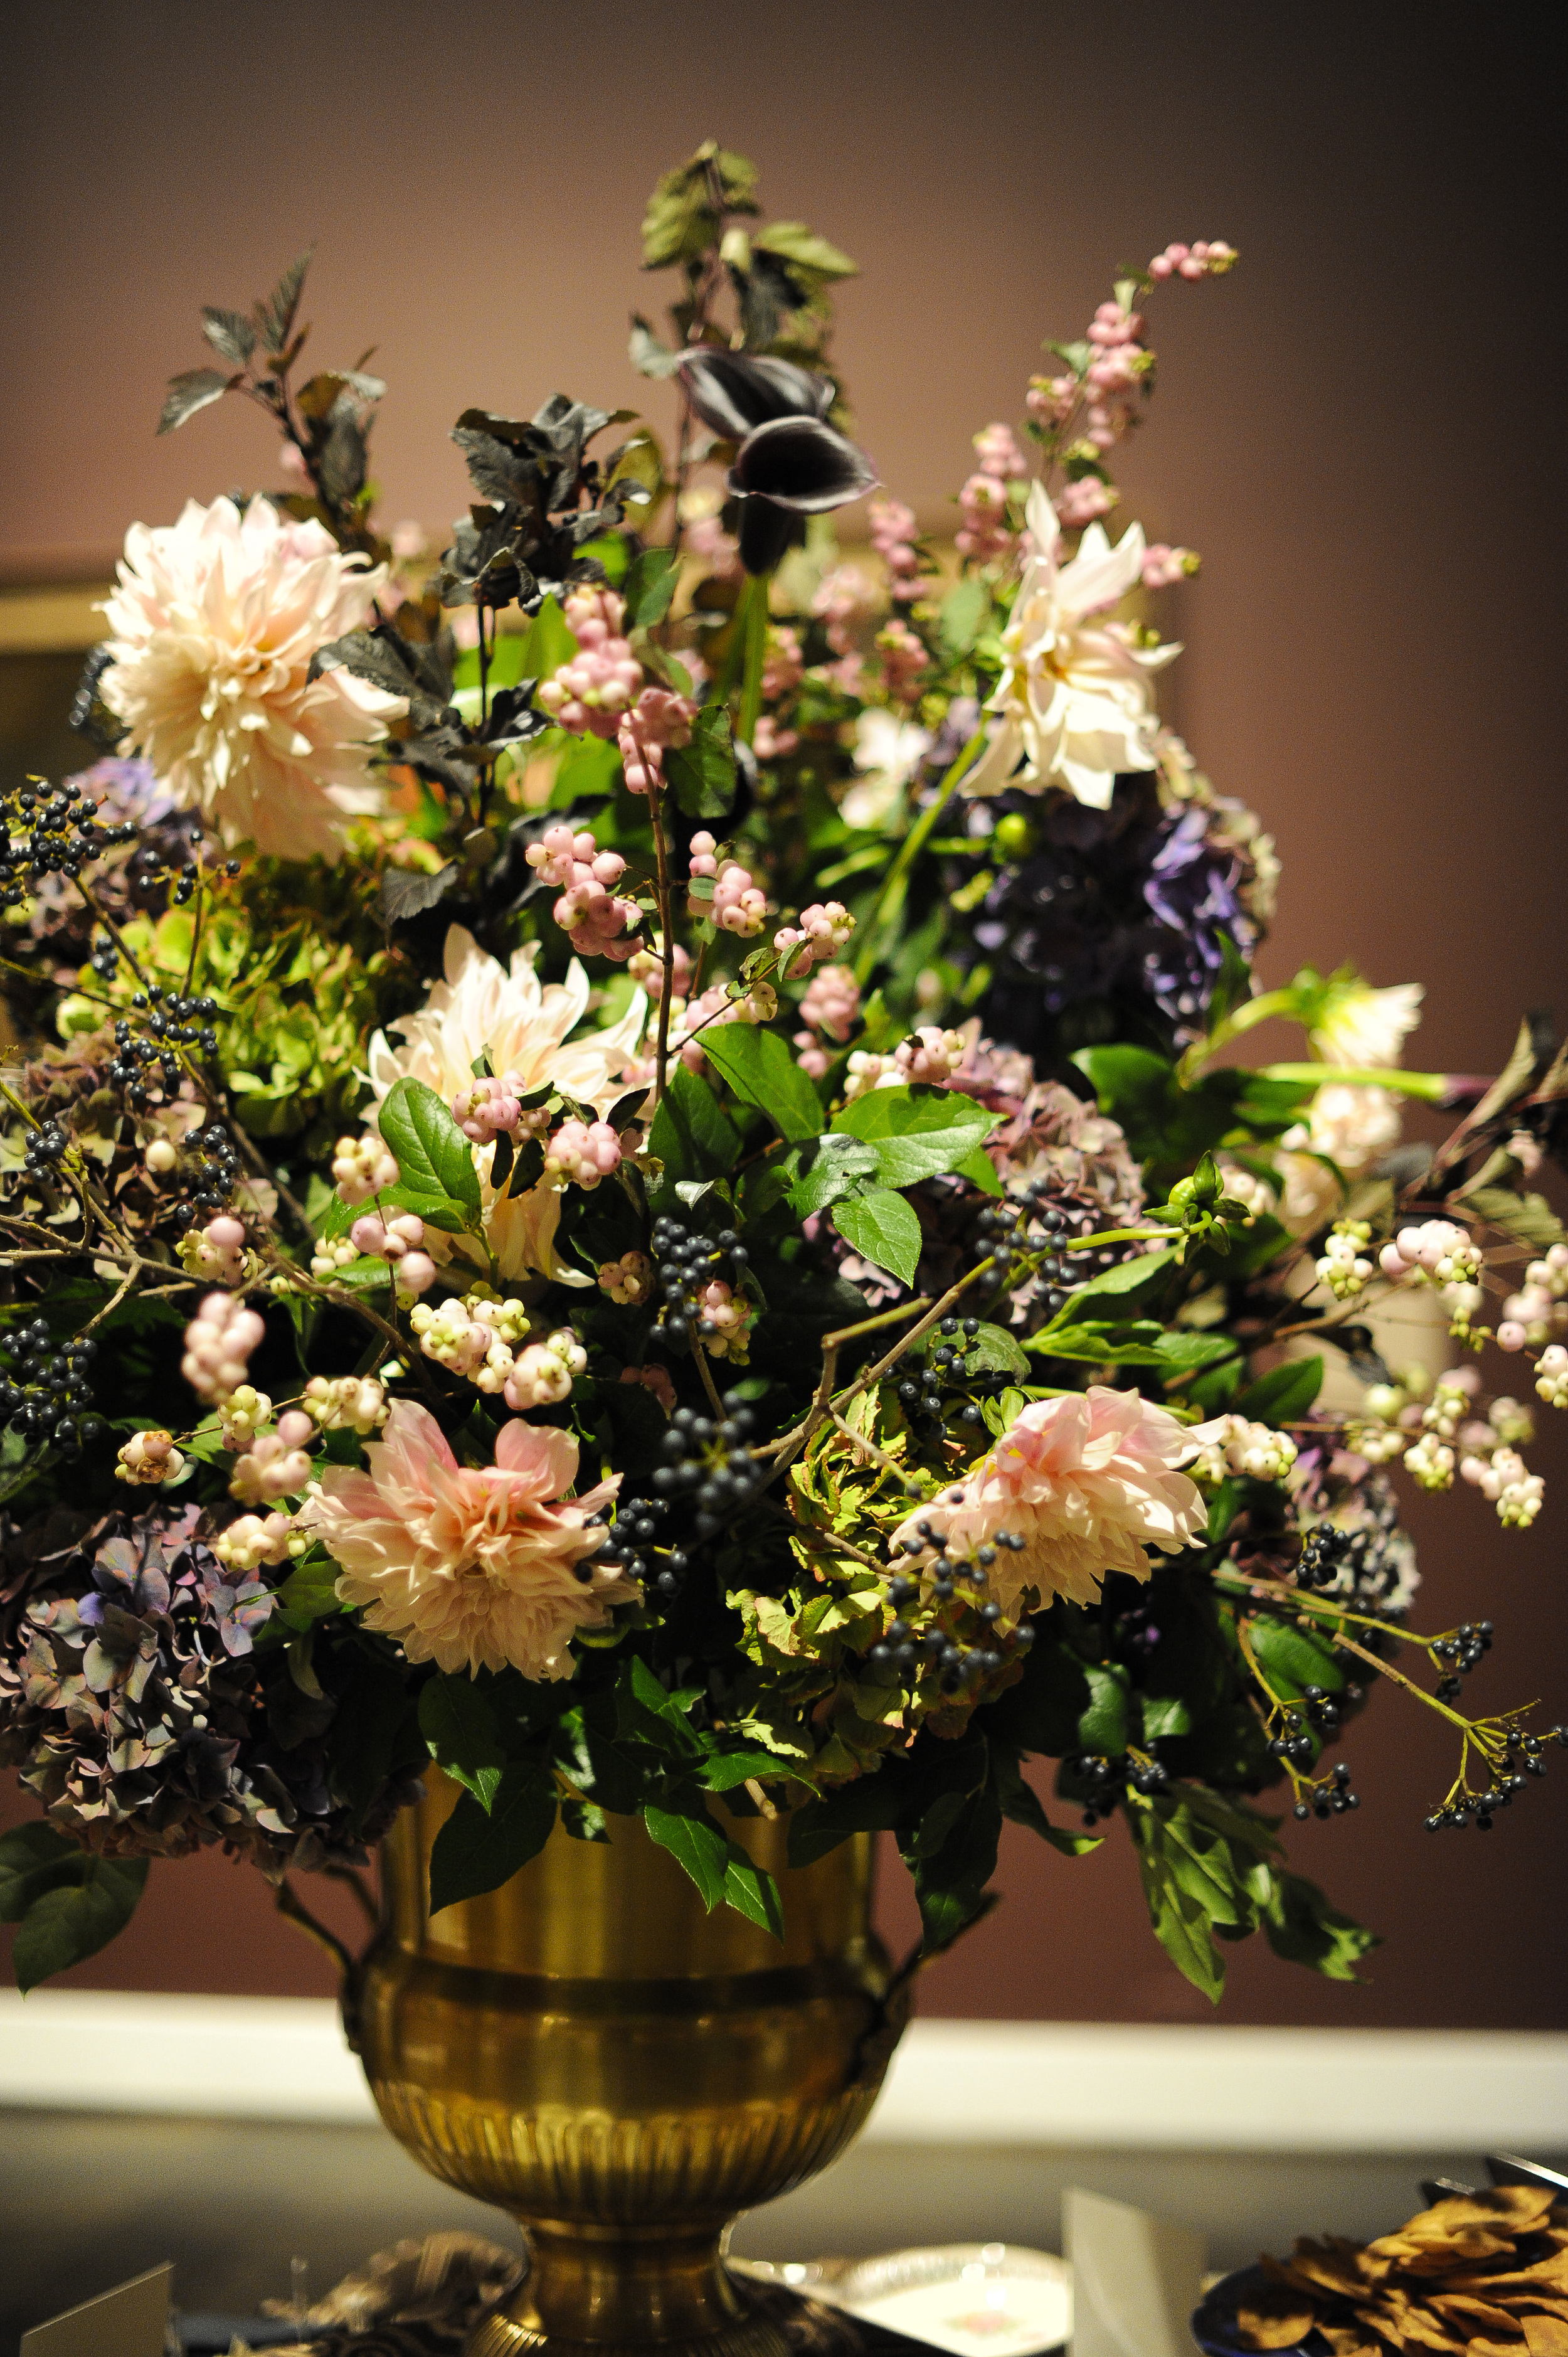
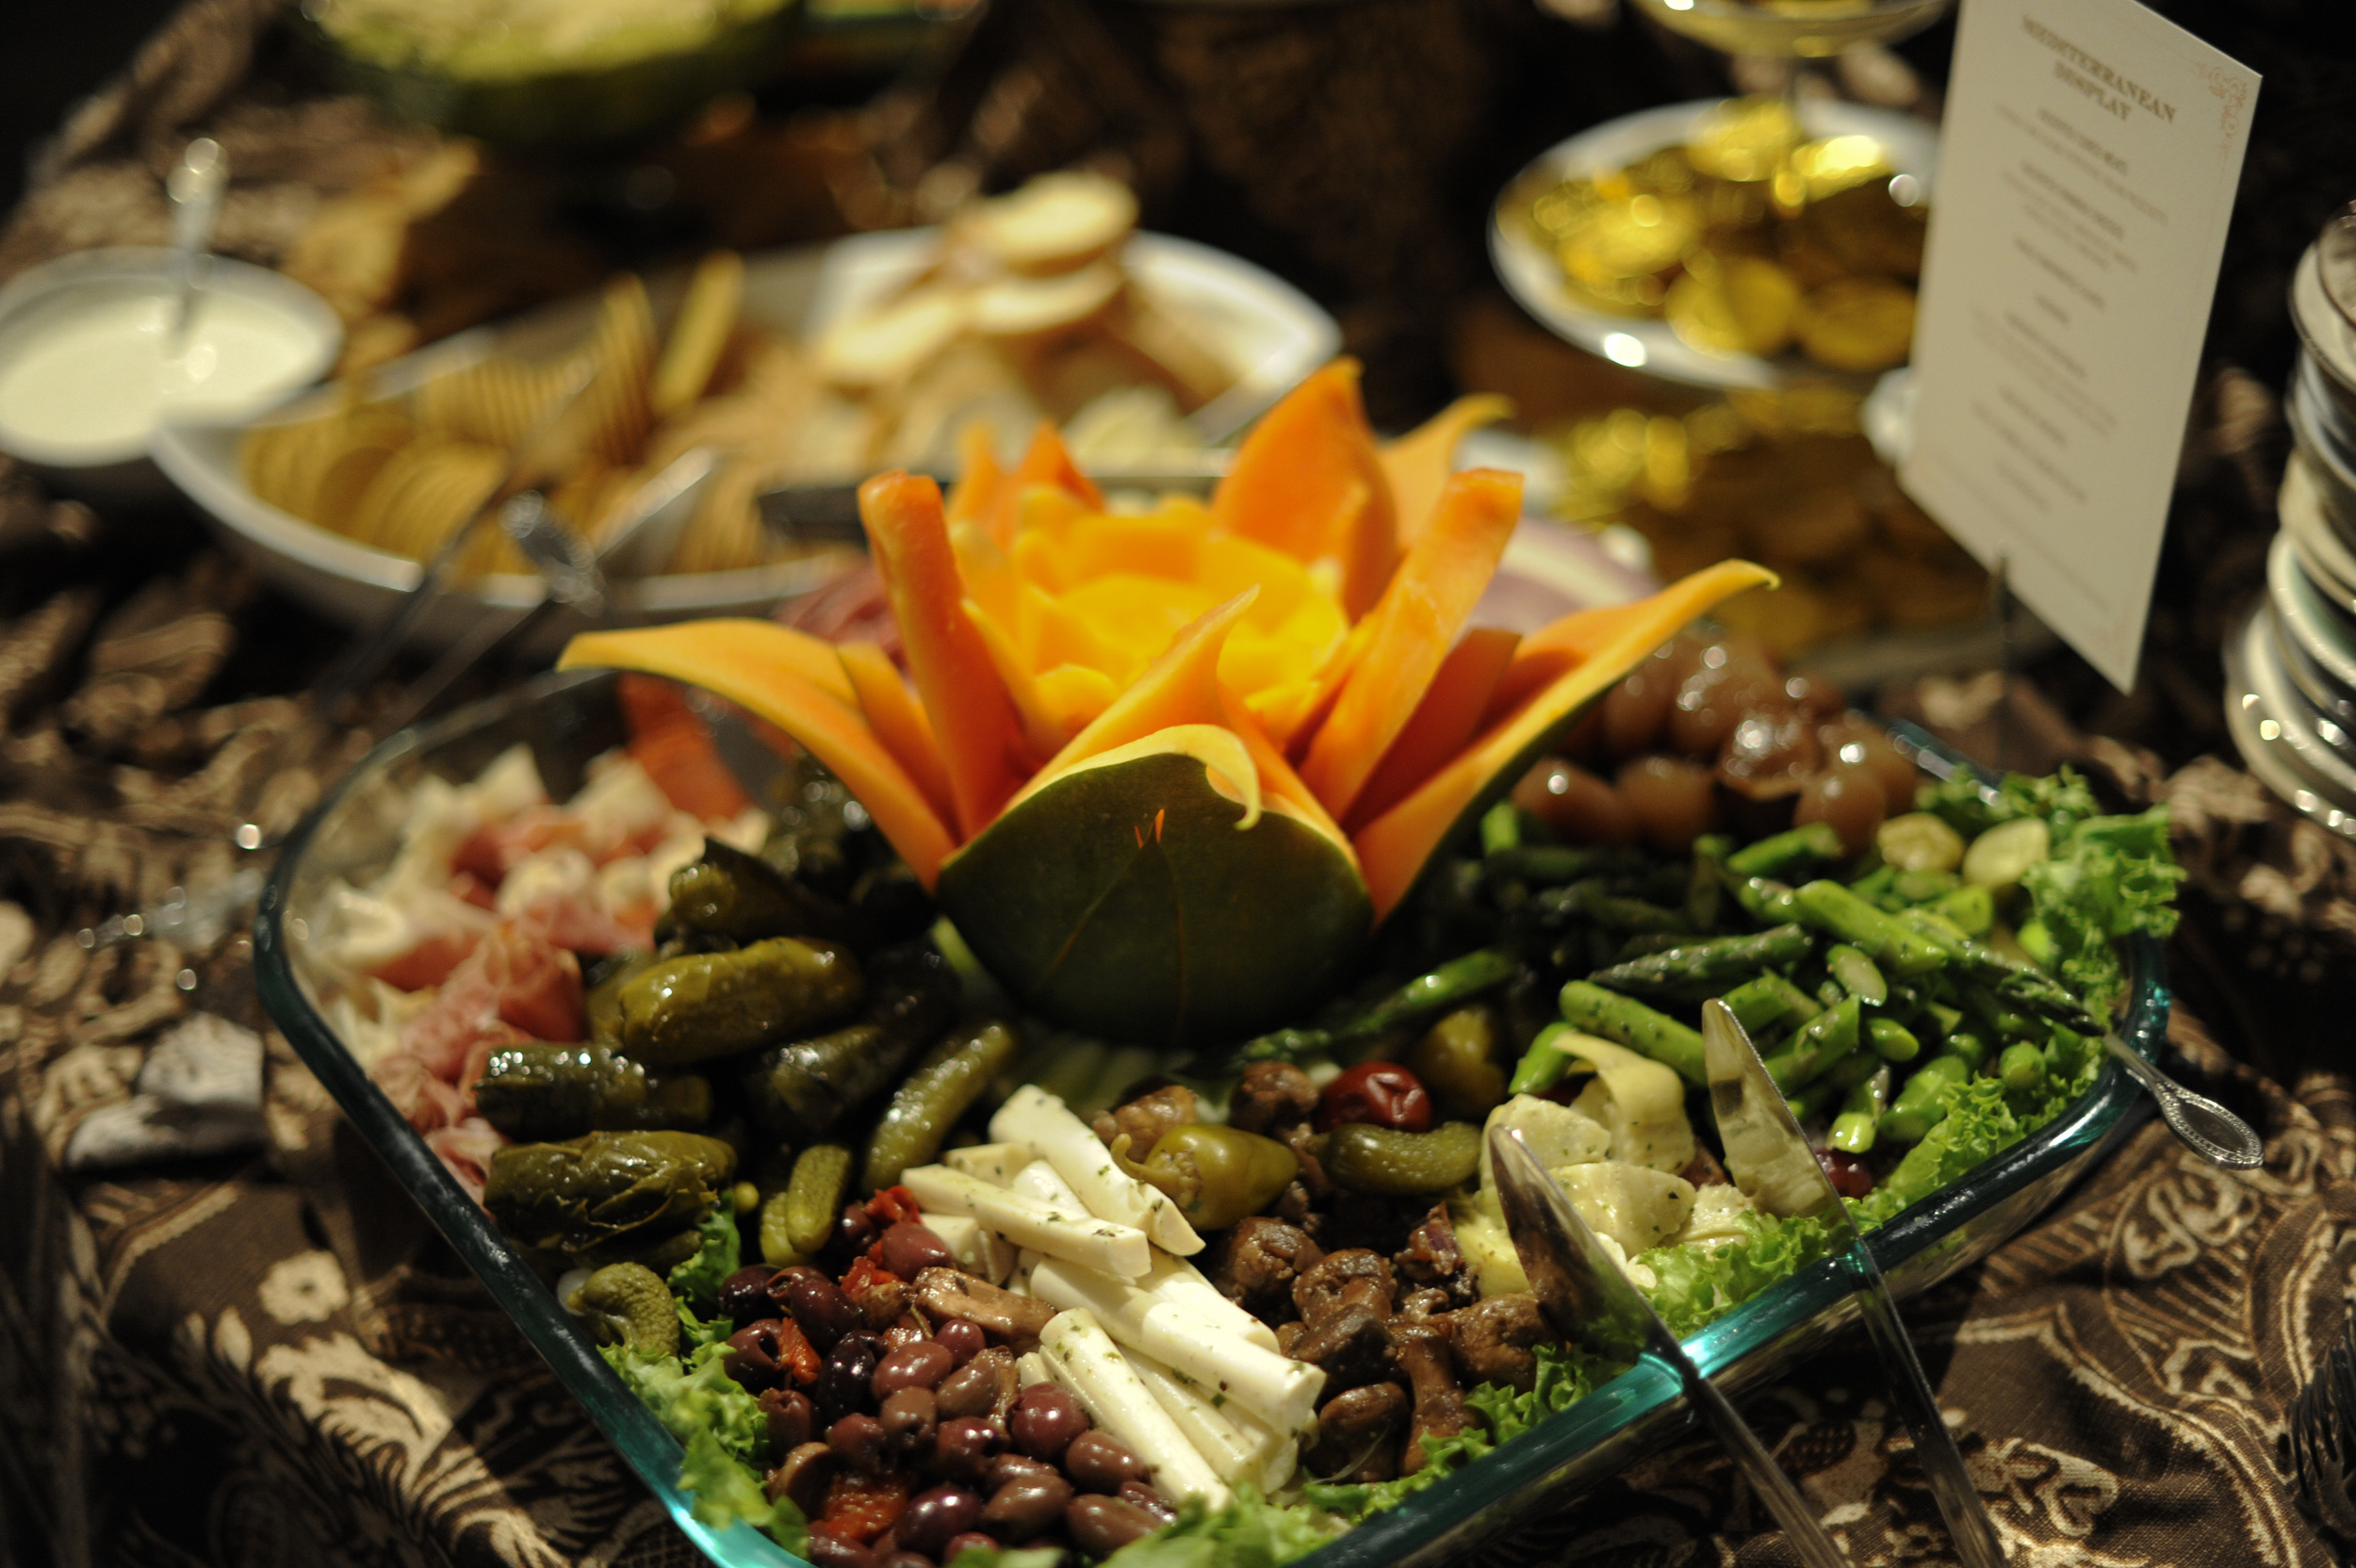
For the opening I designed with the "spirit of collecting" in mind. I was so lucky to get to use these amazing mis-matched teacups and saucers from POSH Couture Rentals for the coffee bar, and small vintage plates for the buffets. Junior and Maria at the Garden Gate did the floral. SMU Catering provided the Spanish/Mediterranean displays of cheeses and meats, as well as fruit tarts, mini manchego flan, assorted truffles and other Spanish desserts. The linens are from La Tavola, Madeline Brown for the buffets, Tuscany Barley for the cocktail tables, and Tuscany Chocolate for the bistro tables. SMU catering also had custom chocolate gold coins made for us, in honor of launching our 50th anniversary ...coming soon in 2015!
Tamytha Cameron Photography captures the most beautiful details of the events!


Had to take a break.
Sorry about the unintentional break. I am finding it difficult to do all my fun activities and find time to share them! Here are a few sneak peeks at what I have been up too! Yes, I did build a Tipi. Photos and instructions to follow.
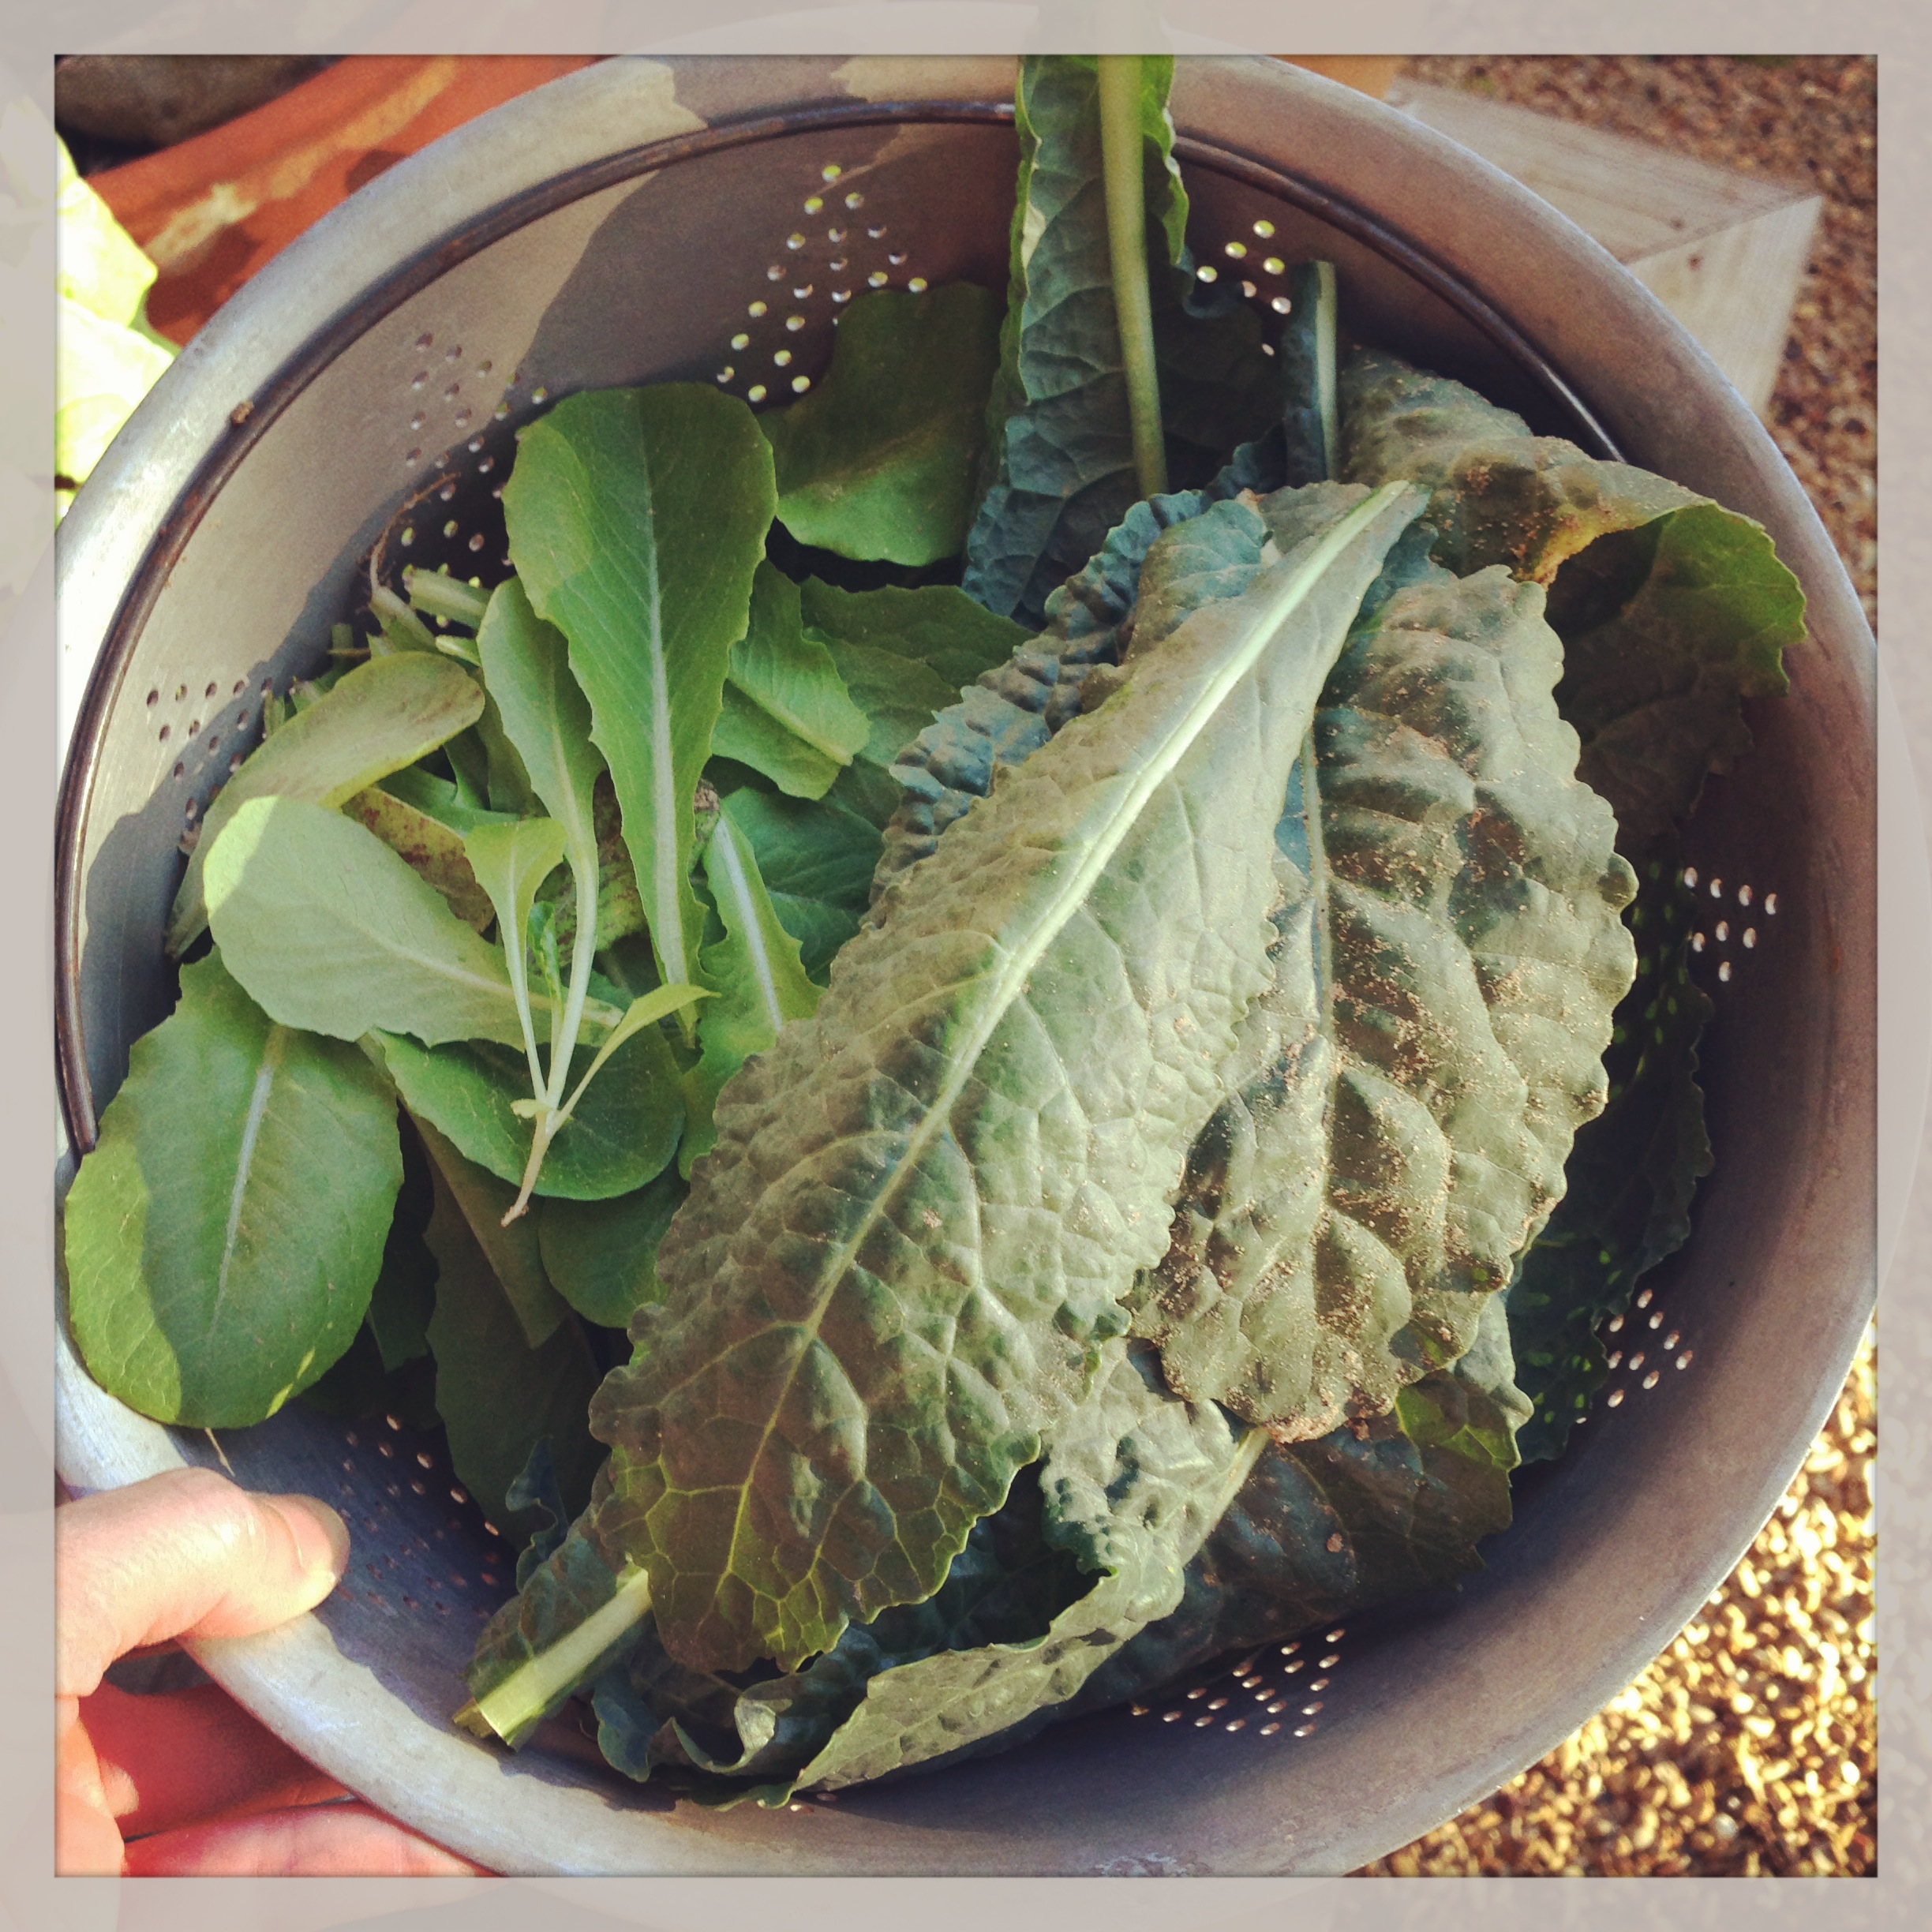
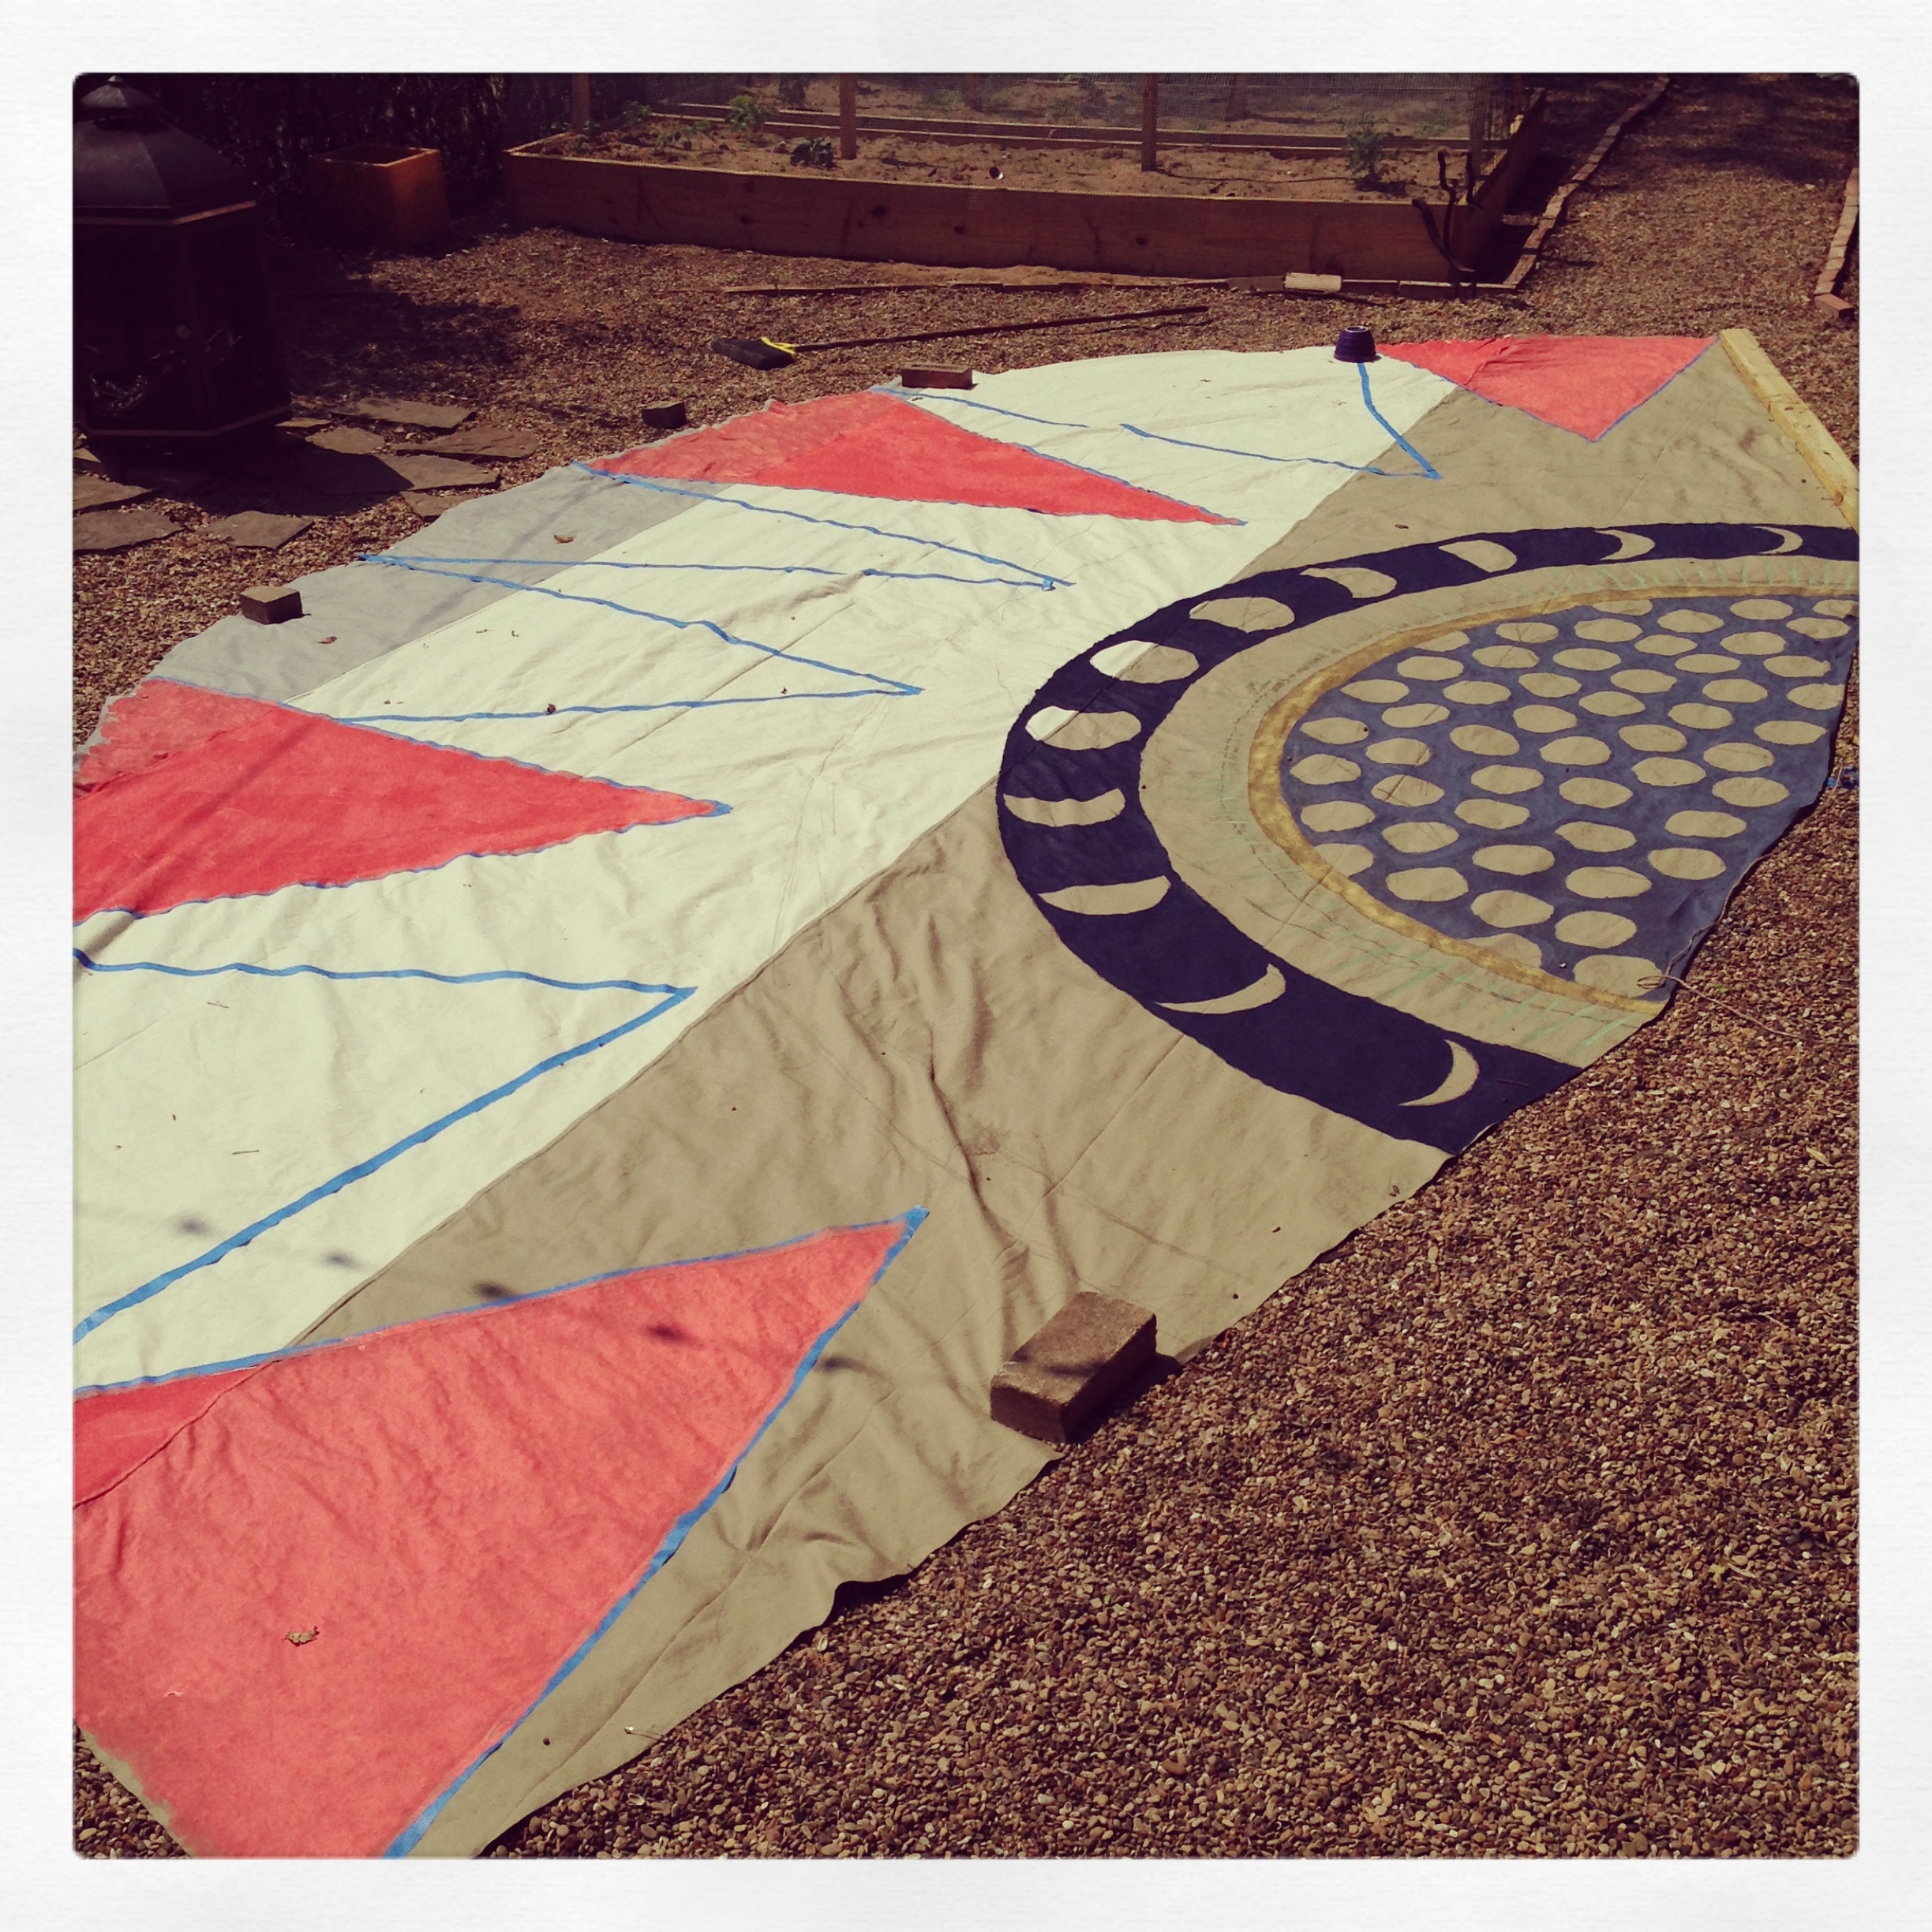
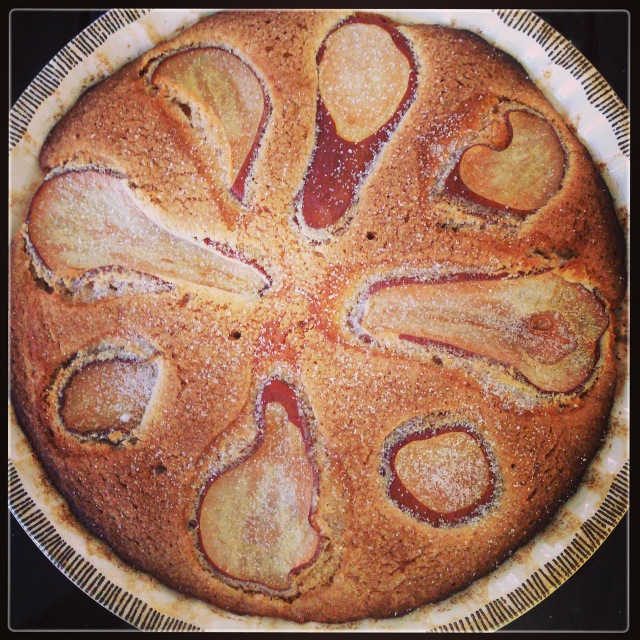
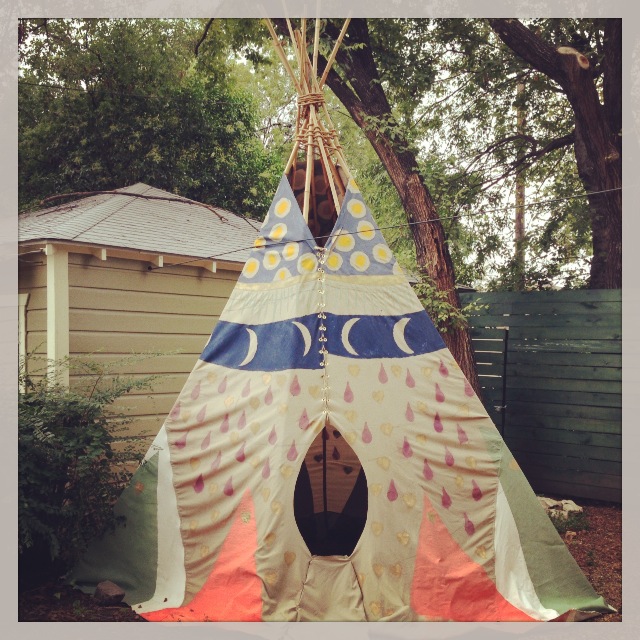
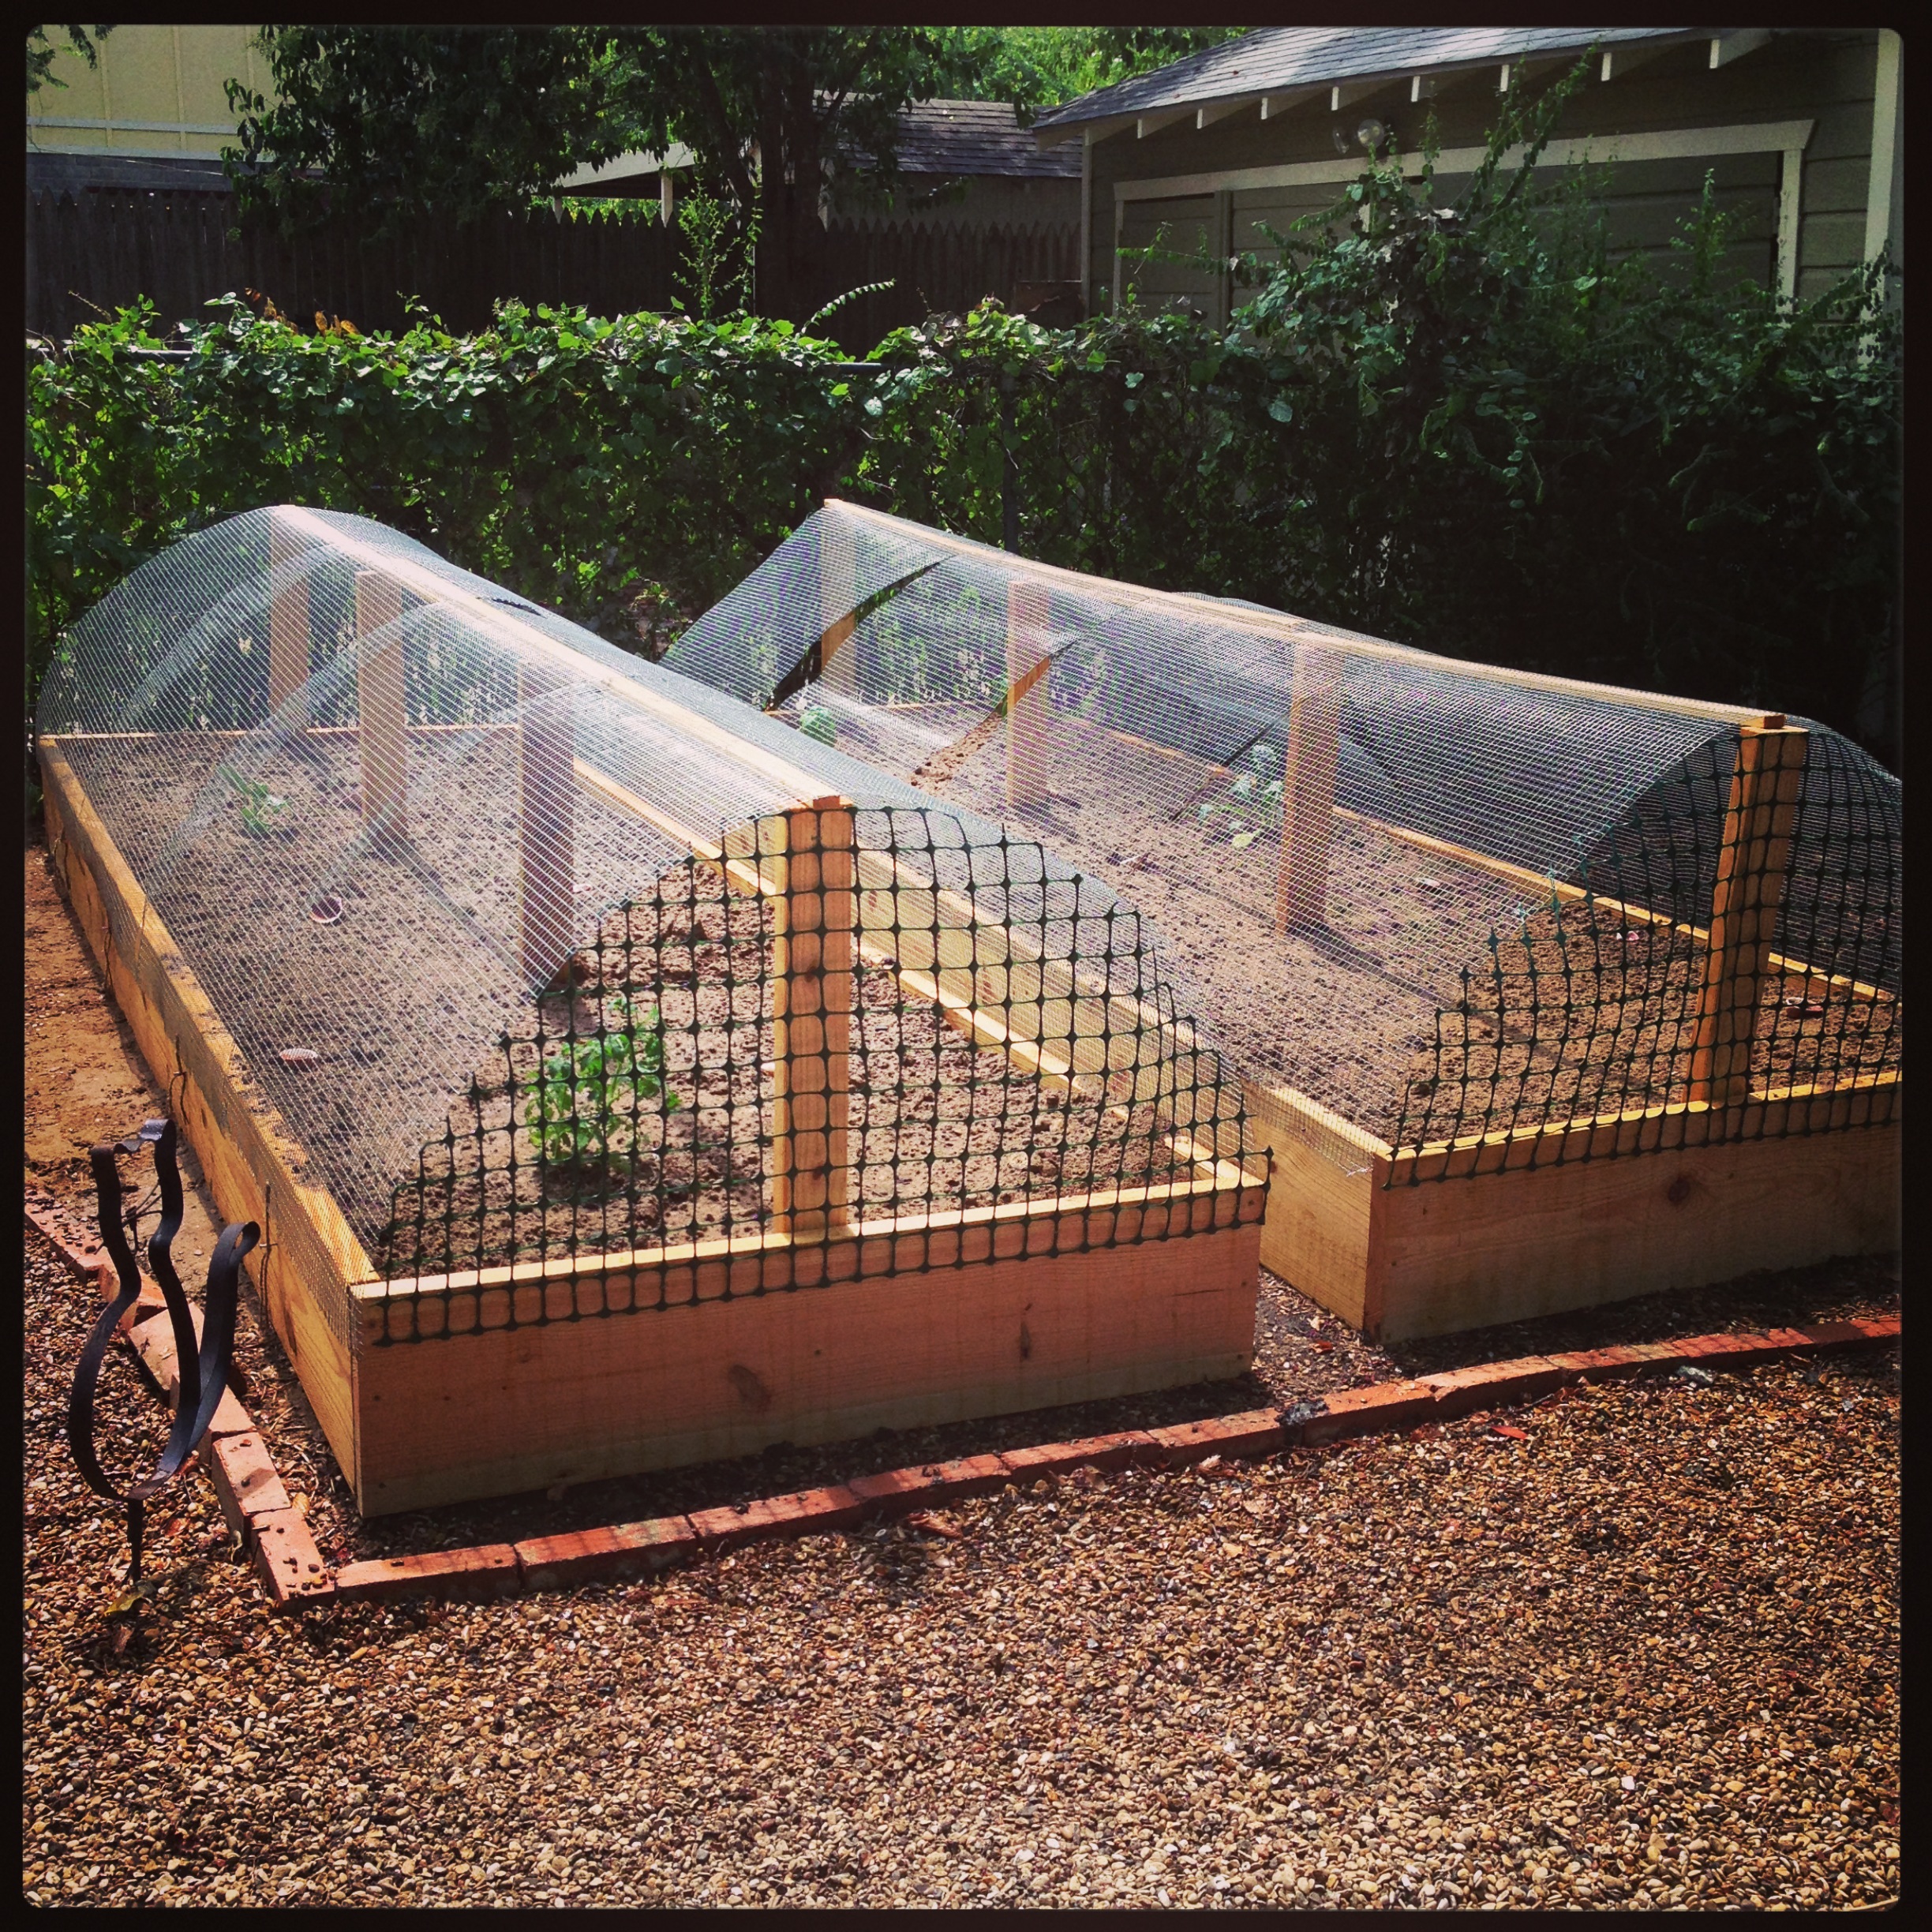
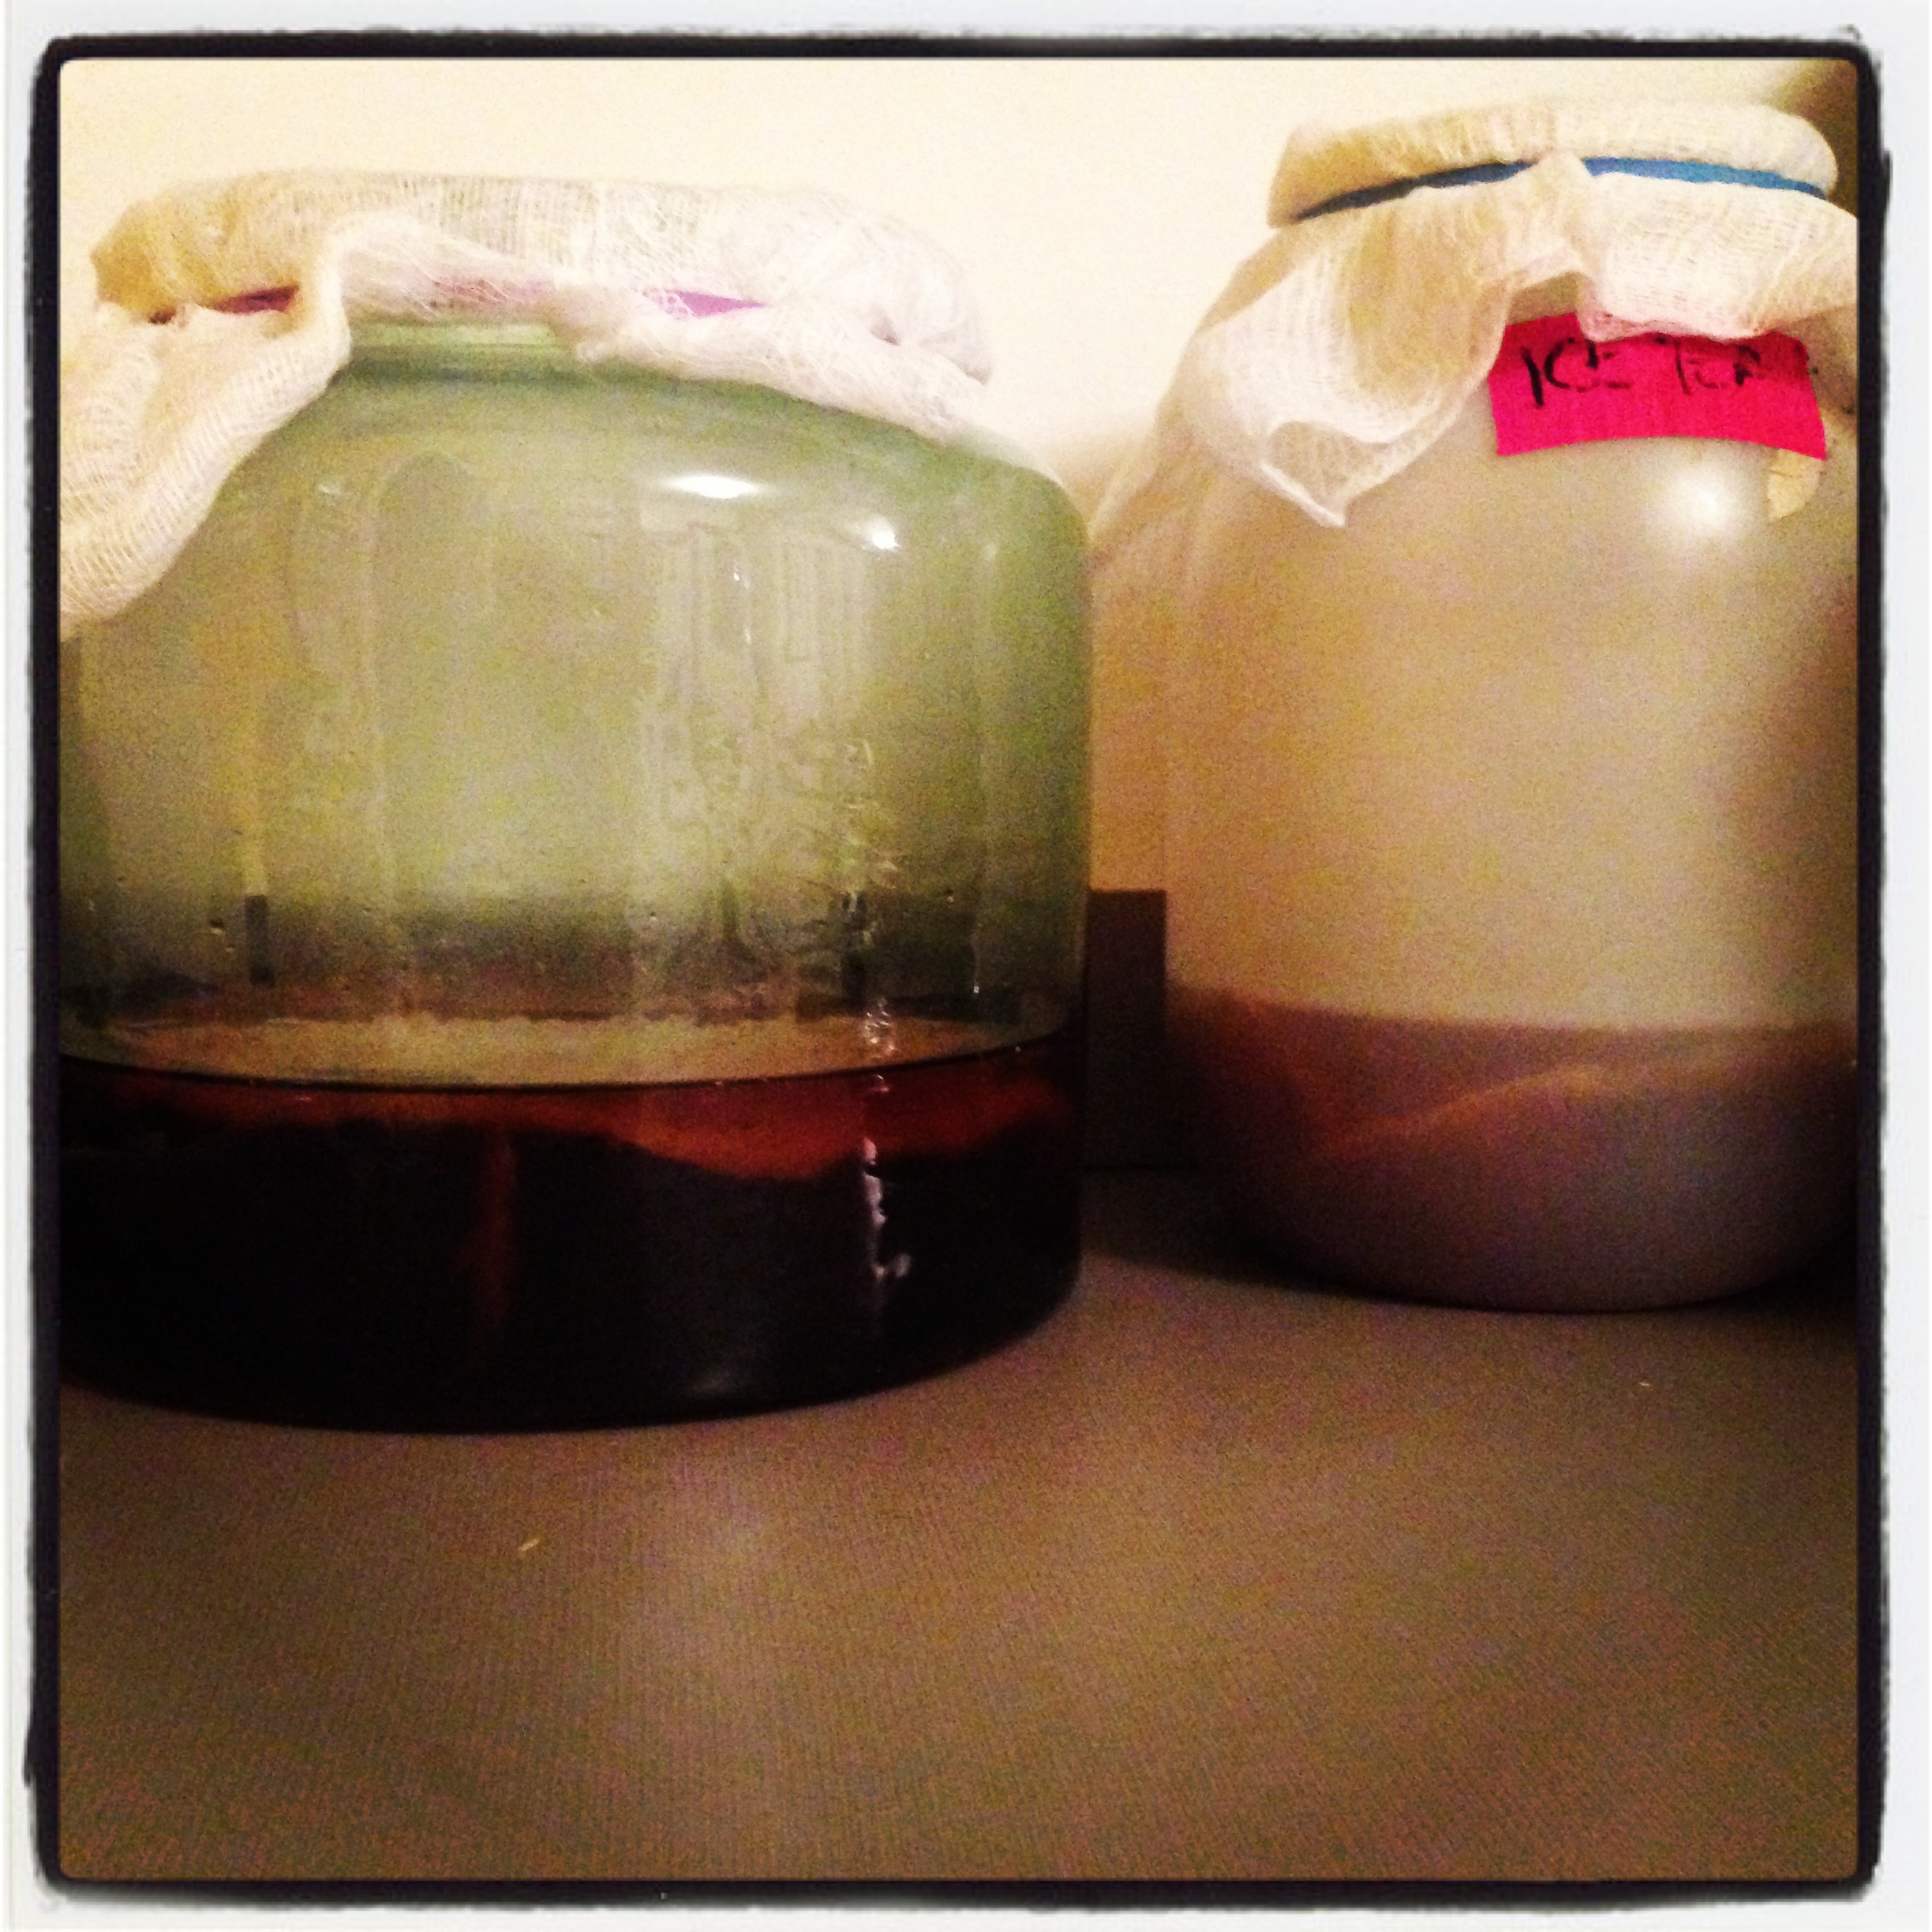
#1. Butterhead Lettuce and Dinosaur Kale #2. Tipi Cover #3. Pear pie/cake #4Tipi Up #5. Chicken Proof Gardening #6. Kombucha
Broken Bow OK. Lower Mt. Fork Camping Trip
Last weekend we went on a float trip down the Lower Mt. Fork river in Broken Bow OK. It was super fun! I highly recommend the trip. Just make sure you check the CFS (Cubic feet per second) this river can be really dangerous if it is above a certain level. You can check the CFS for lower mt. fork here. We have our own boats but you can rent kayaks and canoes from many outfitters down there. Just call ahead. We used Ambush Adventures to run shuttle for us.
There is great fishing and floating. ENJOY!


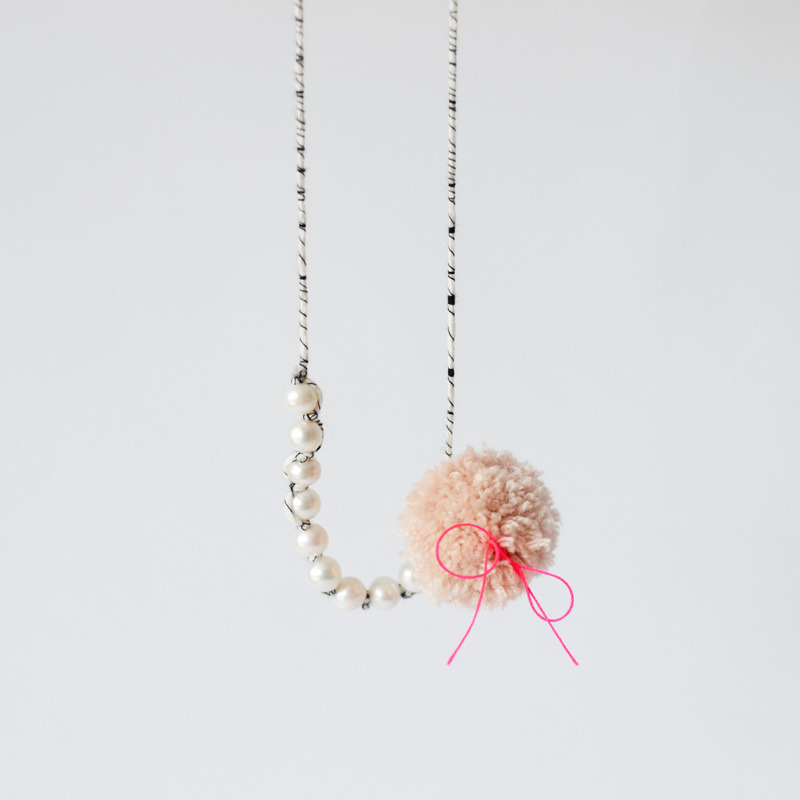
Pearls for punks
in art, Weddings, Simple Life Style
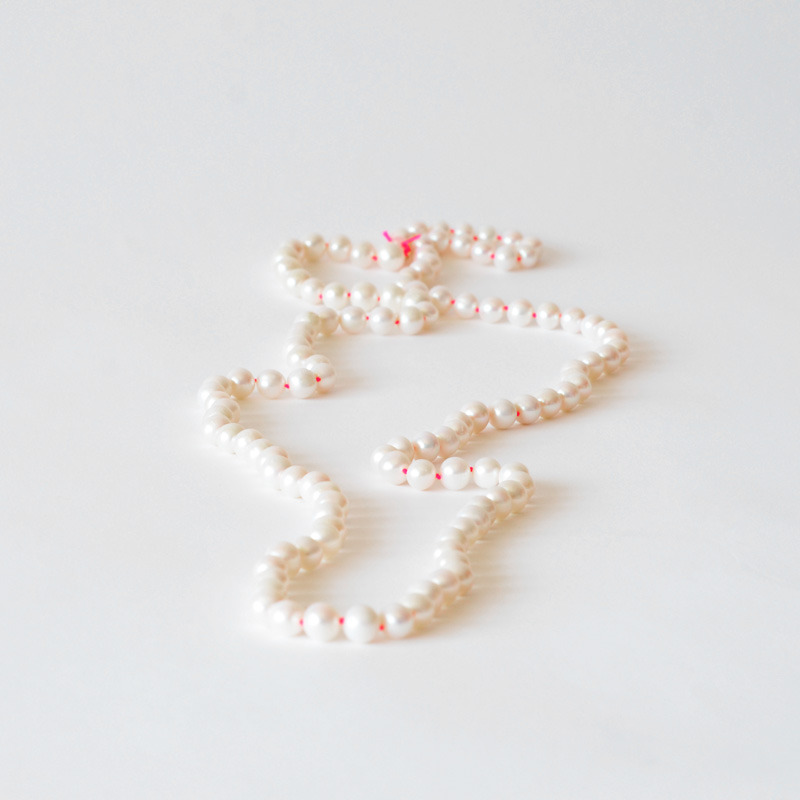
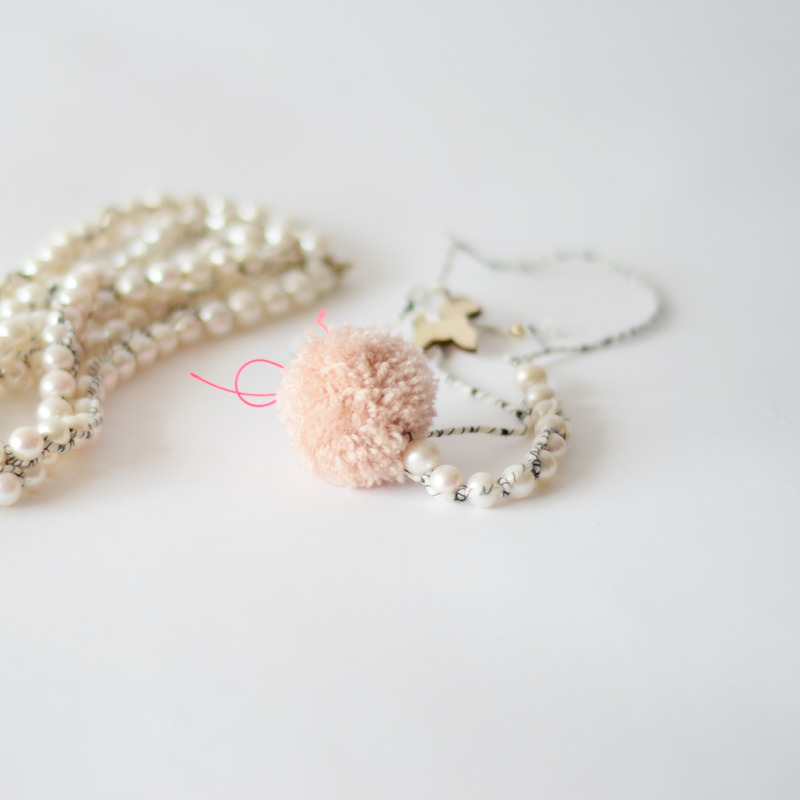
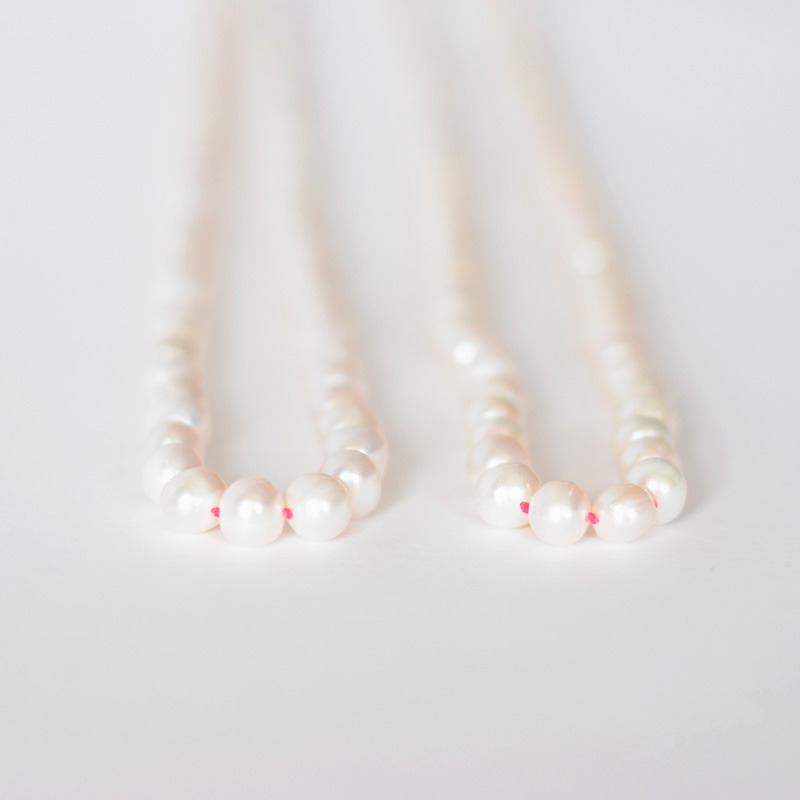
These sweet little creations are from Irene Hoofs gorgeous imagination. These non-traditional, traditional necklaces consist of freshwater pearls rated AA+ threaded together with beautiful off-white Italian cotton from Carta inc. with a 18k gold fill closing.
drool...
"Irene Hoofs, a collector of all things beautiful, created Bloesem blogs in December 2006. Leaving her hometown Amsterdam for the first time in 1997, Irene enjoyed roaming the globe for a number of years making stop overs in London, New York, Toronto and Kuala Lumpur. A banker turned graphic designer, she sold her work through BARNEYS NY and Selfridges & Co. Today she lives in Singapore with her husband Rik and two sons, Lode and Kiet. From her home office overlooking a jungle garden, she aspires to bring outside-the-mainstream daily finds to her readers on B:Kids and B:Living." - Bloesem Wear Website


Kentucky
Sigh, my trip to Ky is over. Here are some of my favorite pictures from the trip! I can break it down in three parts; Places to go, things to eat once you get there, and memorabilia!

1. Morris Book Shop 2. Red State BBQ 3. Spalding's doughnuts 4. Tachibana
5. Al's Bar 6. Churchill Downs

1. Cherry Pie (tart) 2. BBQ nachos 3. Sushi 4. West Sixth IPA 5. Spalding's doughnuts 6. Homemade ice cream
Whilst in Kentucky I picked up a few new shirts and re-stock my CHOW CHOW! If you didn't know, Kentucky is SUPER PROUD and was a state settled by a "Culture of Honor" you can look it up. I think its great, if you don't I would just punch you in the face, or poison your well. What have you?

1. Ale8-1 2. Kentucky for Kentucky 3. Hall's Beer Cheese ( beer cheese festival is in Winchester, Ky) 4. Kentucky for Kentucky 5. CHOW CHOW 6. Kentucky for Kentucky
...................Hot & Spicy Fermented Chow Chow...................
- Fresh ingredients -
12 Jalapeno-diced
4 Manzano-diced
2 peach Habanero-diced
3 green bell-diced
3 red bell-diced
2 Green Anaheim Chile’s-diced
3 green tomatoes (or 6 tomatillo’s) -diced
1 large Vidalia onion-diced (more/less to taste)
1 small head of cabbage (1 Lb or so)-shredded
- Dry ingredients -
2 tsp mustard seed
2 tsp celery seed
2 tsp tumeric
1 tsp cayenne flakes
1TBS pickling salt
1 Cup sugar
- Liquid ingredients -
2 TBS whey (harvest from yogurt)
Distilled water (as needed)
Vinegar (see note)
Glass container with air tight lid (gallon pickle jar works well)
If your glass container has a metal lid, I suggest a couple layers of plastic wrap between the lid and the jar, otherwise the lid might begin to rust on the inside during processing and/or storage.
- Instructions -
Wash all fresh ingredients thoroughly, drain and mix together.
Combine the dry ingredients,
Pack tightly into the glass container 1/3 at a time, adding the dry ingredients at each layer, Fill to within 3 inches at the top.
Add the whey, then slowly pour in the water, until it completely covers the contents.
Make sure to leave at least 2 inches of air space at the top.
Secure the lid, and sit aside to ferment for 2 or 3 days at room temperature.
Soon after sealing the container, you will begin to see small bubbles forming and becoming active.
Occasionally you might need to release some of the natural gasses that form during the process, by quickly opening and re-sealing the lid.
After a few days of fermenting, move the jar to the fridge, where your chow-chow will keep for several months, if it happens to last that long.
Note:
If a tart vinegar flavor is desired, pour off some of the liquid, add cider vinegar to taste and then refrigerate.
The whey (optional)serves as a starter, to get the fermentation underway more quickly.
If you choose not to use a starter, add one additional TBS of salt and allow to ferment 3 full days before refrigeration.
summer reading
I love these books! Hope you do too. - Be back soon, Gone to KY
1. What Kate Ate 2. Lets pretend this never happened 3. Little Women 4. The Secret Garden 5. Lets Explore Diabetes with Owls 6. The Drunken Botanist

My Friend Fridays
My Friend Tamytha (pronounced TAM-uh-Tha) is truly amazing. She has two beautiful and smart daughters. She is a small business owner. She is an artist/photographer. She is really pretty and funny. She is very kind and incredibly patient. She has a Masters Degree, and a one eared cat (see below). She loves Scotland and Starbucks blueberry oatmeal. I could go on and on... Tamytha and I are really different and really the same. Whenever we talk there is always laughter. She always brings out my funny side. She is one of the most selfless people I have ever met, and I love her friendship. I will always be friends with Tamytha no matter how far either of us roams. xoxoxo - M


camping
1. Dutch Oven: for yummy meals. 2. Merit badges: because you did a good job. 3. Vintage Cooler: keep beer cold 4. Appleby Trailer: no sleeping on the ground 5. BioLite Wood Burning Camp Stove: make your own power. 6. Therm-a-rest: good night sleep 7.Headlamp: hands free 8. COFFEE: so you don't harm your camp mates in the morning.
my friend fridays
My friend Nicole Atzbach is the Curator of the Meadows Museum. She speaks 4 different languages! Nicole is in charge of a lot of cool stuff, but most importantly she has twins! Super cute ones. Nicole has a VERY impressive scholarly resume, but my favorite thing about Nicole is that she is not a snob. She is a funk enthusiast (she has been on stage with George Clinton and Parliament Funkadelic) and a PBR drinking champ. Sure she hangs with the Director of the Prado but she also can Salsa, Rumba, and Fox trot her way across a dance floor.

did you know... i heart quilts.
I am fortunate enough to have a side of my family that are/have been quilters. So I have a pretty good collection of them. Including two "toppers" that are not finished. The other night we had a party and somehow in a Meyer lemon vodka fueled moment Erin, Scott, and i got them all out to admire them. (i know! so dorky) Because that's how I roll now, I get a few drinks down and all I want is to talk about quilts... Anyway, after getting them out, I thought..i really need to finish these. Here is a tutorial I found on line to help me!
If you do not have vintage quilt tops laying around your house you can buy them here! vintage quilt tops on Etsy
How-Tuesday: Finish a Vintage Quilt Top
Photo by Alexia Marcelle Abegg Story by Julie Schneider Published on Mar 12, 2013 in Make
You Will Need:

• Quilt Backing Fabric – Measure your quilt top to determine how much backing fabric you will need. If your quilt is less than 84″ wide, you will need twice the length of the quilt top from 42″ wide fabric. If your quilt is 85″ or wider, you will need three times the length of the quilt top from 42″ wide fabric. (Quilting fabric generally comes in 44/45″ width, but only about 42″ is usable width so I base this calculation on that amount.) Pre-wash your backing fabric.
• Quilt Batting – Measure your quilt top and purchase enough batting to give you at least 3″ overhang at each side of the quilt. My favorite batting is Warm and Natural cotton.
• Masking Tape – to hold the layers of the quilt to the floor while you baste.
• Iron
• Straight Pins
• Ruler
• Scissors and/or Rotary Cutter and Mat
• Binding Fabric – You will need to cut 2″ wide by the 42″ width of fabric strips to make binding. To determine your yardage requirement, measure all sides of the quilt and add them together (X), divide that number by 42 = (Y), multiply Y by 2. Divide Y by 36. This is how many inches of yardage you will need. Round up to the nearest increment of a yard (yardage is usually sold in eighth yard increments, with the minimum being 1/4 yard).
• Basting Supplies:
200+ safety pins, depending on the size of your quilt. I recommend a box of 500 — that has worked on every quilt I’ve ever made, up to a large queen size.
• Quilting Supplies:
All-purpose sewing thread in a color to match your quilt. I usually purchase 500 yards for a queen size, 400 for a twin, or 300 for a small baby quilt. If you want to be safe, purchase 500yds.
A free motion, darning, or embroidery foot for your sewing machine and your machine’s manual to instruct you on how to set your particular machine.
Directions:

1. Gather up your supplies.
2. Iron quilt top, backing fabric, and batting.
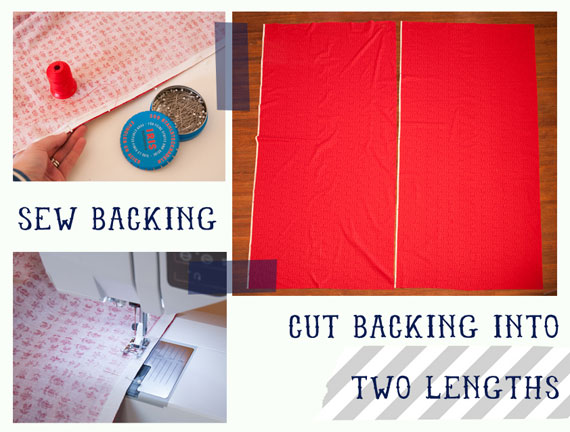
3. Prepare the Backing Fabric. Cut backing fabric into the lengths required by your quilt top. My vintage quilt top required two lengths (shown here). Pin and sew the two lengths of fabric together along the long sides using a 5/8″ seam allowance. The seam needs to be large enough to sew the entire printed selvage into the seam without any of the white selvage edge showing on the right side of the seam after it has been sewn. If 5/8″ is not enough, increase your seam allowance to catch the selvage in the seam.

Trim the seam down to approximately 1/4″. This will help the seam be flat and less noticeable, and will prevent the selvage from shrinking in the wash. Press the seam open.

4. Basting the Quilt Layers
Tip: When basting a large quilt, a partner is helpful.
Lay the prepared backing fabric wrong side up on a smooth surface, such as a hardwood floor, and tape the backing down around the edges every 6 to 8 inches. Lay the quilt batting on top of the backing fabric and smooth the batting. Safety pin the three layers of the quilt together using your safety pins. Pin in a 5″ grid over the entire quilt top.

5. Quilting the Quilt. I like to wind 5-6 bobbins before I begin so that I don’t have to stop and wind bobbins while I am quilting. Set your machine, according to the manufacturer’s instructions, for free motion and attach the free motion foot. Thread the machine with all-purpose thread. Place the quilt under the needle and unroll the edge until you have the center of the quilt under the needle. Keeping the roll to the right of the needle will help the quilt fit under the arm of your sewing machine.
Move the quilt around as you sew, keeping your stitch length even by how fast or slow you move the quilt. Create loops, squiggles, box shapes, zigzags … the possibilities are endless. Fill the entire quilt with your stitching, moving from one section to the next, continuously stitching. Check your batting instructions by the manufacturer to see how close or far apart your stitching can be and still hold the batting together. (For free-motion quilting inspiration, check out some of the resources at the end of this post.)
6. Prepare your Quilt for Binding. Set your machine for straight stitching.
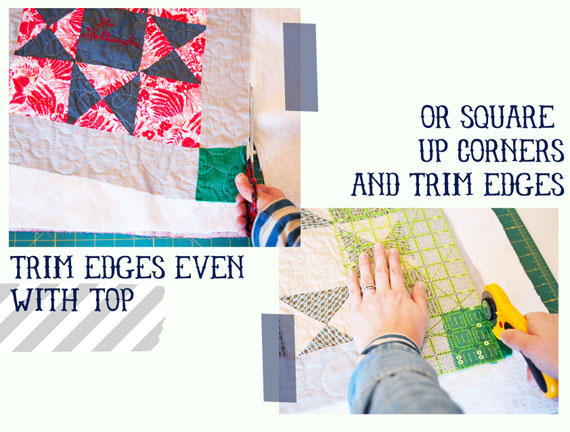
Trim the excess backing and batting with scissors or a rotary cutter, ruler and mat. If your quilt is slightly irregular at the edges, you can either cut with scissors and allow the edges to be irregular (as I have done on this quilt) or you can cut with the rotary cutter, using the ruler to square up the corners of the quilt top. I personally like the personality and charm that comes with flaws like this.

Cut your binding fabric into 2″ strips, cutting across the width of the fabric (from selvage to selvage).
Place one strip onto another fabric strip end to end, with the printed side of the fabrics facing each other, at a 90° angle. Mark a line from corner to corner 45° from the cut edge of the fabric strip. Pin the strips together and stitch on the marked line. Repeat, joining strips end to end, to make continuous binding. Trim the seams down to about 1/4″ and press the seams open. Fold the binding in half, wrong sides of the fabric touching each other, all the way down the entire length of the strip and iron.
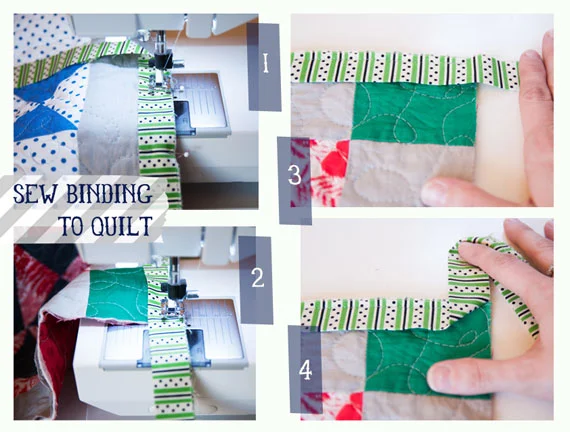
7. Bind Your Quilt. Leaving about 10″ of binding free, begin sewing the binding to the front of the quilt with the raw edges of the binding aligned with the raw, outside edges of the quilt, using a 1/4″ seam allowance. Start sewing the binding on about 20″ from a corner of the quilt.
When you reach a corner, stop sewing 1/4″ from the corner and backstitch. Remove the quilt from the machine. Fold the binding up and away from the quilt at a 45° angle as shown in photo #4 (sew binding to quilt).

Fold the binding back down towards the quilt, aligning the fold with uppermost edge of the quilt as shown in photo #1 (miter corners) and align the raw edges of the unstitched binding to the raw edges of the quilt. Pin in place.
Begin sewing again 1/4″ from the corner of the quilt, backstitch, and sew the binding to the entire quilt edge, mitering at each corner.

Stop sewing when you reach 10″ from the start of your binding stitching. Overlap the ends of the binding by 2.5″ and trim. It is ideal if the the overlap is centered in the section of the quilt’s edge where the binding has not yet been sewn to the quilt.
Unfold the ends of the binding and place them with the printed sides of the binding facing each other, letting 1/4″ of the binding extend over each of the cut ends. Be sure the binding is not twisted before pinning the ends together.

Mark a stitching line just like you did when joining the strips together before stitching them to the quilt. Sew the ends together on the marked line. Trim the seam allowances down to approximately 1/4″ and press the seam open.

Fold the binding back together with the wrong sides facing each other and sew the remaining seam of the binding and quilt.

Wrap the binding around to the back of the quilt and hand sew the binding to the quilt back. At each corner, first fold one side, allowing the corner of the binding to create a little 45°angle, then fold the other side over, also allowing it to create a small 45° angle. This will give you mitered corners. Hand sew the entire binding down to the quilt back.
Congratulations! You now have a finished quilt. You can wash it if you prefer, and let it air dry or dry in the dryer on low heat. Snuggle up and enjoy!

Thank Goodness for etsy!